RS3100 restoration

Use this forum to post threads of ongoing Capri projects and restorations.
User avatar
rshyndy
Posts: 612
Joined: Fri Sep 17, 2010 6:19 pm
Car(s): Ford Escort XR3i MK5a, Lexus is200se
Ford Capri 2.0 laser MK3 resto project

Re: RS3100 restoration

Post by rshyndy »

:shock: WOW!!!!!!
Flawless work...... Il put my welder down now and leave the cramped damp single garage I use ha.
The bar has been raised......
This car is going to be absolutely amazing and I can't wait to see it in person one day.
A true credit to you and the team at restore-a-ford.
Quite alot of excellent quality restorations happening lately.
I need a lottery win I think :whistle:
I KNOW MY CAR IS OLDER THAN ME......WHATS YOUR POINT???
ImageImage
User avatar
347 V8
Posts: 92
Joined: Mon Dec 08, 2014 9:21 pm
Car(s): Mk2 V8, RS3100.

Re: RS3100 restoration

Post by 347 V8 »

Well, don't lose heart. I created this in a single lock up.....I replaced front wings, front panel, door skins, rear quarters, rear panel plus numerous other repairs...wing hanging rails etc all in a damp single lock up. My sisters house was very near this, so I had to run a very long extension lead down to the garage every Saturday! I feel your pain, but it can be done!

Image
User avatar
347 V8
Posts: 92
Joined: Mon Dec 08, 2014 9:21 pm
Car(s): Mk2 V8, RS3100.

Re: RS3100 restoration

Post by 347 V8 »

Image

Part way through the resto. The front was done, time to turn it around to do the rear. The open garage was my work space...although keeping it mobile allowed me to roll it out.
User avatar
rshyndy
Posts: 612
Joined: Fri Sep 17, 2010 6:19 pm
Car(s): Ford Escort XR3i MK5a, Lexus is200se
Ford Capri 2.0 laser MK3 resto project

Re: RS3100 restoration

Post by rshyndy »

That's gave me the kick up the ass I needed. My sons just turned 4 so he can help me soon. Hopefully I'm moving it to a double sized workspace at the back of a mates workshop within the next 6 months. So in between working, training and parental duties I should have a running driving capri in the next few years.
Thanks for the inspirational photos and I look forward to seeing more of the rs3100
Will you be taking the rs to shows when its completed
I KNOW MY CAR IS OLDER THAN ME......WHATS YOUR POINT???
ImageImage
User avatar
347 V8
Posts: 92
Joined: Mon Dec 08, 2014 9:21 pm
Car(s): Mk2 V8, RS3100.

Re: RS3100 restoration

Post by 347 V8 »

The RS will be out and about when done, thats for sure!

Here ya go, more inpiration as to what can be done in a single garage, but more space makes it far easier:

Image

Image

Image

Image

Image

but I was young and no kids at the time, but now my kids are getting older, time is freeing up. I also closed the garage door on this one for months on end sometimes...you need a break, or need a source of inspiration..and back then, that was only capri shows.

so, good luck and get pictures up!
User avatar
Craigorypeck
Posts: 2338
Joined: Sat Feb 21, 2009 1:45 pm
Car(s): Mk III Capri- 2.0 YB cossie lump with eaton blower on bike carbs. Problem... its 4000 miles away.
MK1 resto- 2.3 Turbo or Charger, both probably
Chevy Cobalt
Location: Canada

Re: RS3100 restoration

Post by Craigorypeck »

That's a serious bit of work you did there.
Hats off for doing that.. you've earned the right to have someone else do it now!
:spam:
User avatar
347 V8
Posts: 92
Joined: Mon Dec 08, 2014 9:21 pm
Car(s): Mk2 V8, RS3100.

Re: RS3100 restoration

Post by 347 V8 »

I had a little time over the weekend while the kids were at a party, so remove the caps and prepare to get the crank in!

Image

Once again, make sure everything is clean. I bought a pack of lint free wipes just for this purpose.

The oil holes should be clean, judging by how clean the crank and block were, but it does no harm to check that there are no bits of swarf or grit in here that will ruin your bearings on start up. I used brushes and compressed air to get

Image

Image

I also prepared my thrust bearings and assembly lube. There are some wide grooves on one side of the bearings..sometimes they have a copper appearance on the thrust side as well. I've seen these fitted incorrectly before though!

Image

Image


so once again, clean the journals..they need to be spotless with nothing on them.
Image

all ready to go. The big ends will be cleaned a few more times I'm sure before the pistons go in.

Image

assembly lube in place with some extra to hold the thrust bearings in place while I lower the crank into place

Image


Crank in and here I'm measuring the crank end float. You need to lever the crank all the way one direction, take a reading...and then lever all the way in the opposite direction..take another reading. The difference is the end float.

Image


and here I've spun the crank to be sure I'm not getting any issues at this point. You have to hold the thrust bearings in place to ensure they don't rotate out without a bearing cap in place, but I'm looking for any tight spots that may indicate an issue. All was good!
Image

Image

Finally bearing caps on, torqued up and the crank spun again to check for tight spots

Image

I put the caps in place...they generally need a tap down with a soft faced hammer, but I torque one at a time and check for any tightness. If you find any, remove the cap and possibly the crank and check for any dirt. It doesn't take mach to make a crank tight.

Even did a short video...
Image


so next up, piston rings. These were pre gapped, I was told, but as ever, I always check
Image


I generally put the ring half way down the bore using a piston to get it in square

Image


You can then use a feeler gauge to check the gap

Image


on my temporary clean surface I then laid out my rings with the gap measurements assigned to each piston.

Image


The main idea was to check that they were not too small. I would consider around 0.015" to be about the limit. 0.020 on the compression rings was a tad wider than ideal, but as far as I'm concerned this is ok. There have been lots of studies on ring gaps and their effect on power/blow by and it really is non conclusive about how critical this is. One thing I know for sure, if they are too tight and the ends meet, it could be the end of your engine..or severely damage the bore at least. So overall, happy with these!

and once again, after play, the block goes in the bag to keep any dirt/dust out at this stage...

Image
User avatar
MattMe
Donator
Donator
Posts: 569
Joined: Thu Aug 21, 2014 10:43 am
Car(s): Mk3 2.8 injection
Previously owned:
Facelift Mk1 V8
Mk3 2.0 Laser
Mk3 2.8i

Re: RS3100 restoration

Post by MattMe »

I have a question regarding the soda blasting.

I've been reading up on the various different methods and I've heard a lot about the concerns and difficulties with removing all the residue after the blasting is done. The blast is tiny particles of bicarb and can cause quite aggressive, premature rusting if left in contact with bare metal.
What did you do to ensure it was all cleaned out, or prevent it getting in places you would not be able to remove it from?
Are you, or were you, concerned with the possible negative affects?

It's certainly a very effective process. Surprising how well it can clean a surface up without even heating the panels. I imagine a lot less labour intensive than doing it with elbow grease.

Cheers,
Matt
User avatar
3 Litre Power
Posts: 471
Joined: Tue Feb 24, 2015 4:41 pm
Car(s): 1975 Capri II 3000 Ghia factory manual, 505k kms, Sunset Red, BVR, B.I
1988 Ford Escort XR3i Cabrio, 177k kms, Red, Black Top ( Daily )
Location: In the garage...

Re: RS3100 restoration

Post by 3 Litre Power »

God progress keep it up
My Mk2 Capri Facebook page https://www.facebook.com/FordCapriMk2
:burnout:

Oil and Coolant guru
Finnish but born and raised in Spain.
User avatar
347 V8
Posts: 92
Joined: Mon Dec 08, 2014 9:21 pm
Car(s): Mk2 V8, RS3100.

Re: RS3100 restoration

Post by 347 V8 »

MattMe wrote:I have a question regarding the soda blasting.

I've been reading up on the various different methods and I've heard a lot about the concerns and difficulties with removing all the residue after the blasting is done. The blast is tiny particles of bicarb and can cause quite aggressive, premature rusting if left in contact with bare metal.
What did you do to ensure it was all cleaned out, or prevent it getting in places you would not be able to remove it from?
Are you, or were you, concerned with the possible negative affects?

It's certainly a very effective process. Surprising how well it can clean a surface up without even heating the panels. I imagine a lot less labour intensive than doing it with elbow grease.

Cheers,
Matt
Hi Matt. I looked into the best method of stripping and it all gets quite confusing...and I've slightly revised my view from experience.

Having met a number of people through restoring the two capris I have, I have built up a picture through reliable accounts and first hand experience.

Firstly, I'm not sure there is a perfect stripping process, each has it's upsides and downsides.

From my view, there are two main processes:

Blast Cleaning
This can be sand, soda, walnut shells, glass beads, lots of stuff.

Acid dipping
You put the car or parts in a vat of acid and let the acid eat the rust away. You then neutralize/wash the residue acid off.

I discounted Acid fairly early on. I have spoken to body shop owners and people with direct experience of this. there are too many accounts of once having being cleaned, the car is then painted. Acid then leaches out from seems that have not been washed out..and may not be able to be washed out, ruining a very expensive paint job. On many occasions, the acid has worked it's way between spot welded panels via capillary action, so once in, it's extremely difficult to get out. I have heard of this from reliable sources, but more importantly, seen photographic evidence and examined a body shell at a restorers to see what the situation was. Additionally, I have heard of two restorers that will not touch a body shell that has been dipped. Having carried out an expensive respray....and this could be 7k plus, only to find acid leeching out from between panels, the owner is stuck in between, with the dipper saying it's the bodyshops fault and the bodyshop saying it's the dippers fault. If you get this situation, the dipper may well say 'ok, we'll re-dip for free' well, there goes the 7k paint job...and they won't pay for that. It's a conversation that many bodyshops just don't want to risk having. Havingsaid tta, I'm sure many have used this process without issue, but I've heard and seen too much tat is negative.

When it comes to blasting, when I had mine done, it was seen as the gentlest of method of paint removal. What they may not tell you is that with just soda, the steel is actually left very smooth and it';s not a good surface for paint, while it doesn't do a great job on rust removal so, as a final stage, they add in some coarser material to key the surface and remove rust.

Have a look at this:
Image

you can see the shiny area is after soda blasting, while the lower area has been blasted with courser material to remove rust and key the surface.

A close up of the soda blasted area and you see rust around the holes for the fake vents

Image

Here is a video as well

Image

you can see how it's a labour intensive process and very dusty.

As far as soda being trapped, I've not heard any issues, but I do know that these guys blow out and clean the shells before they leave...and in my case, also sprayed etch primer onto the shell to ensure that it's preserved for the trip to the body shop.

This is how it turns up at the body shop
Image

Also, a lot was stripped off after this, so inner and outer sills, rear arches has minor repairs. Now, there could be soda trapped in the chassis sections, but I know that at least one chassis section was opened up when one inner wing was replaced..and no soda was found, but granted, there could be soda in the shell somewhere, I just saw no evidence of it. Does it concern me? No overly, a I'll be injecting massive amounts of dinitrol into the chassis sections and sills (and the sill have zero soda in them as they are all new, both inner and outer. I know there are other box sections underneath, so this have and will be further treated with cavity wax.

As far as I'm concerned, soda blasting is the least risky way of blasting my shell.
The problem with doing a whole shell by hand is that you may never see all the areas that need doing. There are areas that I know, had they not been blast cleaned, the could well have been overlooked, only to resurface once my paint was a few years old. Blasting is also a lot more thorough and quicker process.

I mentioned at the beginning I'd revised my view. After speaking with my bodyshop, their practice is now that bonnets, boots and roofs don't get blasted. Now, it could be that they could be soda blasted and then not have the abrasive mix after, but this has yet to be tried. I do know that a bonnet was damaged..and when I say damaged, you can feel ripples in the large areas that were not present before, while my boot skin was rippled and my spoiler no longer fitted after soda blasting. Both were able to be fixed (the boot skin was heated and shrunk to re tighten the skin) it was still annoying as my boot was an almost perfect rust free panel. They have formed this view over a few cars/years, so experience has modified their view.

Is it still a good process? in my view yes. Would I have it done again? almost certainly, with the above considerations taken into account, unless there was something better out there.
Arnoldhar
Posts: 157
Joined: Sun Jun 15, 2014 4:35 pm
Car(s): 2.0l mk3

Re: RS3100 restoration

Post by Arnoldhar »

I had my mk3 blasted by the same company and they are very good, the term "soda" is used but they use various media to blast/ clean the shell not only soda. I was very concerned about residual and panel damage so I only had the engine bay under side and up to the seals done, the rest of the car was chemical striped. My other concern was there etch primer and application. A good few years ago I had a car painted and during the first cold spell it micro blistered so all the money was wasted, personally I would never have any one else apply any layer of paint apart from the painter. I picked up my shell on a sunny dry day then that evening it was in the spray booth being etched by the restorers, and he told me He would never paint a car without applying all the layers him self
Just think if for some reason moisture got in to the etch prime coat. Painters paint blaster blast
As for residue yes even after they flip it and blast with an air line you do keep getting bits out, it took two days to get it all out of my shell. If your shell requires lots of metal work i believe it's the was to go
User avatar
MattMe
Donator
Donator
Posts: 569
Joined: Thu Aug 21, 2014 10:43 am
Car(s): Mk3 2.8 injection
Previously owned:
Facelift Mk1 V8
Mk3 2.0 Laser
Mk3 2.8i

Re: RS3100 restoration

Post by MattMe »

Very interesting points.

Although acid dips sound the most thorough method, they also have plenty of down-sides. As well as the ones mentioned, you also have the concern of not knowing everything that has been removed, if that makes sense. If you're removing paint by hand you are seeing everything that happens. With acid there's no way of knowing. With blasting you could take it easier in areas that are visibly weak, whereas with acid you might end up with not much shell left.

I'm also very interested in injecting cavity wax to preserve what I have. The sills and box section are typically a nightmare on Capris.


Arnoldhar - when you say if your car requires a lot of metal work it's the best way to go, what about those of us that aren't expecting 'a lot'? Some people I've spoken to seem to prefer doing it all manually by hand with paint stripper and a scraper.
How did you remove all the residue? Did you tape up the holes in the sills etc before taking it to be blasted.
User avatar
347 V8
Posts: 92
Joined: Mon Dec 08, 2014 9:21 pm
Car(s): Mk2 V8, RS3100.

Re: RS3100 restoration

Post by 347 V8 »

Yep, agree about the priming. My restorer/painter is the same. They want to have control over the whole process, which I agree with as I don't want to get into a finger pointing game should an issue occur. In this case the blaster and restorer/painter have a great working relationship where the painter provides the chromate etch to the blasters who apply it and they are happy with the conditions under which it's applied. From my point of view, this is all done under the control of the restorer/painter, so they will honor any issues that should arise. Bottom line, I trust them and their reputation!

Valid points however, as painting in the wrong conditions on prime or top coat will induce micro blistering...which is not nice at all!
User avatar
347 V8
Posts: 92
Joined: Mon Dec 08, 2014 9:21 pm
Car(s): Mk2 V8, RS3100.

Re: RS3100 restoration

Post by 347 V8 »

MattMe wrote:Very interesting points.

Although acid dips sound the most thorough method, they also have plenty of down-sides. As well as the ones mentioned, you also have the concern of not knowing everything that has been removed, if that makes sense. If you're removing paint by hand you are seeing everything that happens. With acid there's no way of knowing. With blasting you could take it easier in areas that are visibly weak, whereas with acid you might end up with not much shell left.

I'm also very interested in injecting cavity wax to preserve what I have. The sills and box section are typically a nightmare on Capris.


Arnoldhar - when you say if your car requires a lot of metal work it's the best way to go, what about those of us that aren't expecting 'a lot'? Some people I've spoken to seem to prefer doing it all manually by hand with paint stripper and a scraper.
How did you remove all the residue? Did you tape up the holes in the sills etc before taking it to be blasted.
The other thing to bare in mind with acid dipping is it's not exactly unheard of for damage to occur due to careless handling!
User avatar
Craigorypeck
Posts: 2338
Joined: Sat Feb 21, 2009 1:45 pm
Car(s): Mk III Capri- 2.0 YB cossie lump with eaton blower on bike carbs. Problem... its 4000 miles away.
MK1 resto- 2.3 Turbo or Charger, both probably
Chevy Cobalt
Location: Canada

Re: RS3100 restoration

Post by Craigorypeck »

Re blasting..

When mine was done they used a plastic bead media This won't warp panels or leave any residue behind.
It was then low pressure blasted with aluminum oxide to key the surface for paint.
:spam:
Arnoldhar
Posts: 157
Joined: Sun Jun 15, 2014 4:35 pm
Car(s): 2.0l mk3

Re: RS3100 restoration

Post by Arnoldhar »

If you have a fair amount of metal work to do, this is normally in the areas where the media gets stuck therefore it gets removed when the metal work is done.All open holes were taped over in my car but the media just finds ways in. I personally think the best way to remove paint from panels is the long hard process of chemicals. My car is black and will show every imperfection in a panel that could be caused by blast pressure that's why I went for the underside and engine bay only

All the residue was removed by spinning the shell on the spit then hovers with tubes in all the chassis rails and seals
Caprifan Rob
Posts: 1838
Joined: Tue May 06, 2014 8:47 pm
Car(s): 2.8injection special

Re: RS3100 restoration

Post by Caprifan Rob »

This is a top class restoration, enjoying the pictures, it's a great car. Any more pictures of your mk2 ? It's one of the nicest I've seen, the look is spot on.
Cheers
Rob
User avatar
347 V8
Posts: 92
Joined: Mon Dec 08, 2014 9:21 pm
Car(s): Mk2 V8, RS3100.

Re: RS3100 restoration

Post by 347 V8 »

Yep, I'll post some mk2 pictures in the members cars section. Awaiting some new rear wheels, which should look good!
User avatar
347 V8
Posts: 92
Joined: Mon Dec 08, 2014 9:21 pm
Car(s): Mk2 V8, RS3100.

Re: RS3100 restoration

Post by 347 V8 »

so now the weather is getting better,..and now it's crap again, I thought I would do an update, as I've been working on the RS for some reason or another!

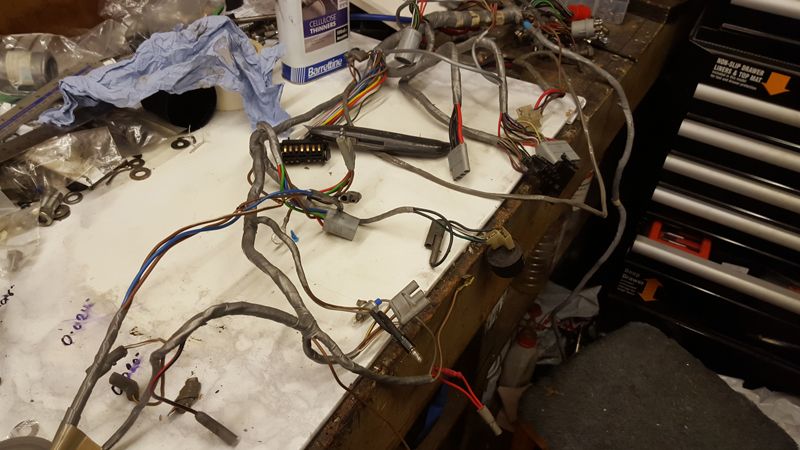
So, into the black bin bag of looms and the first one out is the interior loom. It's actually in pretty good shape with only fairly minor problems.

Image

Image

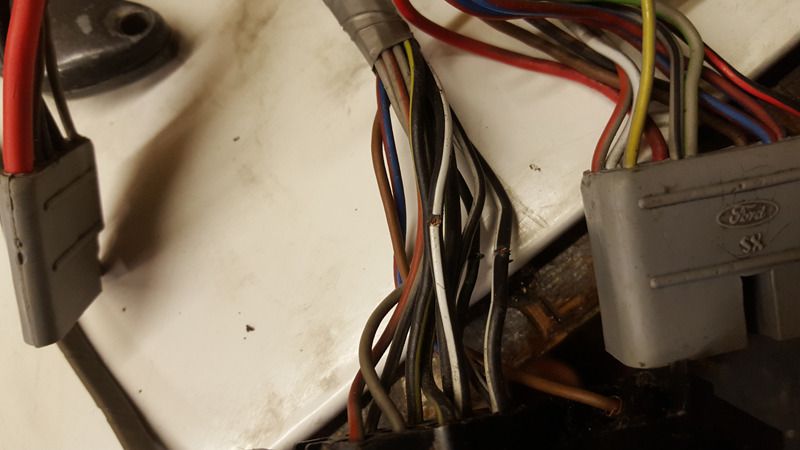
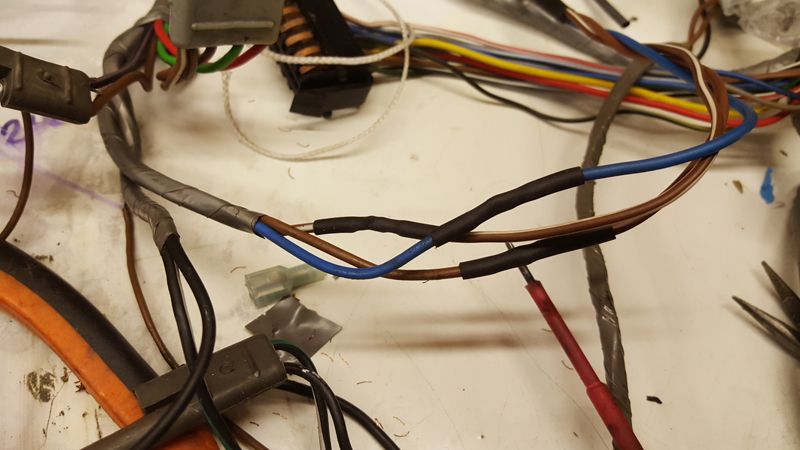
here are where tere were some scotch locks....convenient, yes, but hate them. Best solution here is to tape these up in my view
Image

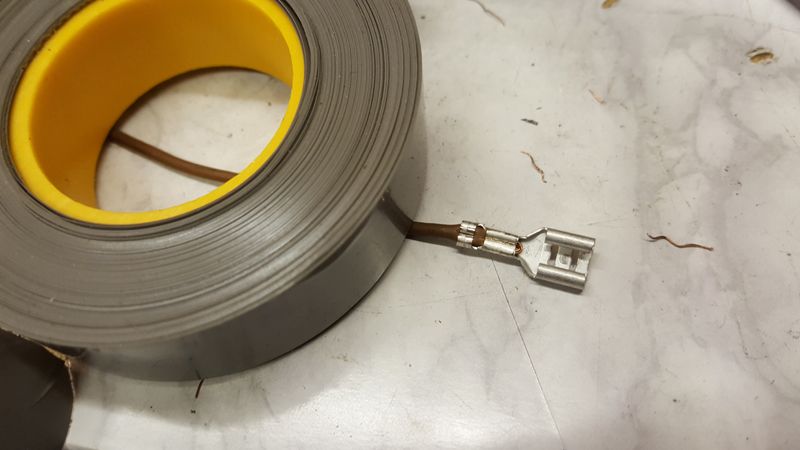
Then there were these:
Image

Image

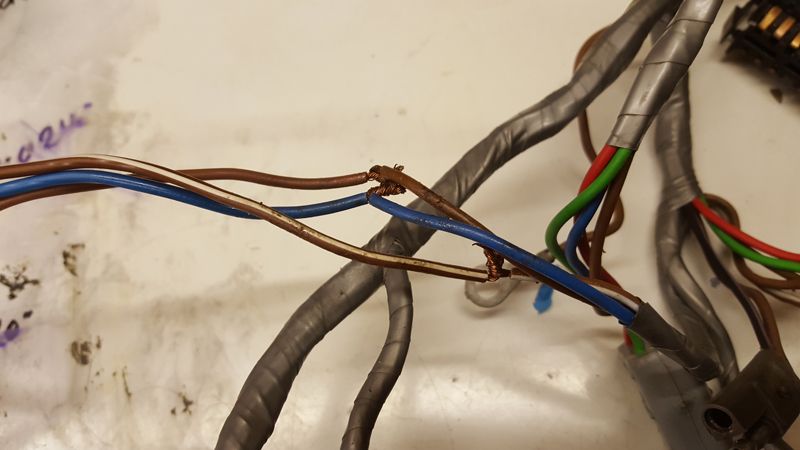
so fixed and heat shrunk and will be taped over
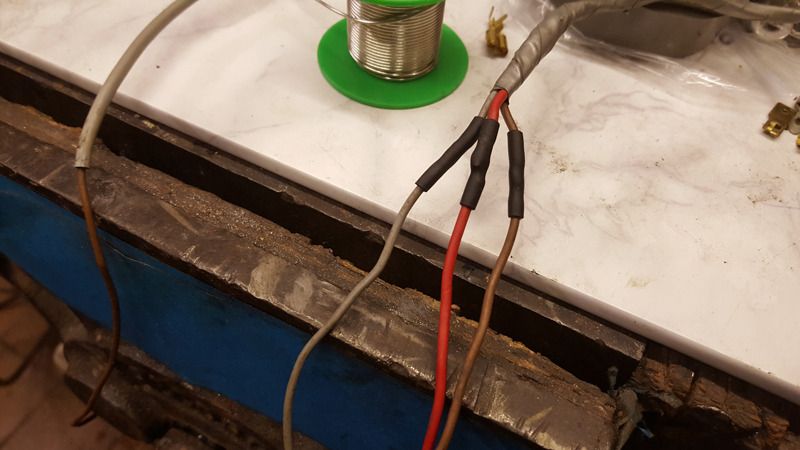
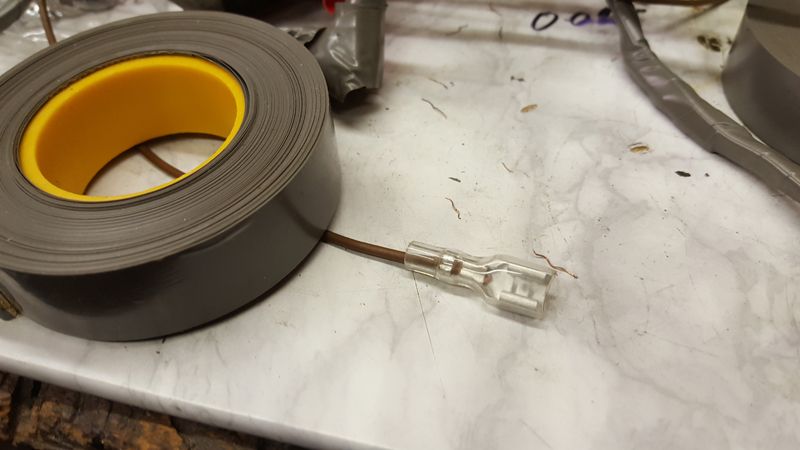
Image

Image


Once more fixed
Image

Taped over and no one will ever be the wiser....and ecen then this is all buried under the dash!
Image

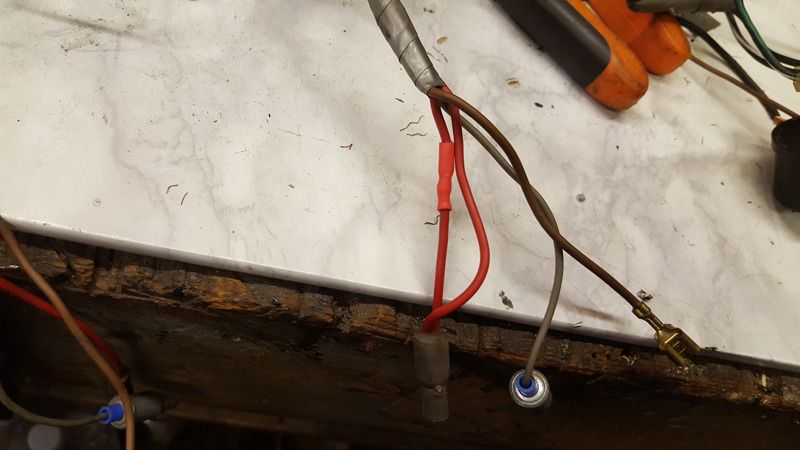
and new ends on the curtesy light switches as these were non existent!
Image

Image

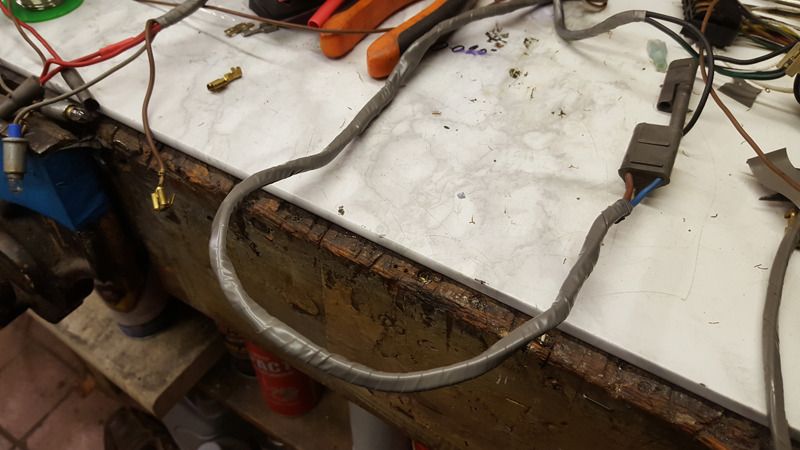
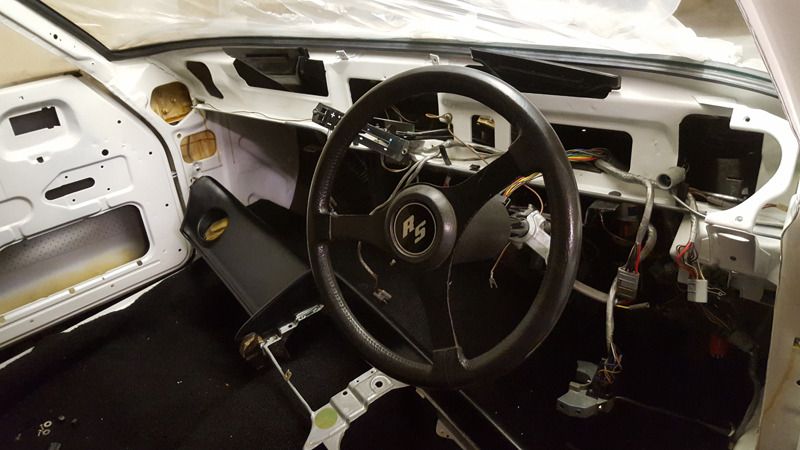
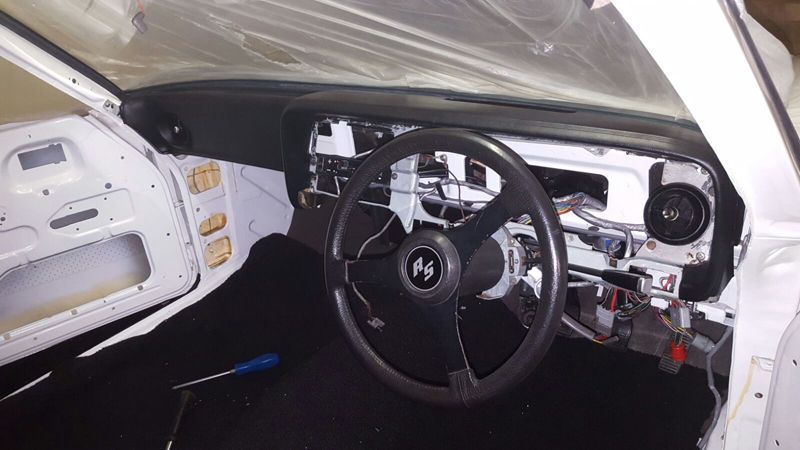
and then it's a case of starting to put it into the car!
Image
Image
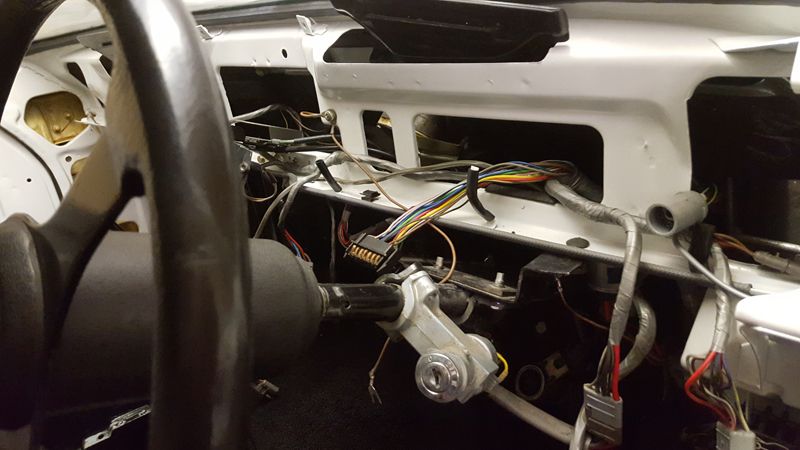
This is where taking photo's during dis assembly proved invaluable!

My original dash was in a fairly poor state with burns and cuts, so I sourced a black dash from a mk3 capri. Very very similar, but there are a few differences.

Image

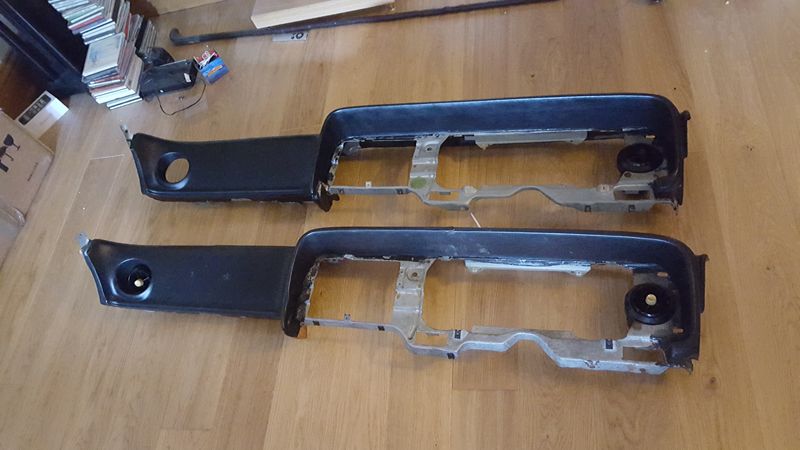
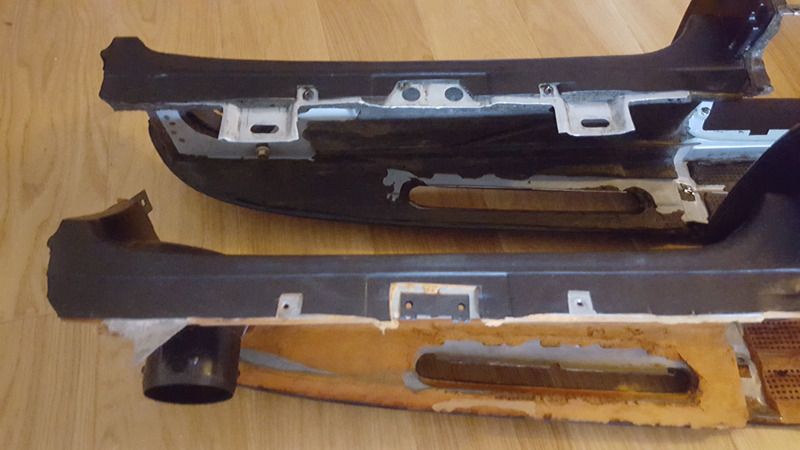
The original dash is on the bottom

Image

Image

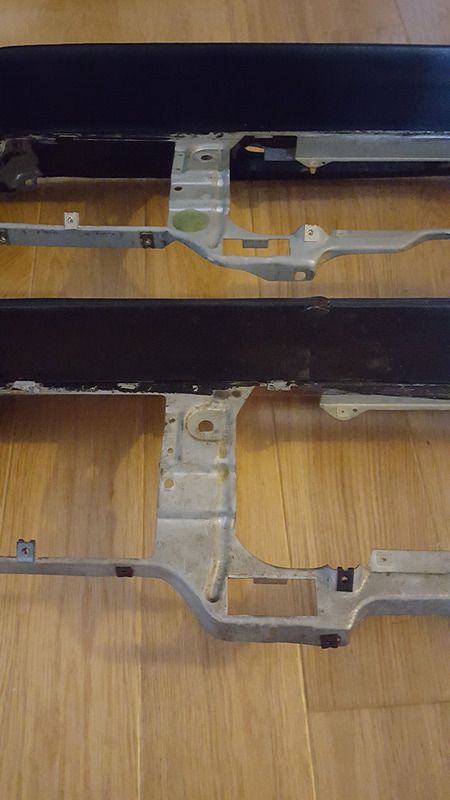
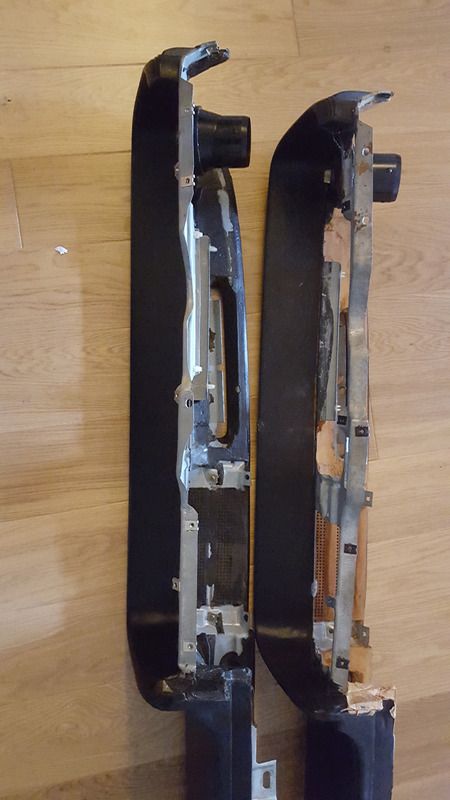
The two additional bracket/extensions stop the mk3 being fitted, so these parts are now on the garage floor

Image

and there she is! Looking rather nice with NOS heating vents!

Image

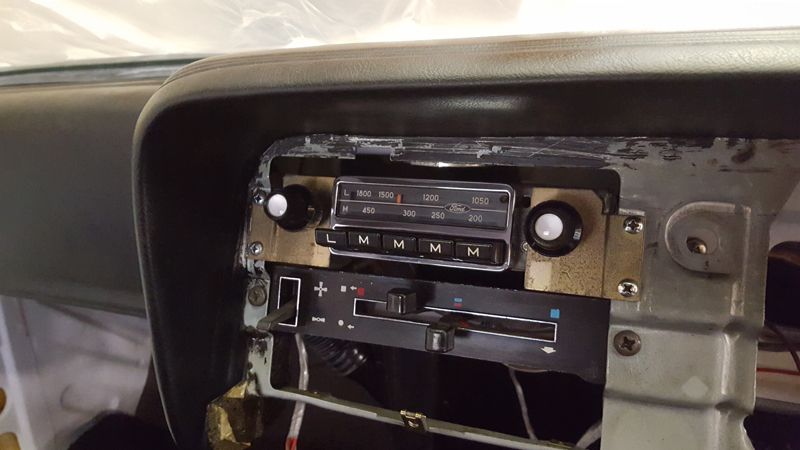
While I was on a roll, I thought I would dig out the NOS radio fitting kit and a period Ford radio I had picked up at an auto jumble.

Image

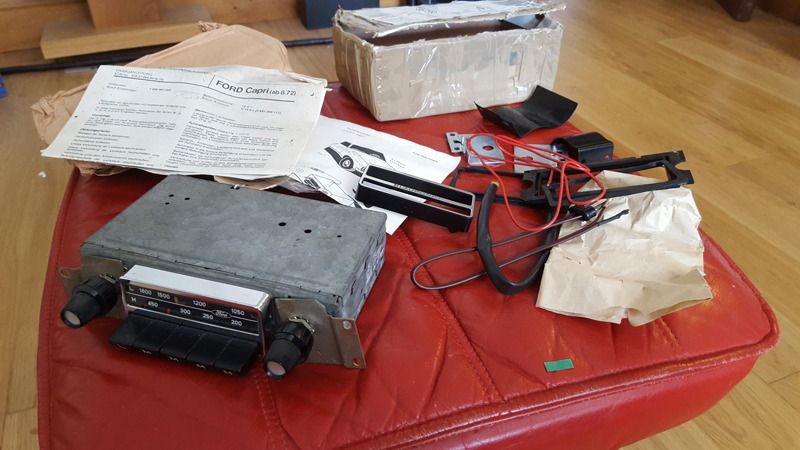
Looks rather good...no idea if it works!
Image

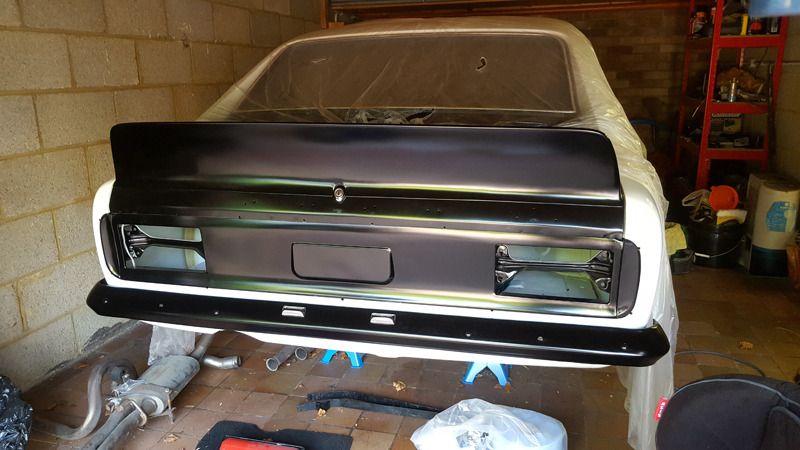
The remainder of the loom was routed to the rear, through the rear panel...once again, reference photo's proved invaluable.

I then assembled the rear bumper and put a good coating of Dinitrol on the rear:

Image
Image

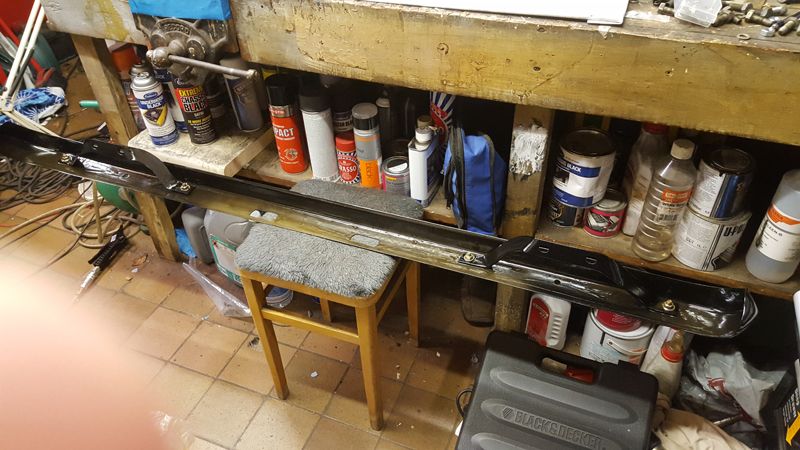
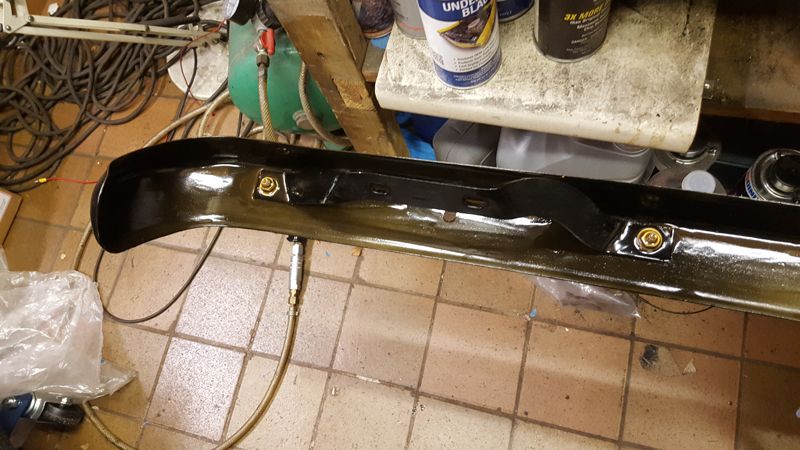
and putting it on with new number plate lights, connecting them up to the loom
Image

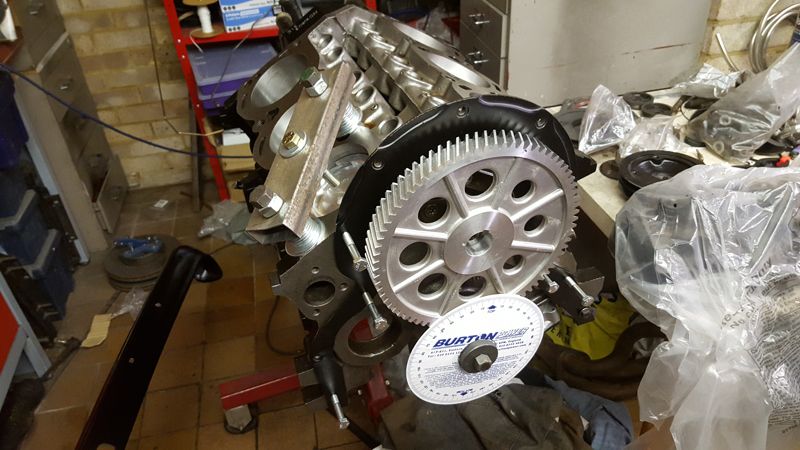
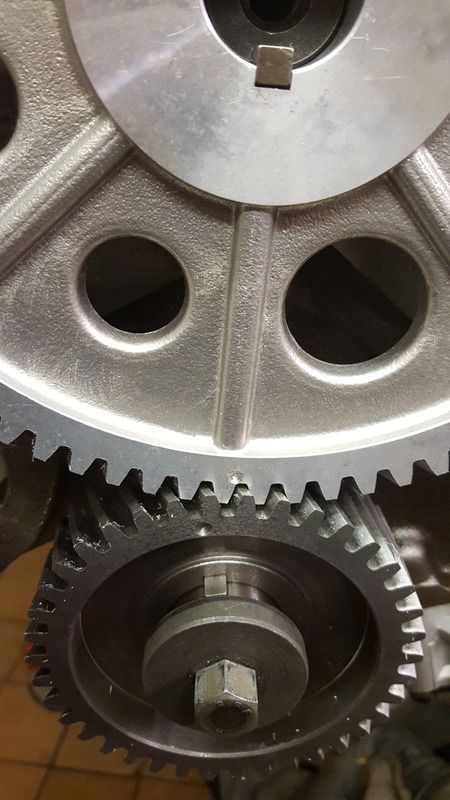
Then back to the engine. After weighing up the various options, I went for a new alloy cam gear with matched steel crank gear. I've heard a few stories now of the all steel cam gears eating into the cam retainer, which would be behind this gear, as they are no machined correctly.

So now I had the gear, time to time the cam. Offset keys used to be available for the essex..I even had some...but that was 4 house moves ago! so timing them 100% accurately can be tricky, but close enough should do.

So first up, find true TDC. Here is my bodged together piston stop. The idea here is that you wind the crank one direction and it stops before TDC. Wind it back in the other direction and it stops after TDC. Using a timing wheel on the crank and a temporary pointer (I used gardening wire held under a bolt). I initially make a good guess as to where TDC is and set up my timing wheel so that my pointer indicates TDC. I then wind the crank so the piston is half way down the bore and bolt on my piston stop. Wind the crank one way, note the reading on the degree wheel, wind it the other way and once again, note the timing on the degree wheel. If I've guessed right, the reading should be the same, so x degrees before and after TDC. If they are different, move the timing wheel such that they are the same (add your readings, divide by 2 and adjust the wheel so that timing is shown when you are at the piston stop...you can then check this by rotating the crank back and forth to the piston stop each time to check your readings are the same before and after TDC)

Timing/Degree wheel in place

Image

So here I have 32 degrees BTDC
Image

and here I have 32 degrees ATDC
Image

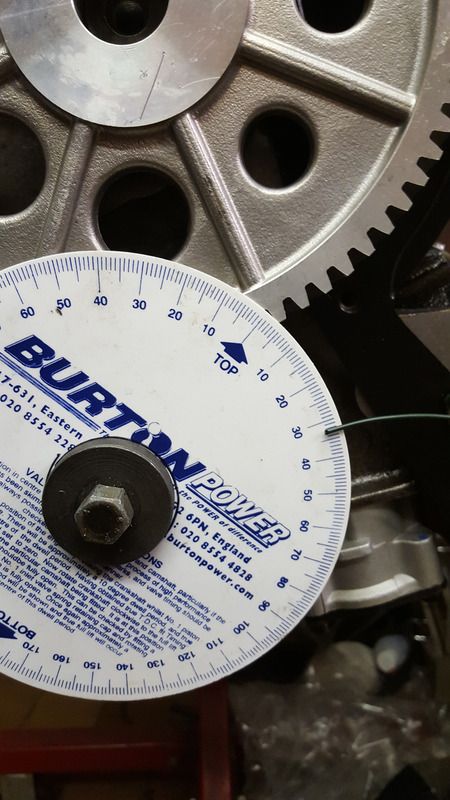
so if I take my piston stop off, I can rotate the crank to where my pointer indicates TDC and I know it will be accurate...but don't loosen the timing wheel or more the pointer from now on in!

Here is my cam card, where the details of the timing are shown.

Image

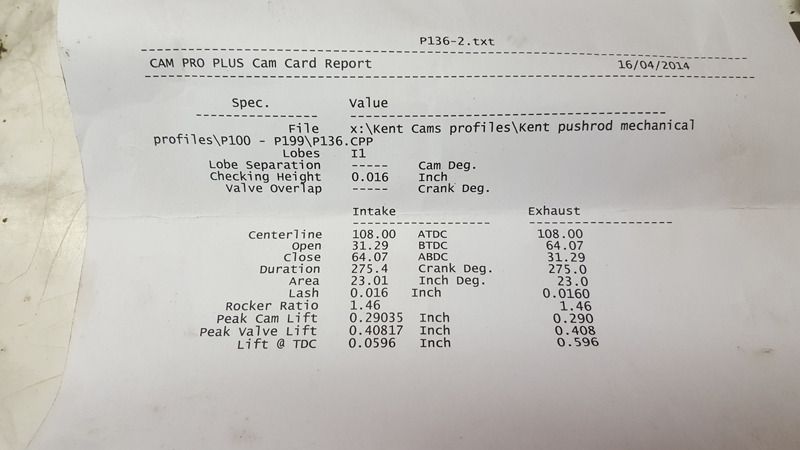
This is a custom grind provided by a good friend and engine builder. Kent Cams ground the cam, however. The number I'm interested in for timing is the inlet center line of 108 degrees ATDC. This means that when the crank is 108 degrees after TDC, the inlet on number 1 cylinder will be at the center of it's peak lift. As there is some dwell at peak lift, it's not easy to identify exactly where this is...just like identifying TDC using piston position alone. In a very similar fashion to finding TDC, I put the timing gears on as per factory, so with the dots on the crank and cam wheel aligned, this would be a good starting point to see what I got.

First thing to do is to set up a dial gauge on the inlet follower of number one cylinder. I used very thin oil as I wanted the follower to follow the cam profile closely and not 'stick' in it's before due to thick oil (this isn't an issue once valve springs are exerting pressure on the followers via the push rods).

Image

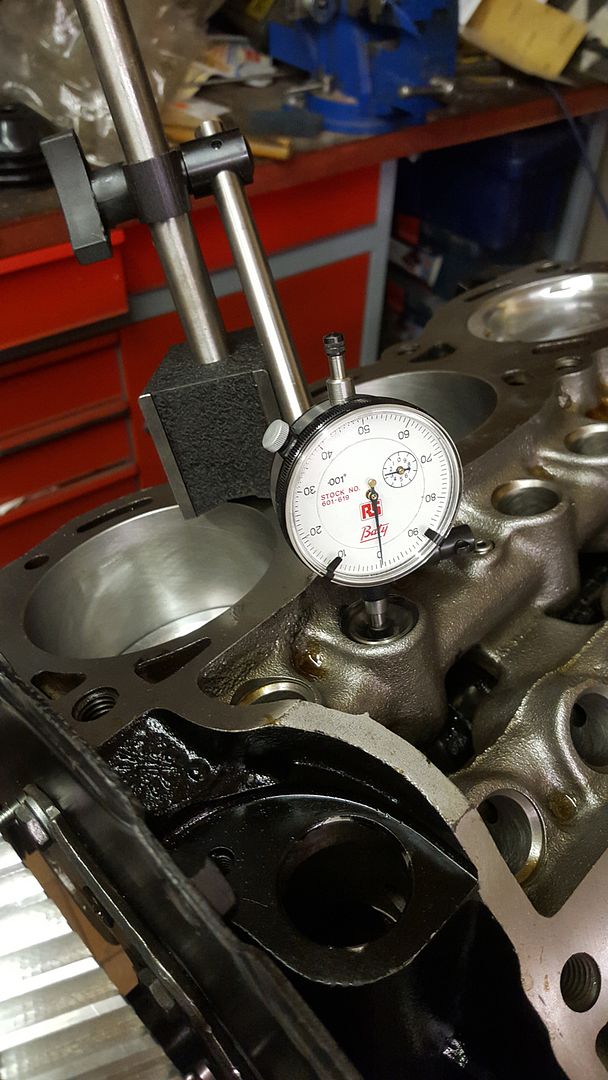
I would intially rotate the crank to where I'm getting what looks like full lift on the inlet cam. I would see the dial gauge increase, stop, then no change and then start to decrease, as the follower moves up, remains at peak lift for a while and then falls. You could actually note the reading on the degree wheel a soon as the dial gauge reaches it's peak and note it again when it starts to decrease and in theory, half way in between would be the lobe center line. You can take this a stage further by identifying this center point and setting your gauge to zero, as I did. I then moved the crank anti clock wise, well past the peak of the cam lobe and then wound it forwards, clockwise, so engine rotation, until I was 50 thousandths of an inch below zero...so 50 though below peak lift. Note the degree wheel value. Then continue rotating past peak lift, so zero on the gauge and then until the gauge read 50 below zero again, though past peak lift...and then note the degree wheel timing again. Half way between the two is your lobe center line (and this does assume the lobe profile is symmetrical) I was getting 139.5 one side and 91 degrees the other, so added uip to 220.5, divided by two means my lobe center line was at 110.25 degrees. Given I have 76 teeth on my cam gear, each tooth represents 4.7 degrees, so moving the gear one tooth gets me to about 105 degrees. The choice I had was to run the cam advanced by 3 degrees or retarded by 2 degrees. I chose advanced as in theory, this opens the inlet slightly sooner and increases low end torque as the expense of high end....but I honestly don't think there will be that much in it.

so here is where the two timing gears ended up:

Image

so now time for the heads. Bye bye forged pistons!

Image

Image

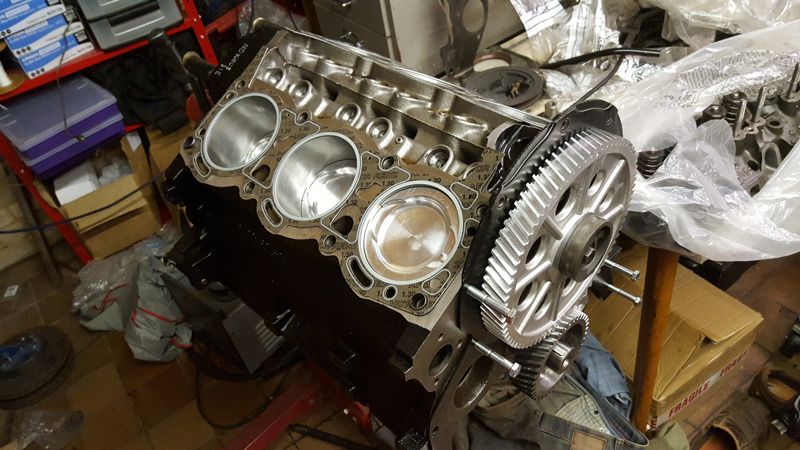
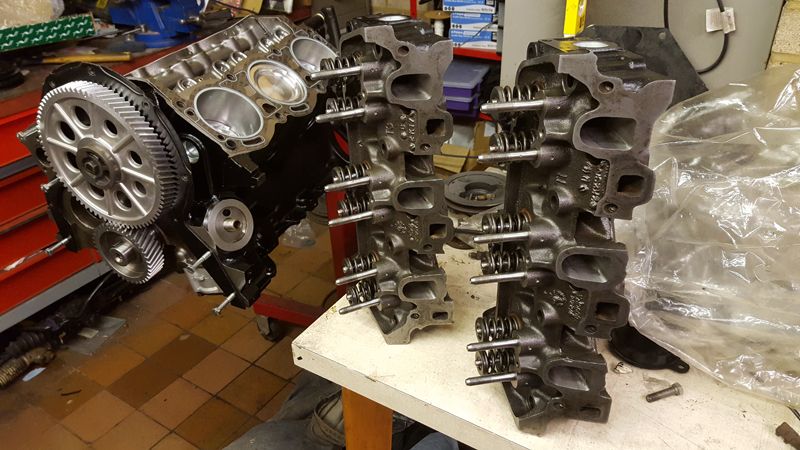
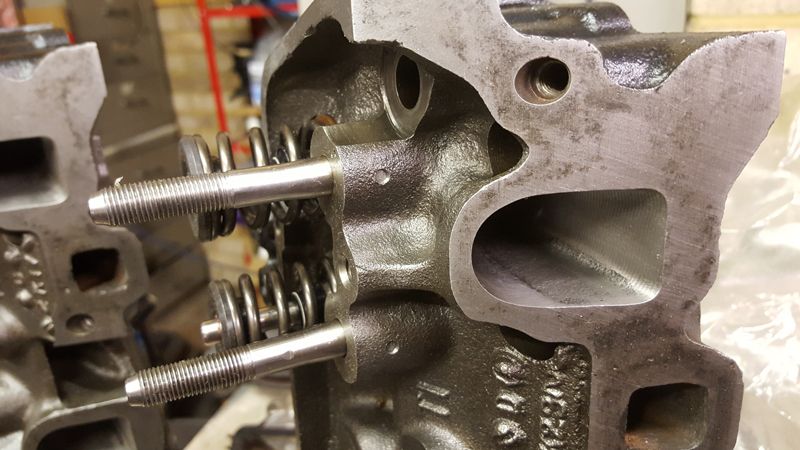
You can just see the ribbed effect on the inlet ports due to the CNC porting. For those who don't know, CNC porting is automated porting using computer controlled machines, where the porting from port to port on a head is 100% consistent, so each port should be identical, from one port to another, from one head to another, so ensure consistency.

Image

First head in place......although followers went in first, as once the heads are on, you won't get the cam followers in!
Image

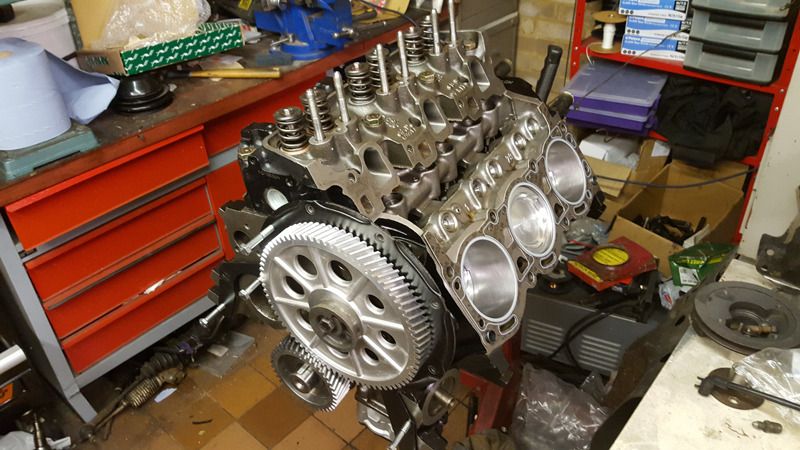
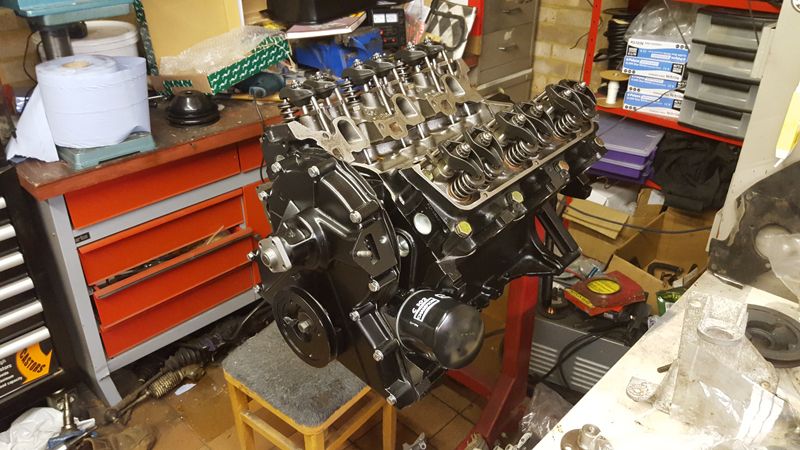
Getting there! Heads on and push rods and rockers cleaned. Oil goes rough the push rods and rockers, so it's important to make sure the oil ways in these components are clean.

Image

I appear to have a selection of inlet manifolds:
Image

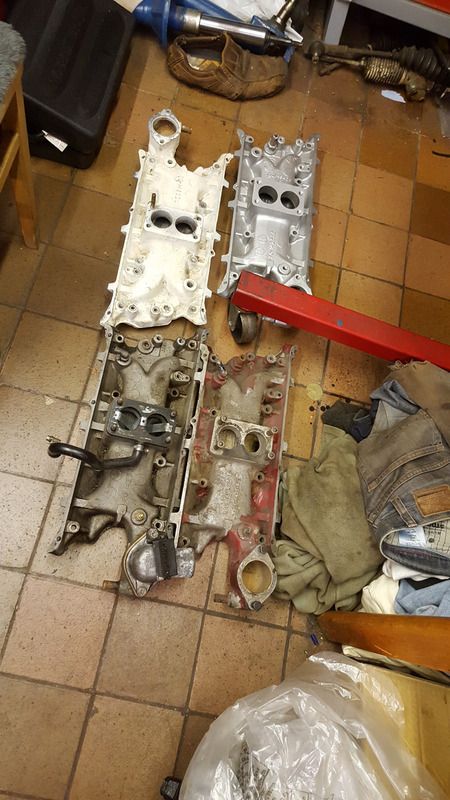
The white one came from my Mk2, the one with the remnants of red paint is allegedly and RS3100 inlet and the one with the black pipe was my original manifold on this car...and the silver one is a standard manifold.

Here you can see both my original and the red manifold look ported compared to the standard original manifold:
Image

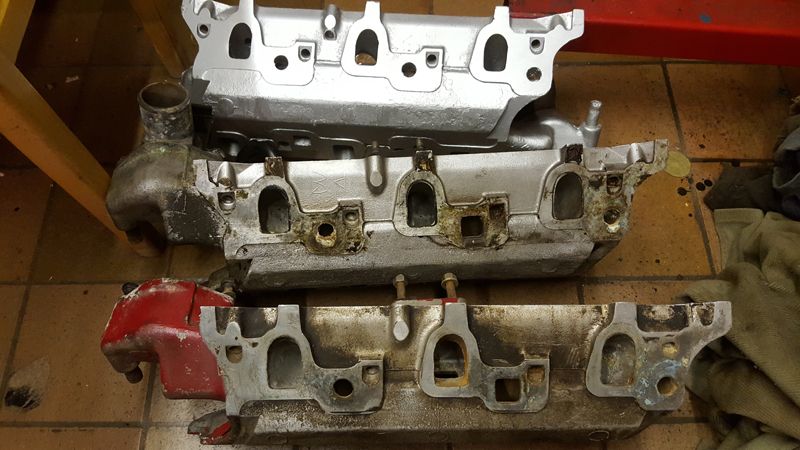
So I'm, going to see which one fits best and matches the ports in my heads. I've had issues with a modified essex manifold not fitting before and not sealing the water ways correctly, resulting in a leak.

So up to date. More as it happens!
User avatar
3 Litre Power
Posts: 471
Joined: Tue Feb 24, 2015 4:41 pm
Car(s): 1975 Capri II 3000 Ghia factory manual, 505k kms, Sunset Red, BVR, B.I
1988 Ford Escort XR3i Cabrio, 177k kms, Red, Black Top ( Daily )
Location: In the garage...

Re: RS3100 restoration

Post by 3 Litre Power »

The RS 3100 is supposed to already have smoothed out heads and inlet manifolds though that looks so good
My Mk2 Capri Facebook page https://www.facebook.com/FordCapriMk2
:burnout:

Oil and Coolant guru
Finnish but born and raised in Spain.
Post Reply