Damn, he was right!
-
Peter-S

- Donator

- Posts: 7455
- Joined: Mon Jul 28, 2008 7:57 am
- Car(s): 1985 Capri 2.0
1983 Capri 2.8i - Location: Kent
- Contact:
Damn, he was right!
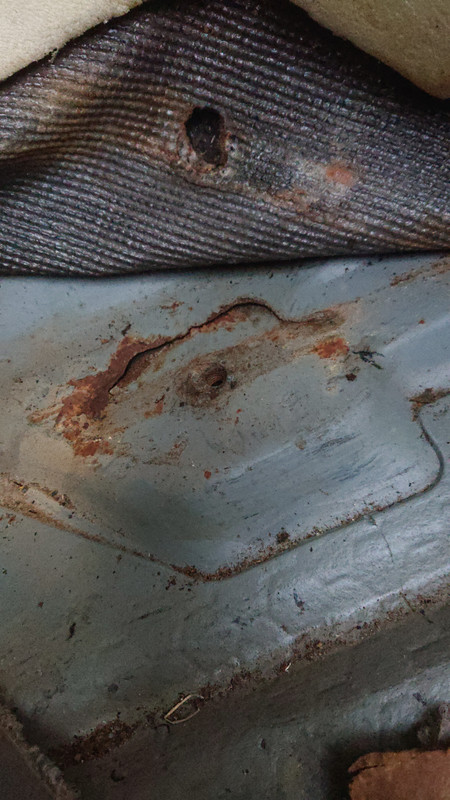
I had an mot advisory back in February as there was a sign of cracking around a driver's seat mount on the 2.0. Finally got around to having a look. Another little job to do!

-
Jasonmarie

- Donator
- Posts: 4717
- Joined: Thu Aug 13, 2015 12:30 am
- Car(s): Ford Capri 2.0 Laser Mercury Grey 1987 hobby .
Mercedes Vito tourer 2.1 Big Bus Daily Driver - Location: Kent

Re: Damn, he was right!
Time to start that diet! 

Re: Damn, he was right!
Is that just stress or is there some corrosion on the other side too? Something else to worry about.
-
Andrew 2.8i

- Donator
- Posts: 14775
- Joined: Sat Jan 25, 2014 7:38 pm
- Car(s): '83 2.8 Injection (sunny days only)
'04 Toyota MR2 (owned from new) - Location: Ceredigion
- Contact:
Re: Damn, he was right!
What would be the cause of a crack like that?
Just weakening of the metal over time?
Andrew.
Just weakening of the metal over time?
Andrew.


-
Peter-S
- Donator
- Posts: 7455
- Joined: Mon Jul 28, 2008 7:57 am
- Car(s): 1985 Capri 2.0
1983 Capri 2.8i - Location: Kent
- Contact:
Re: Damn, he was right!
I would think so Andrew, it's gone along the edge of the reinforcing plate underneath. Maybe need to slow a bit more on the cornersAndrew 2.8i wrote: ↑Thu Jul 15, 2021 7:03 pm What would be the cause of a crack like that?
Just weakening of the metal over time?
Andrew.

-
Peter-S
- Donator
- Posts: 7455
- Joined: Mon Jul 28, 2008 7:57 am
- Car(s): 1985 Capri 2.0
1983 Capri 2.8i - Location: Kent
- Contact:
Re: Damn, he was right!
Looks OK underneath Steve. I'll clean it up to make sure but looks like a stress crack to me.

-
pbar

- Posts: 7533
- Joined: Thu Jun 07, 2012 6:29 pm
- Car(s): Capri 2.0 Laser, frequent driver.
- Location: North-West
Re: Damn, he was right!
What's your plan with that Peter, fill the crack with an eventual line of weld? Nice straightforward fix if that will do it.

Re: Damn, he was right!
Hi steve,
I had a similar problem.
Like you I cleaned and degreased around the cracks after which my son welded them. The welded joints were treated with rust inhibitor.
Plates (x4) were made up and welded on from above.
The finished areas were then sprayed with zinc.
All the best
I believe the problem is both fatigue and a little corrosion.Is that just stress or is there some corrosion on the other side too? Something else to worry about.
I had a similar problem.
Like you I cleaned and degreased around the cracks after which my son welded them. The welded joints were treated with rust inhibitor.
Plates (x4) were made up and welded on from above.
The finished areas were then sprayed with zinc.
All the best
-
Mc Tool
- Donator
- Posts: 2373
- Joined: Sat May 17, 2014 8:34 pm
- Car(s): 1980 mk3 capri 2l ohc T9 , Toyota Blade Master 3.5l V6, Paso , 850T,rd400, 900ss
- Location: Invercargill New Zealand
Re: Damn, he was right!
They are pretty flimsy though . Silly thing here is that that sort of mount would pass wof (mot ) on a factory car .... but would be rejected on a scratch build or heavily modified car , you would have to fit 4mm plate of a minimum area ( not sure how big )
Sometimes I talk to myself ... and we both have a good laugh
-
mjcapri
- Donator
- Posts: 1893
- Joined: Tue Jul 29, 2008 5:23 pm
- Car(s): Diamond White Granada 24v
Caspian Blue Sierra XR4i
Stealth Grey Focus RS
Storm Grey Fiesta ST200 (actually belongs to the missus!)
Mean Green Fiesta ST-3
Re: Damn, he was right!
Clean the crack out with a Dremel or similar Peter and then drill a hole at either end of the crack to “terminate” it. Fill with weld (I’d just MIG it) but you’ll need to be careful of getting too much heat into it. Ideally use a heat sink and be careful of welding too long a run at once.
-
Peter-S
- Donator
- Posts: 7455
- Joined: Mon Jul 28, 2008 7:57 am
- Car(s): 1985 Capri 2.0
1983 Capri 2.8i - Location: Kent
- Contact:
Re: Damn, he was right!
Thanks Mark. I've been using a dremel type thing to clean it. I'm confident I can drill the holes that just leaves the other bit!mjcapri wrote: ↑Sat Jul 17, 2021 8:00 amClean the crack out with a Dremel or similar Peter and then drill a hole at either end of the crack to “terminate” it. Fill with weld (I’d just MIG it) but you’ll need to be careful of getting too much heat into it. Ideally use a heat sink and be careful of welding too long a run at once.

Re: Damn, he was right!
Peter,
I`ve been trying to work out which mounting point that is, I`m thinking rear but is it left or right?
I`ve been trying to work out which mounting point that is, I`m thinking rear but is it left or right?
-
Peter-S
- Donator
- Posts: 7455
- Joined: Mon Jul 28, 2008 7:57 am
- Car(s): 1985 Capri 2.0
1983 Capri 2.8i - Location: Kent
- Contact:
Re: Damn, he was right!
Yes Steve, rear of driver's seat next to the tunnel
-
Peter-S
- Donator
- Posts: 7455
- Joined: Mon Jul 28, 2008 7:57 am
- Car(s): 1985 Capri 2.0
1983 Capri 2.8i - Location: Kent
- Contact:
Re: Damn, he was right!
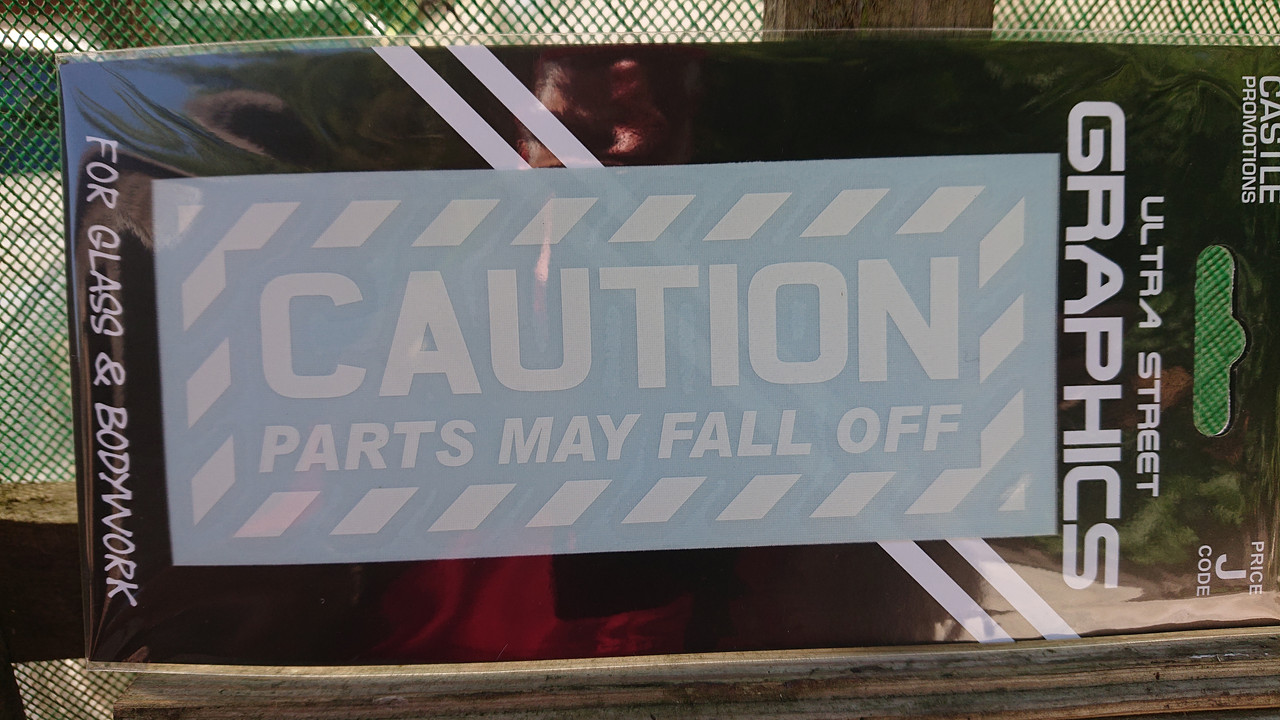
I'm going to put this in the car when I'm done

-
Mc Tool
- Donator
- Posts: 2373
- Joined: Sat May 17, 2014 8:34 pm
- Car(s): 1980 mk3 capri 2l ohc T9 , Toyota Blade Master 3.5l V6, Paso , 850T,rd400, 900ss
- Location: Invercargill New Zealand
Re: Damn, he was right!
Just make sure they know you're talking about the car.....
 .......you are aren't you?. Ah ha ha ha ,just realised that sticker would be better on my car, yeah , that could be real funny
Sometimes I talk to myself ... and we both have a good laugh
-
Peter-S
- Donator
- Posts: 7455
- Joined: Mon Jul 28, 2008 7:57 am
- Car(s): 1985 Capri 2.0
1983 Capri 2.8i - Location: Kent
- Contact:
Re: Damn, he was right!
Hamish, there's days when I'm not really sure