I've not seen a thread on this before so thought i'd share it with you all as its a nice easy job to do, doesn't take much time to complete and can save you around £40.
Fast forward to the end for the bearings that i needed and the part number of my alternator.
A little while ago i'd noticed my alternator had become noisy but was still functioning as it should. As i was carrying out some other work, i took the fanbelt off to see how the alternator felt. It was very 'knocky' and rough so i started to look to see if i could get a replacement.
I had a look on euro car parts and they could supply a Lucas alternator for around £50 with my old one as an exchange. As i had heard mixed reviews on the Lucas ones and i think mine is a Bosch one, i thought i'd rather keep hold of mine. I was under the impression that mine was a Bosch one, but im actully not that sure. Does anyone know the difference?
So after lots of googling, i'd seen that people had replaced the bearings on other alternators for other cars, but not necessarily a Capri. I gathered that some types of alternator are more complicated than others, but luckily the Capri's alternator is super simple and easy to strip down. I also tried to find any information on the bearings but didn't find anything. Only thing for it was to get the thing out of the car and strip it down to get to the bearings.
So, with it off the car, i took a couple of photos to get the part number and the position of the regulator/rectifier on the back;
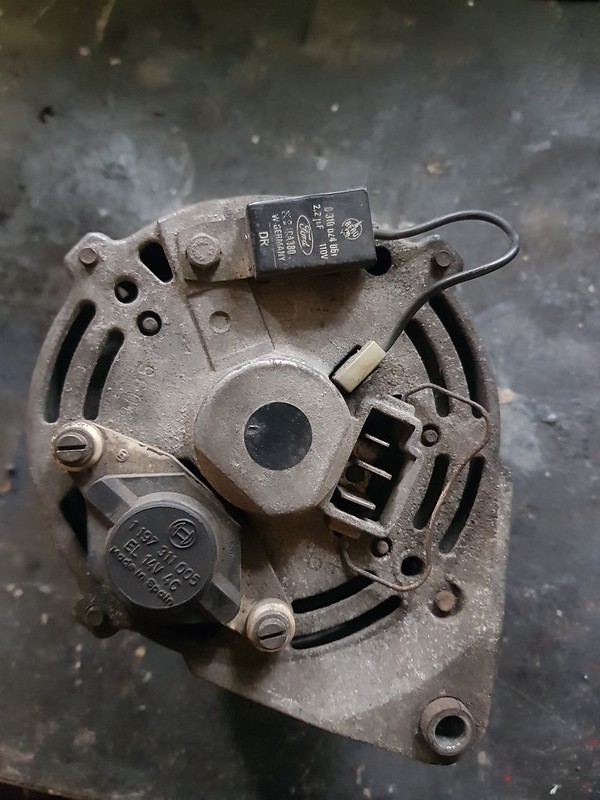 20200330_170340 by Robert Scott, on Flickr
 20200330_170406 by Robert Scott, on Flickr
Also, as most of you know, it is probably a good idea to take lots of pictures just so you can be sure it all goes back together as it should.
I took off the reg/rec and put them in a safe place. Then i took the fan off the front. I first tried to do this with a ratchet and jamming a screwdriver in the fan to stop it spinning. I wouldn't advise this as it didn't work and could risk damaging the fan. the fan isn't actually held central with the keyway so if the nut on the alternator is tight, the fan just spins as you try to undo it. Luckily i have an impact gun, which with a few 'dugga duggs' the nut came off straight away. At this point, be sure to lay out all the spacers and plates etc. in the correct order to ensure it all goes back together correctly.
With the fan off, the front casing can be removed. This is held in with 4 long screws which will probably be tight and full of crud so be careful removing these. I used plenty of wd40 and patience. 3 out of my 4 came out nicely with a bit of messing around, but one was very tight. lots more wd40 and an impact driver and it was still very tight, however i persisted and it finally started to undo. it was tight all the way out so i'm not sure if it was maybe bent slightly. With all the screws removed, i used a puller to remove the front case. This probably isn't essential and you'd probably need to be careful not to damage the rotor shaft when using it, but mine didn't take much pressure to remove.
 20200330_173850 by Robert Scott, on Flickr
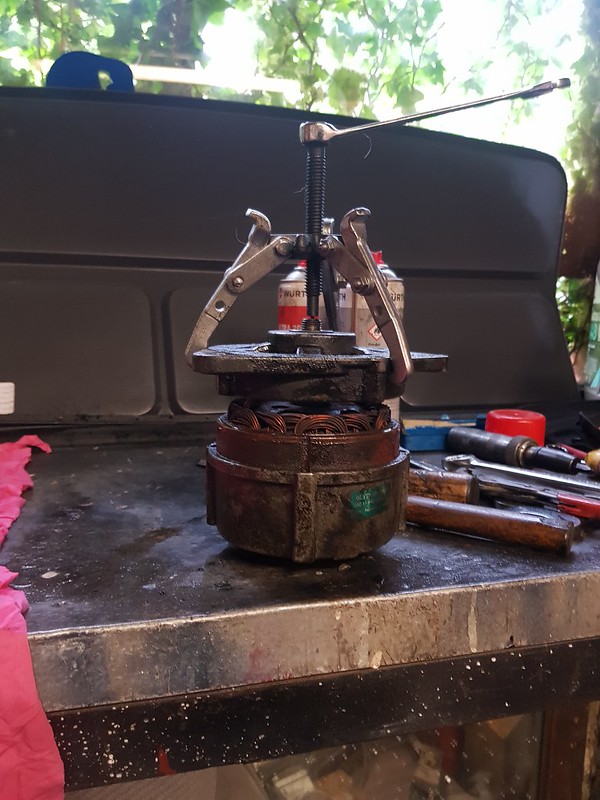 20200330_181456 by Robert Scott, on Flickr
With this removed, you'll be able to see a brass plate at the back of the bearing, this comes off by removing the 2 screws and reveals the bearing. Mine was knackered as expected. A quick knock through with a hammer and socket from the front and it flew out. The bearing had '6203z' written on it a quick google of this code tells you what it all means and the sizes etc. These may be different depending on type of alternator but i'll post the part number of my alternator at the end so then it should be the same.
 20200330_181928 by Robert Scott, on Flickr
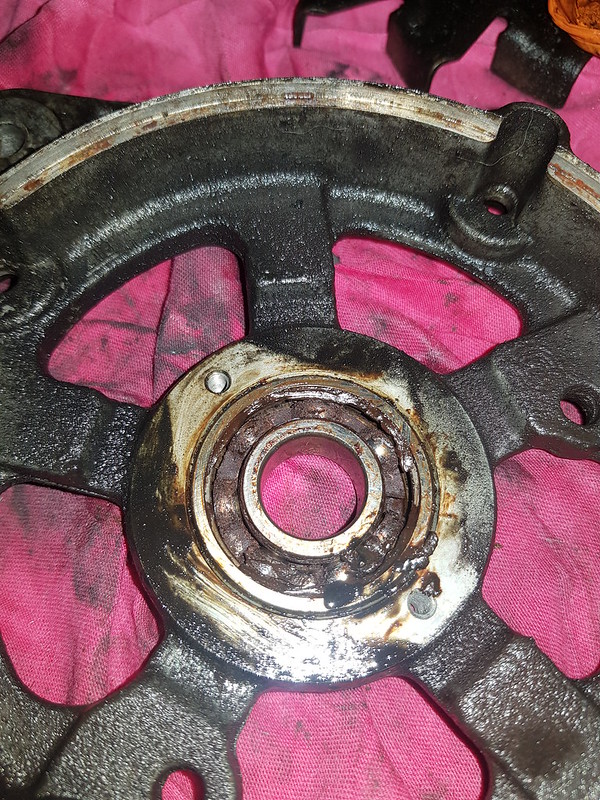 20200330_181940 by Robert Scott, on Flickr
Next thing is to remove the rotor shaft, little bit of a wiggle and this just comes out. i didnt notice this until i was putting the whole lot back together but the rear bearing actually presses in to an o-ring. No idea why, possible to stop it seizing in there as theres no real way to get the bearing out of the rear casing.
 20200404_135442 by Robert Scott, on Flickr
 20200330_184518 by Robert Scott, on Flickr
The rear bearing 'should' stay on the rotor shaft. again, i used my puller to remove the bearing off the shaft. As this one is smaller than the one in the front casing, it was very hard to see the number on it as it was stamped on the side as opposed to the front. Took me ages to figure out what it said, took lots of googling the wrong code before i found that id read one of the numbers wrong. turns out the one on the back said 6201-2rs/c3
This is all the stripping down you need to do for the bearings, but as i was bored and i had some spare paint in the garage, i decided that i wanted to paint the alternator aswell... So i then removed the stator assembly aswell which was only held in with a few screws. Obviously you need to be careful not to damage any of the wires or soldered joints. The stator assembly then just pulls out and i could spray away.
 20200330_185344 by Robert Scott, on Flickr
Putting the alternator back together is just as easy as stripping it. I put the rotor in a vice with soft jaws and gently tapped the new bearing onto the shaft using a socket the same size as the inner race of the bearing. important to do this as squarely as possible so as not to damage the shaft or bearing. If like me you decide to take the stator out, obviously this needs to go back in before the rotor. it is pretty self explanatory which way it goes.
I mentioned earlier that there's an o-ring where this bearing sits in the rear casing. i gave this just a light smear of oil just to help the bearing go in. might be advisable to not put too much on as you don't want for the bearing to spin within the casing. I then pushed the rotor in position as far as it would go.
 20200404_135449 by Robert Scott, on Flickr
Next i hammered the new bearing into the front casing. this came out easy enough so it shouldnt be too hard to knock it in. i used a socket slightly smaller than the outer race of the bearing and tapped it in until it stopped. I then refitted the brass plate at the back.
 20200404_160548 by Robert Scott, on Flickr
The front casing can now be fitted, this goes on easily enough. I got it on as far as i could by hand then used the 4 screws to tighten it evenly. Once this is all tight you should be able to spin the rotor by hand and there should be no resistance like there was before.
 20200404_160812 by Robert Scott, on Flickr
Now the fan can go back on, i actually put these on in the wrong order at first which is why its important to make note when stripping it. Either way, i got it right in the end just remember, the fan goes on first haha.
 20200404_163522 by Robert Scott, on Flickr
Then to tighten the fan assembly, i locked up the fan with a screwdriver and tightened the nut with a ratchet. i cant advise how tight this should be as i just went off feel.
Then the alternator can be put back on, job done!
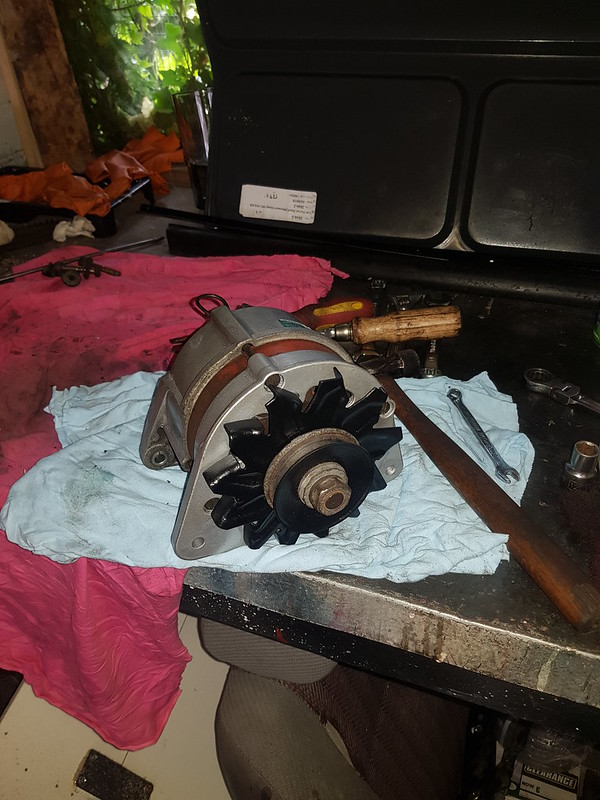
 20200404_165812 by Robert Scott, on Flickr
I hope that someone finds this write up useful, it really is a simple job that anyone can do themselves, and save around £40 in the process. The bearings cost just over a fiver and the paint i used was just some stuff i already had in the garage. If i already had the bearings and didnt bother stripping it completely to paint it, the job could probably be done in 2hrs from start to finish and that'll be taking it easy aswell.
Its probably worth mentioning aswell that the rear bearing didnt really have any issues at all, i only replaced it as a matter of course. I think it is the front bearing which is more likely to be the culprit and can probably be avoided by tensioning the fan belt correctly, i may have done mine too tight in the past which may have accelerated the wear on the bearing.
For anyone who wanted to fast forward to the end;
My Alternator part number - 0120 489 096 097
Front bearing-6203z
Rear bearing- 6201-2rs/C3
Hope this helps, nice little job during the lockdown