RS3100 restoration

Use this forum to post threads of ongoing Capri projects and restorations.
User avatar
347 V8
Posts: 92
Joined: Mon Dec 08, 2014 9:21 pm
Car(s): Mk2 V8, RS3100.

RS3100 restoration

Post by 347 V8 »

well, I have been lurking long enough, so I thought I would contribute with a restoration thread...or actually, the finishing of a restoration!

A little bit of back ground...

I've had my RS3100 for 7 or 8 years now, purchased way before the prices got out of hand. It was a sound car with an MOT and I had it on the road for a number of years. I always knew I wanted to restore the car to it's former glory, as it was beginning to show it''s age and a few issues would need attending to. This was going to be a full strip, soda blast back to the bare metal and start from there.

Here at the AVO show when it was at Stanford hall. This is the Ford owned capri 280 and the guy standing there is Jeremy Walton, author of a few capri books

Image

Looks really nice!

but in detail getting a little dog eared..

Image

Image

Image

Image

plus some other issues that I knew about, so let the strip down begin!

Image

Floors pretty good, but some interesting patches in the normal places

Image

Image

front passenger foot well
Image

looks good so far..but the wings and top plates have to come off:

Image

oh dear, knew this was coming, indicated by local swelling of the top plates:
Image

Image

Image

These can hide a lot of issues. Ok on top, but underneath..
Image

Image

inner strengtheners removed..
Image

the whole front end looking a little sad..
Image

rust lurking under the rear panel
Image

so the next step, lets get it soda blasted and see what that reveals...more soon!

Image

Once a shell is down to this level, it can actually be lifted by two people, one at each end.
User avatar
3 Litre Power
Posts: 471
Joined: Tue Feb 24, 2015 4:41 pm
Car(s): 1975 Capri II 3000 Ghia factory manual, 505k kms, Sunset Red, BVR, B.I
1988 Ford Escort XR3i Cabrio, 177k kms, Red, Black Top ( Daily )
Location: In the garage...

Re: RS3100 restoration

Post by 3 Litre Power »

Yours is probably the first RS 3100 on the forum? looks nice even before the restoration :D
My Mk2 Capri Facebook page https://www.facebook.com/FordCapriMk2
:burnout:

Oil and Coolant guru
Finnish but born and raised in Spain.
User avatar
Andrew 2.8i
Donator
Donator
Posts: 14774
Joined: Sat Jan 25, 2014 7:38 pm
Car(s): '83 2.8 Injection (sunny days only)
'04 Toyota MR2 (owned from new)
Location: Ceredigion
Contact:

Re: RS3100 restoration

Post by Andrew 2.8i »

Hi,
Beautiful car. It looked nice enough before, I can't wait to see the "after" photos!

Andrew.
Image
User avatar
MattMe
Donator
Donator
Posts: 569
Joined: Thu Aug 21, 2014 10:43 am
Car(s): Mk3 2.8 injection
Previously owned:
Facelift Mk1 V8
Mk3 2.0 Laser
Mk3 2.8i

Re: RS3100 restoration

Post by MattMe »

Very nice car you have there. Quite a few threads making me jealous recently!

I'm shocked by the strut tops appearing in such good condition, hiding the sin underneath. I daren't look at mine!

Very interested to see the progress, please do keep us up to date.
User avatar
347 V8
Posts: 92
Joined: Mon Dec 08, 2014 9:21 pm
Car(s): Mk2 V8, RS3100.

Re: RS3100 restoration

Post by 347 V8 »

now at the soda blasters, here is the sight that greeted when I arrived:

Image

Image

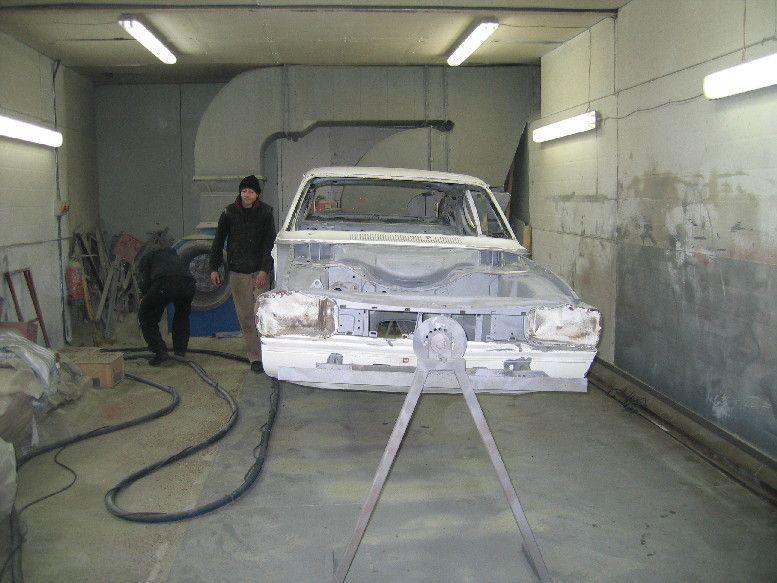
turning the car over...

Image


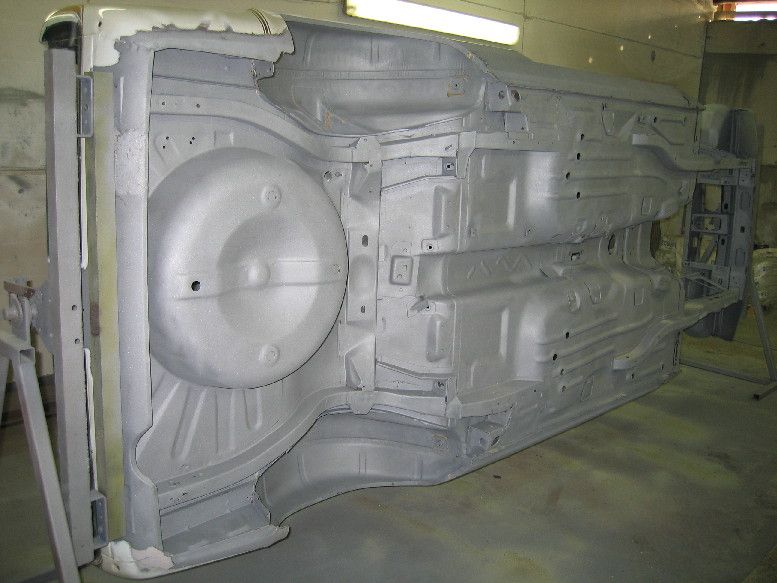
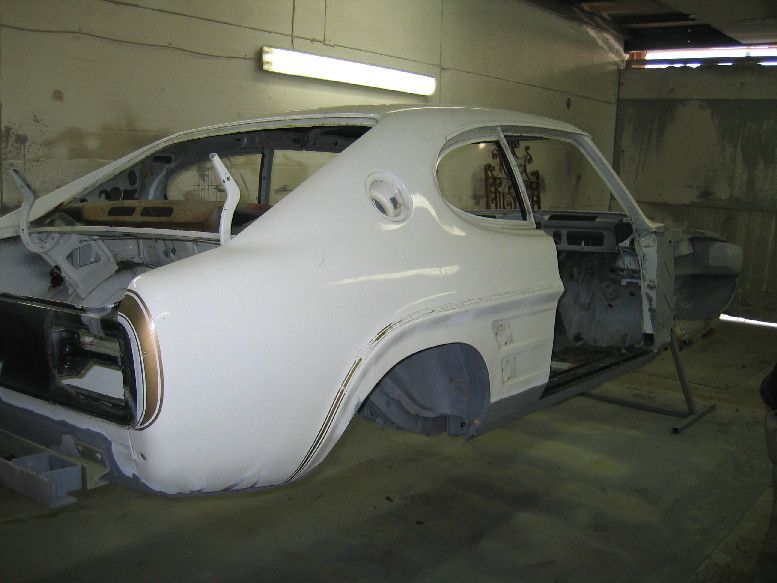
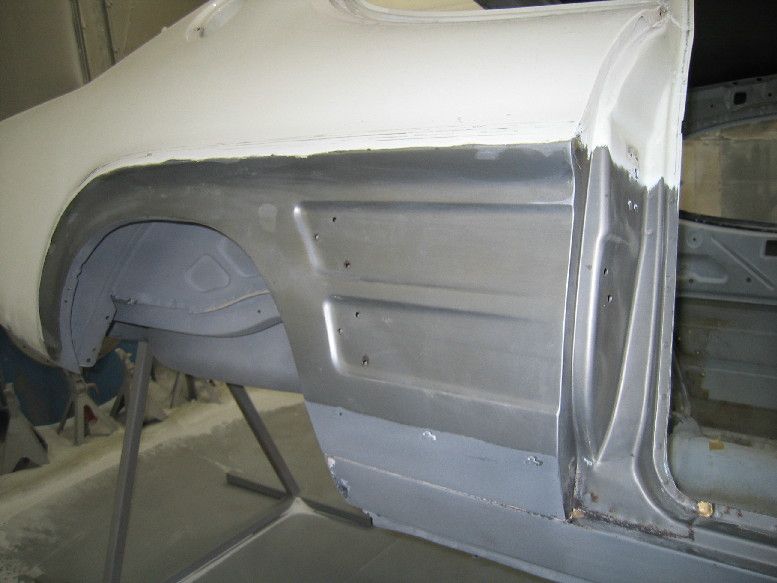
Looking preety good at this point. A few areas to be repaired, but no huge suprises here!

Image


Image

Image

Image

Image

Image

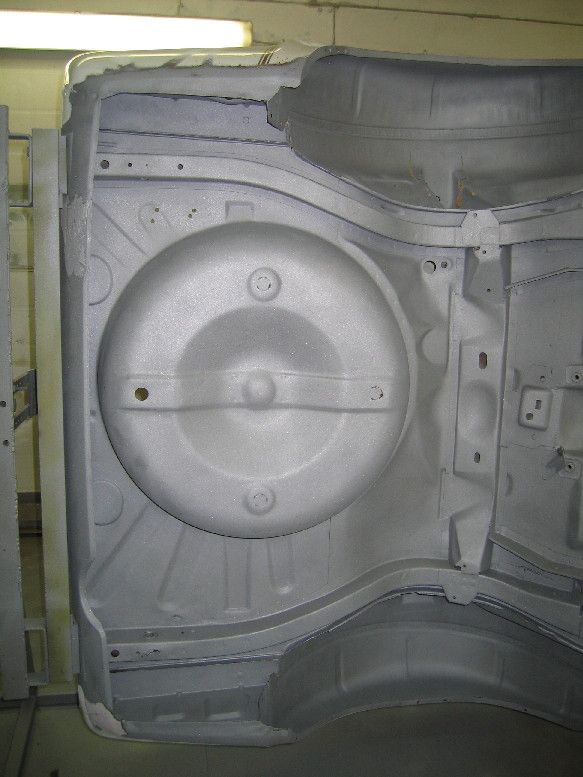
Overall, very please with the process and the condition of the car. This should dispel any doubts about soda blasting removing sealer and underseal. This car was covered in at underneath, but you would never know it looking at these pictures.

Here's a video of the process.

Image

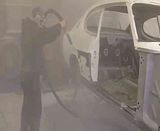
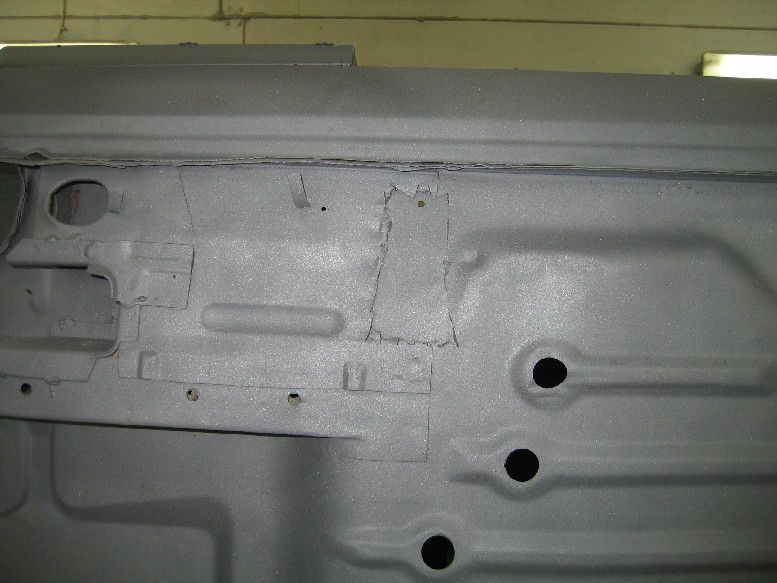
The first stage is just fine soda, almost like talcum poder. This takes the paint off, but not the rust. You can see how it leaves the panel, compared with the area underneath that as also be blasted with a more aggressive media to key the surface and clean way any rust. Notice how the angle of the nozel is kept mostly at a very low angle to the body work. Even with this process, you can damage panels if you are careless, but with sand blasting, due to it being far more aggressive, panel damage can occur due to careless use and pure heat build up in a panel. Touching this panel the second the soda was turned off revealed a cold panel, no heat build up whatsoever.

Image

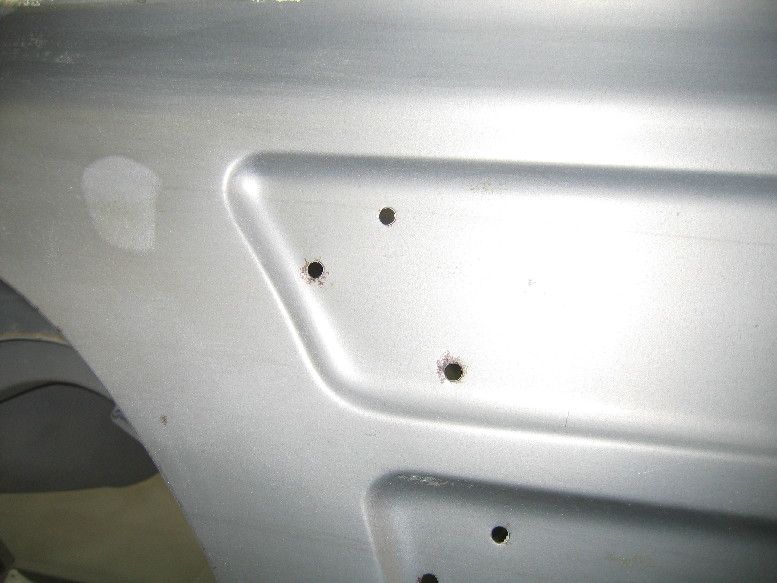
Here you can see rust around the holes for the fake vents. This will be cleaned off with a more aggressive media:

Image

Here is the general view of restore a ford. they have since moved.

Image

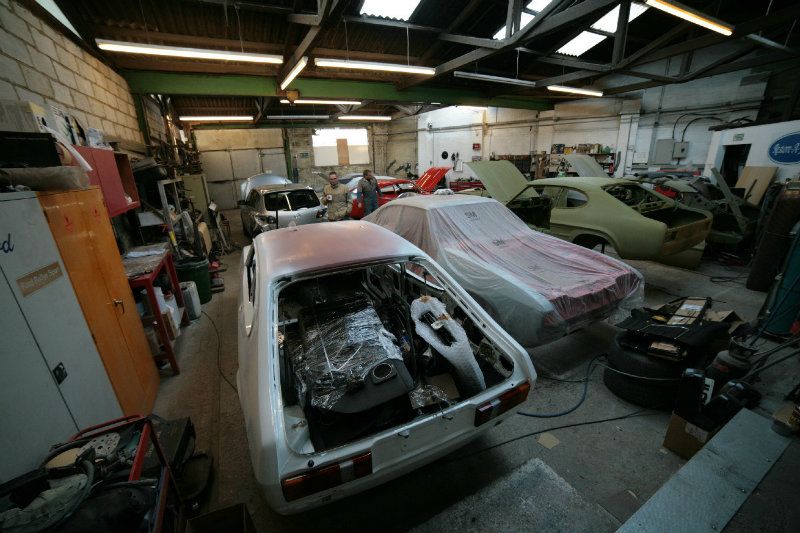
Lots going on, with 2 RS3100's nearly completed, an escort mexico, 2 mk3 capris and a Mk 1 GXL capri. Elsewhere there is another RS3100 awaiting attention and a mk 1 granada estate awaiting an epic rebuild. Stuart also has three other personal projects that he never really gets time to work on.


Image

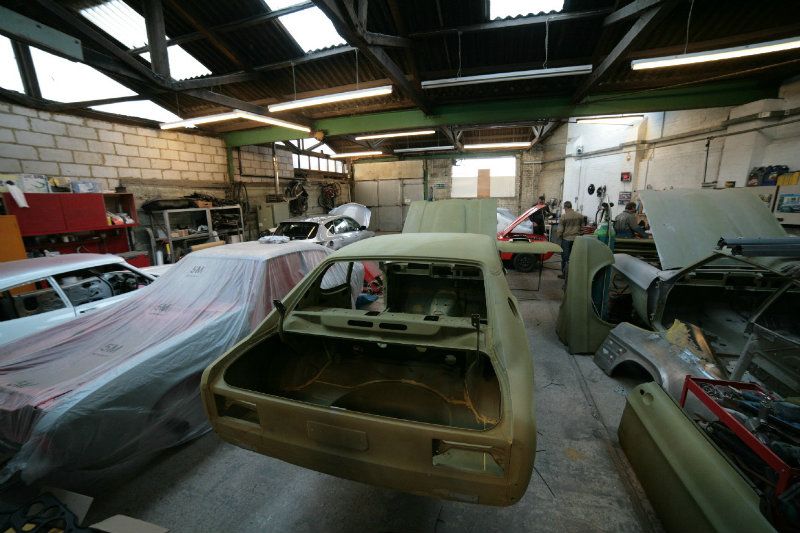
another view. To the right is the spray booth.

Image

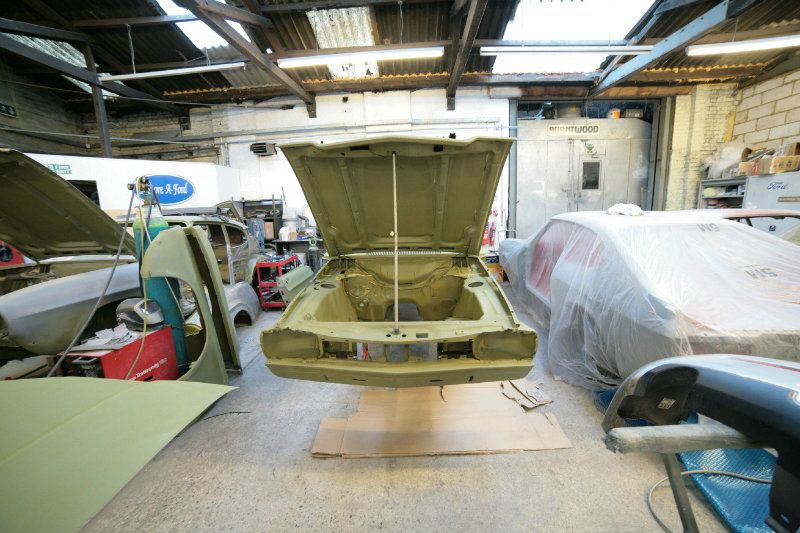
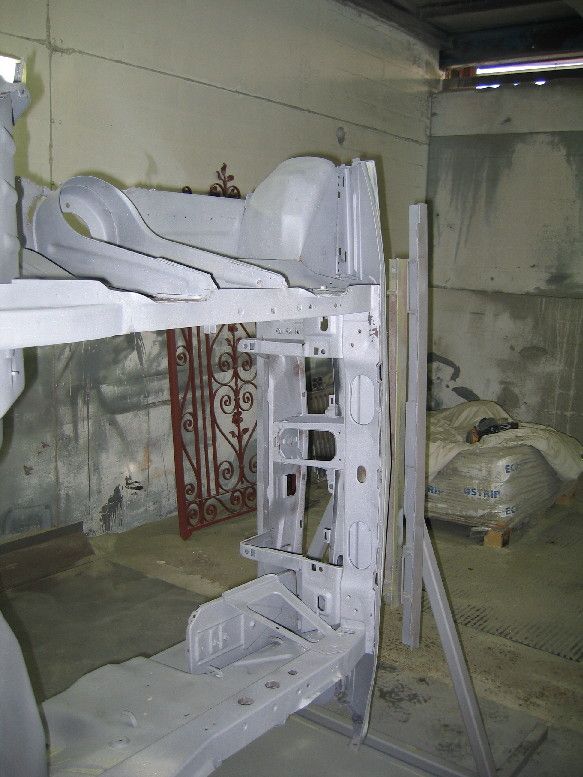
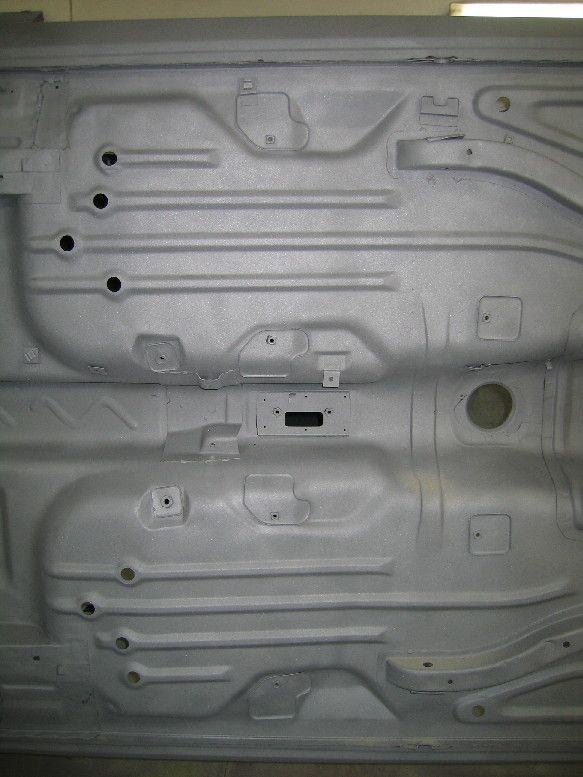
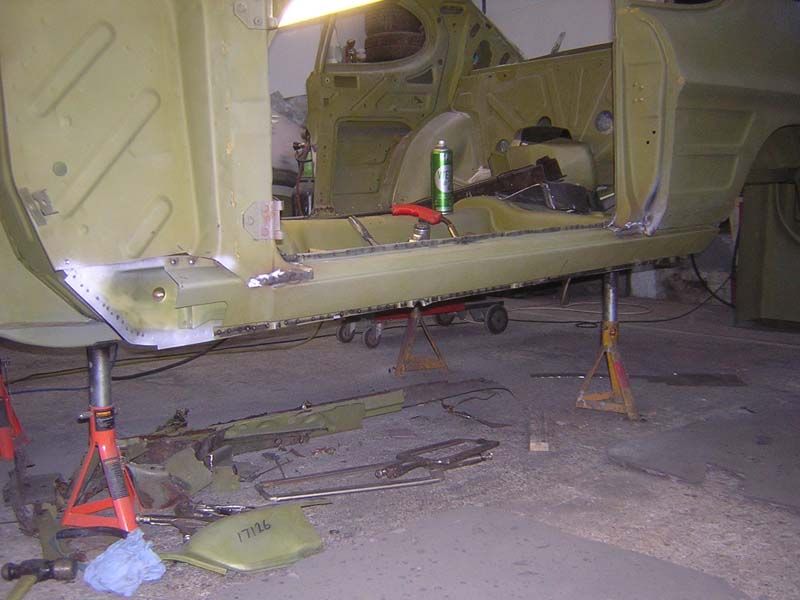
so here is my car, all etch primed up and looking pretty good..

Image

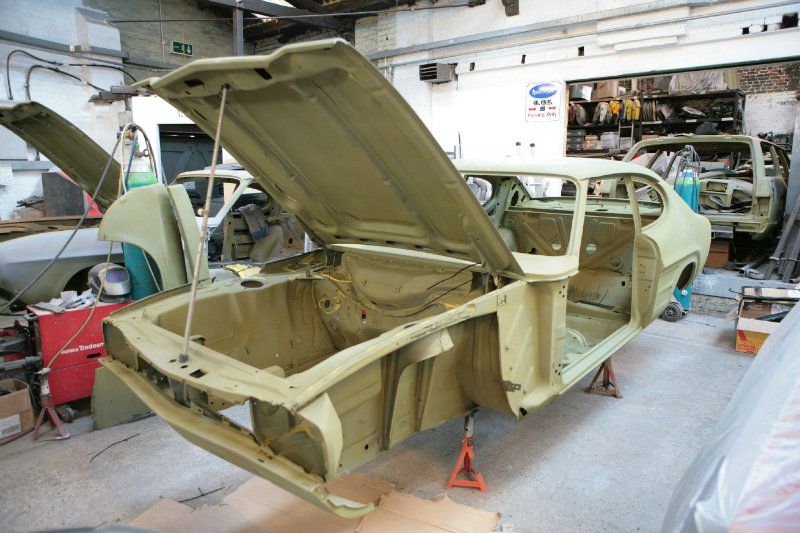
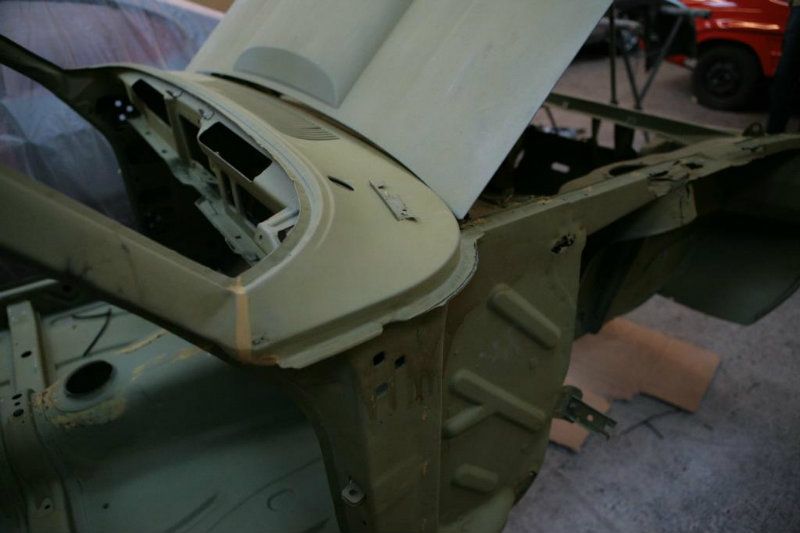
There are lots of small areas that have come to light, as well as damage. You can see some perforation where the screen pillar meets the scuttle, so this will be opened up for investigation. You can also see a dent on the screen pillar.

Image

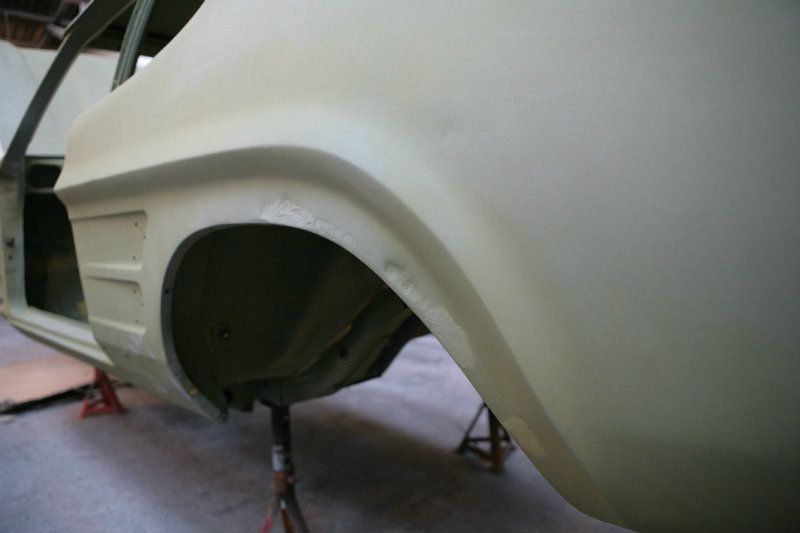
Here you can see some leaded repairs to the wheel arch, so not as clean as the other side, still excellent considering the cars age!
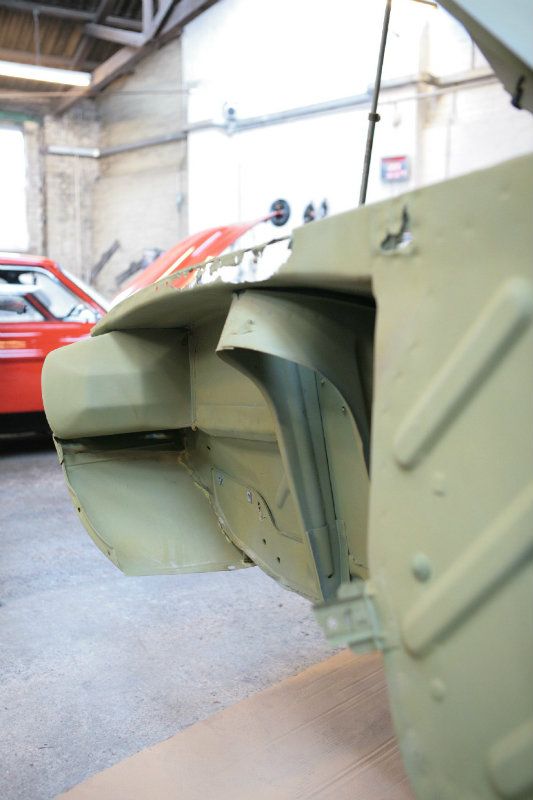
Not really visible is that the seam where the rear quarter joins the wing is holed, so where the panel forms a flange that fold horizontally to meet the top of the sill, there is some corrosion to the extent that the flange doesn't really exist, so this flange will be remade when the new sills go on.

Image

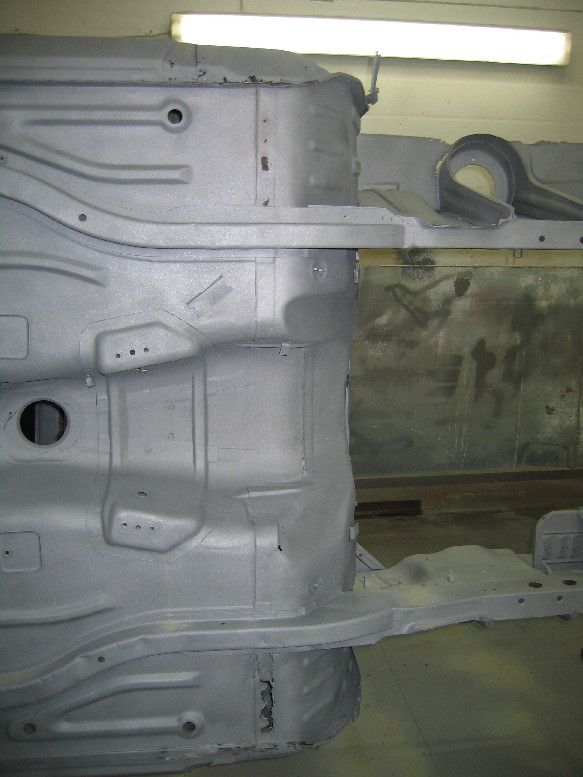
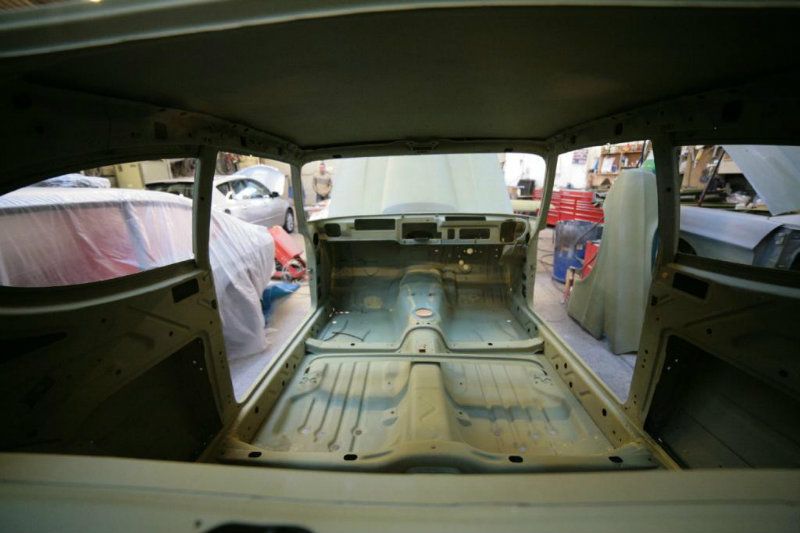
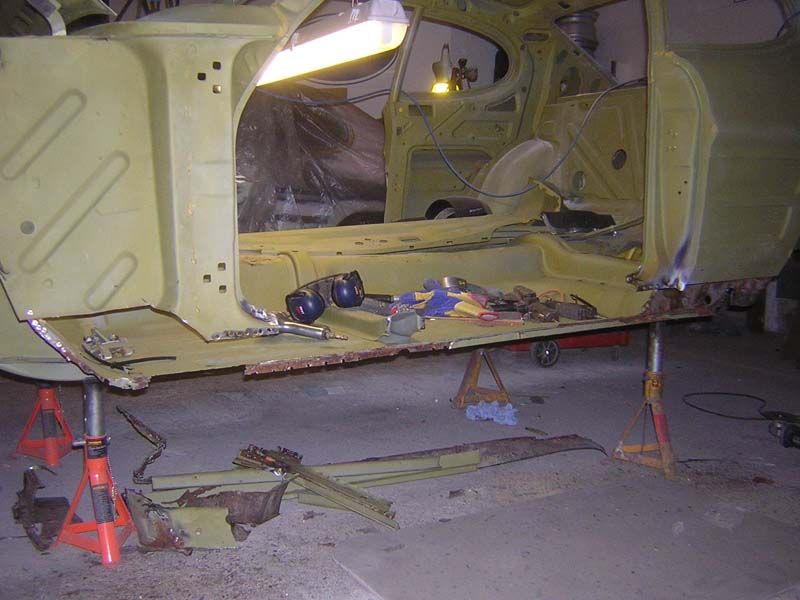
The inside has been blasted and primed as well. some light coming in at the passenger side at the end of the sill. The sills will actually be replaced, inner and outer, as they are ok, but the flanges where they meet are swelling, so as I'm not planning on doing this again, the sills are coming off.

Image

Image

More smaller areas to be done, but to be expected..

Image

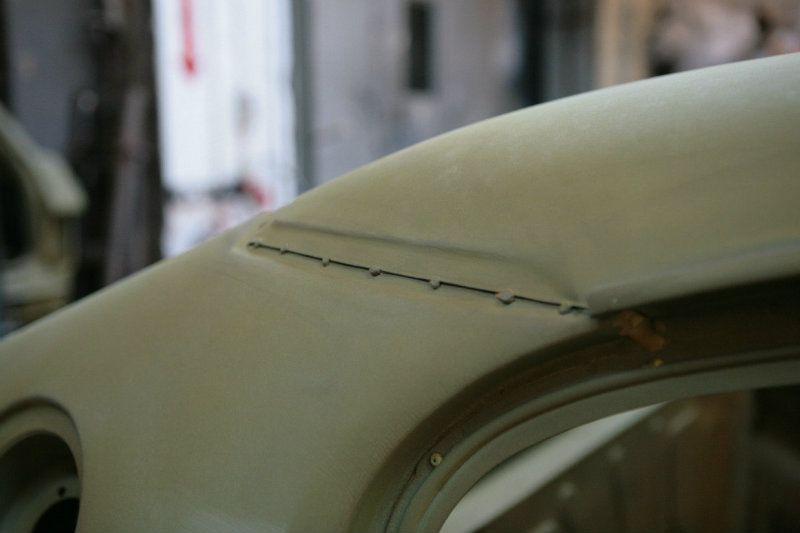
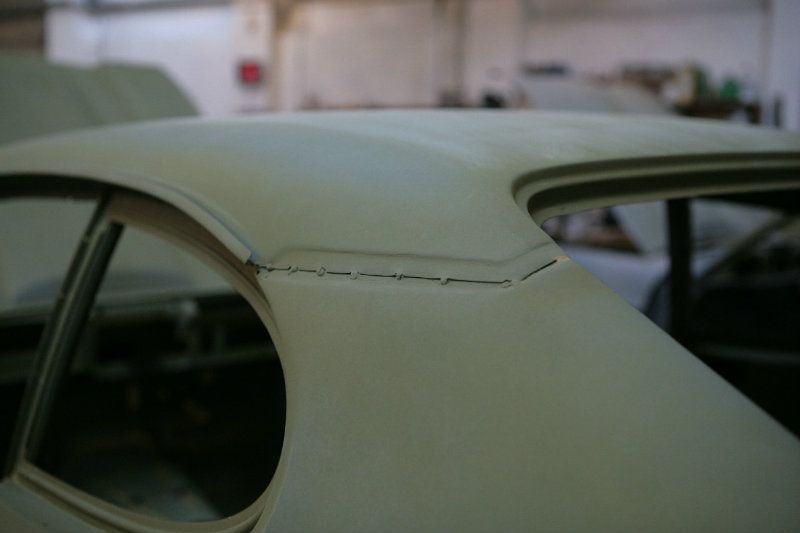
I was concerned about how the roof had been fitted, but other than just being tacked here...not a big issue to correct, really happy with these
Image
Image

It's difficult to see but there are some sizable dents in the bonnet on the passenger side. I could start looking for a new bonnet, but being such a big panel, these are easily damaged. I've bought two bonnets for my mk 2 capri, only to find they have lots of ripples in them due to bad storage, so I'll keep an eye out for another bonnet. I could find a second hand one that once blasted, could be worse than mine, while my one has the merits of otherwise being fine and rot free, so pending another excellent bonnet coming up, then plan is to repair this one.

Finally, and difficult to photograph, both rear quarters have very subtle dents below and to the rear of the rear quarter windows, so these will be looking at. My fear of having to replace rear quarters has been placated, as otherwise, these are very good. With rear quarters fetching up to 2k a side, this would put a serious dent in my budget if these were needed.

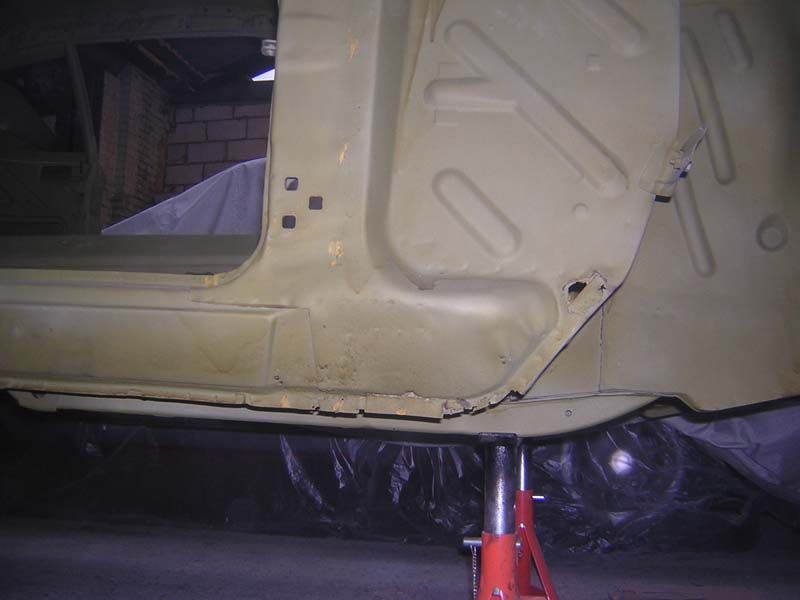
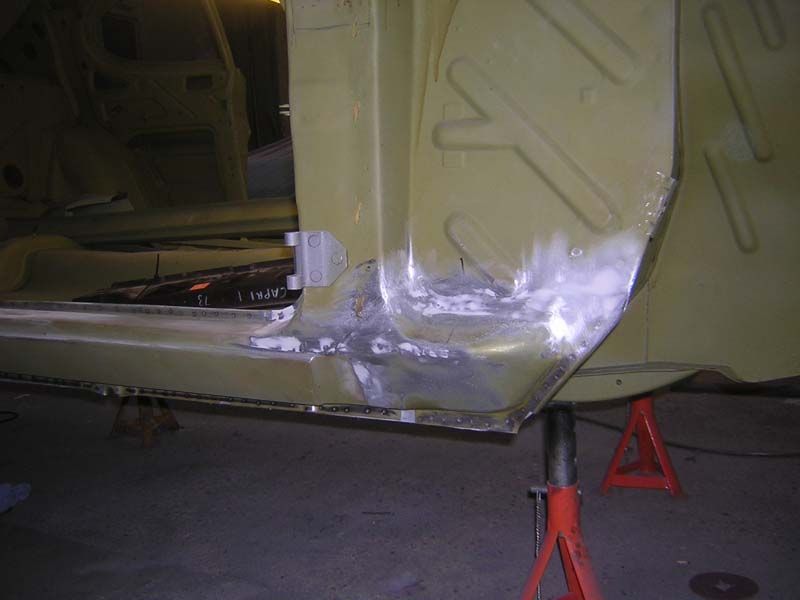
Drivres side sill and bottom of the A post. the decision was made to replace this bottom section and the whole inner sills. I've used original Ford outer sills, express steel panels inners, which really are an excellent fit.

Image

Here the inner sill is off and the scuttle to A post flange has been rebuilt, ready for the new A post lower section

Image

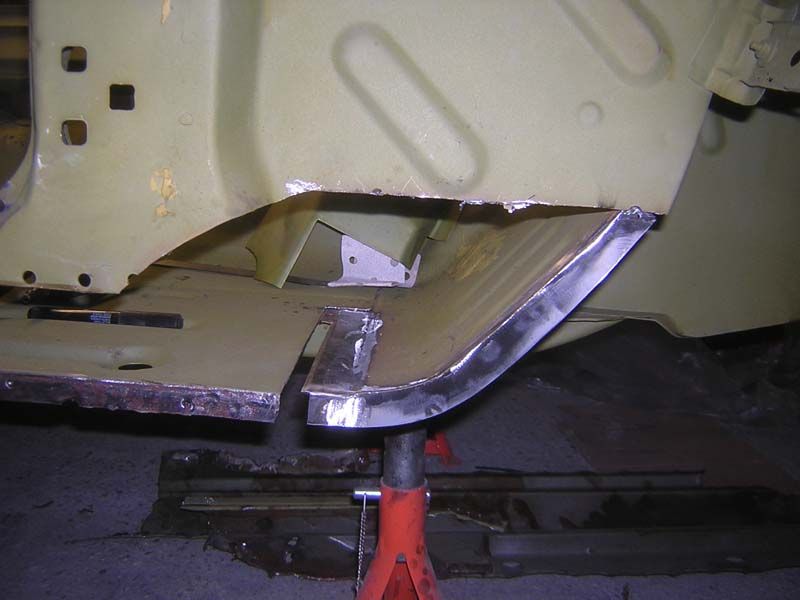
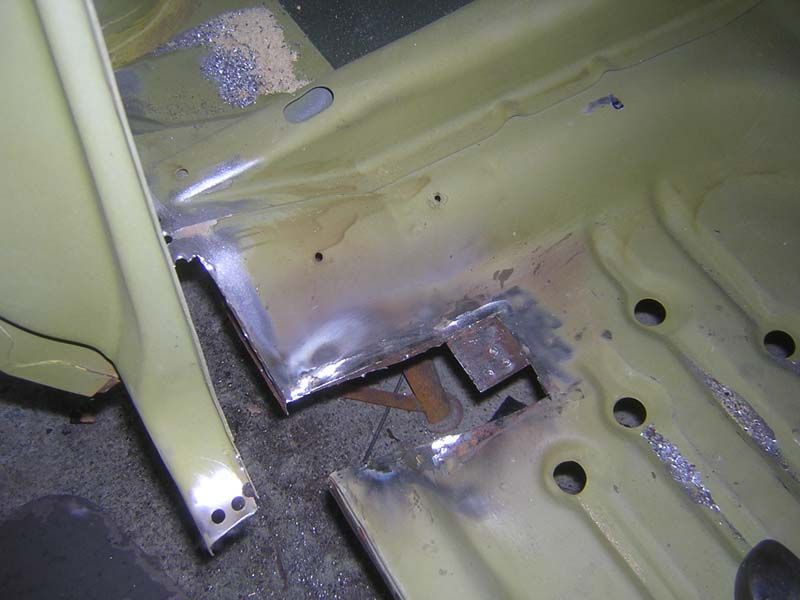
while here's the area where the scuttle and floor overlap, so this needs cutting out and remaking..
Image

Image

Image

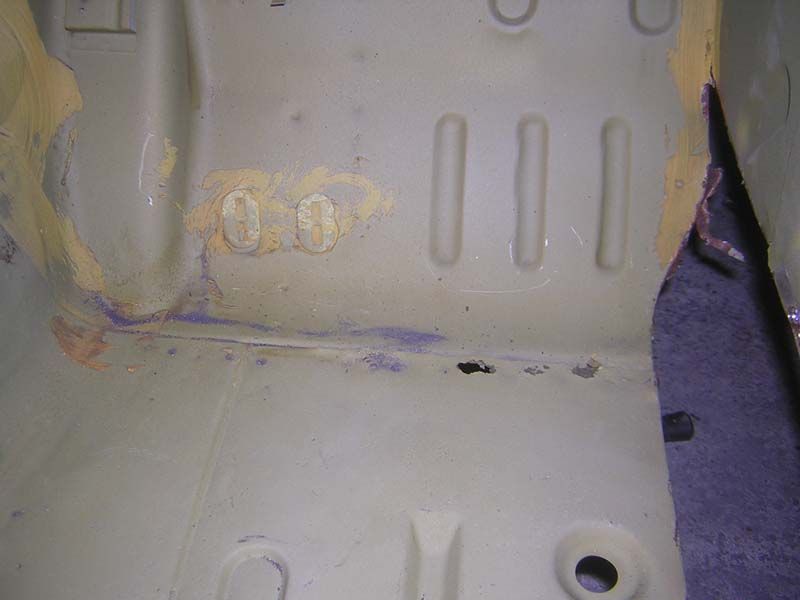
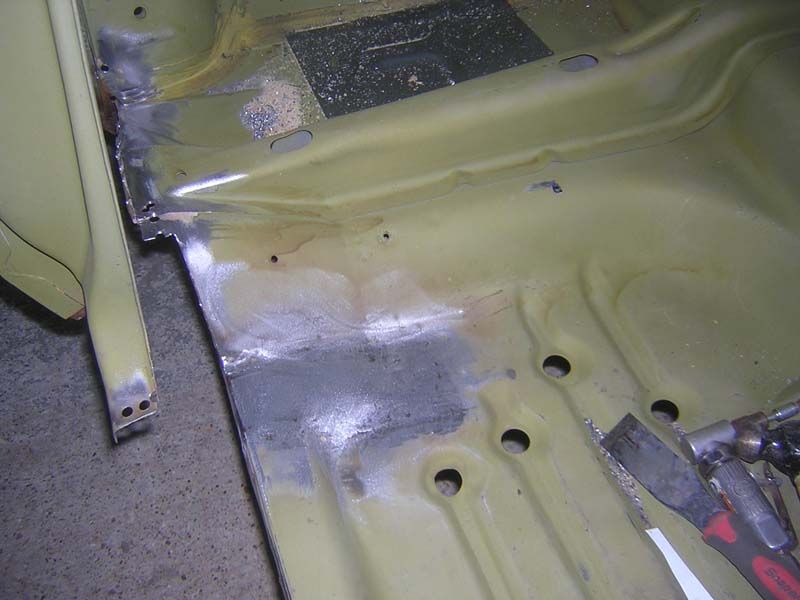
all done. Should look pretty original here, as Stuart has recreated the overlapping edges as per the original panels.
Image

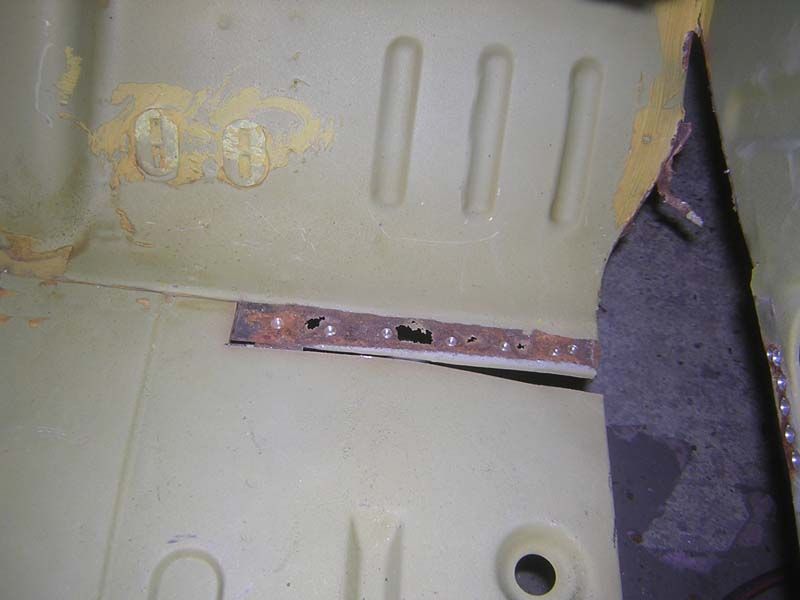
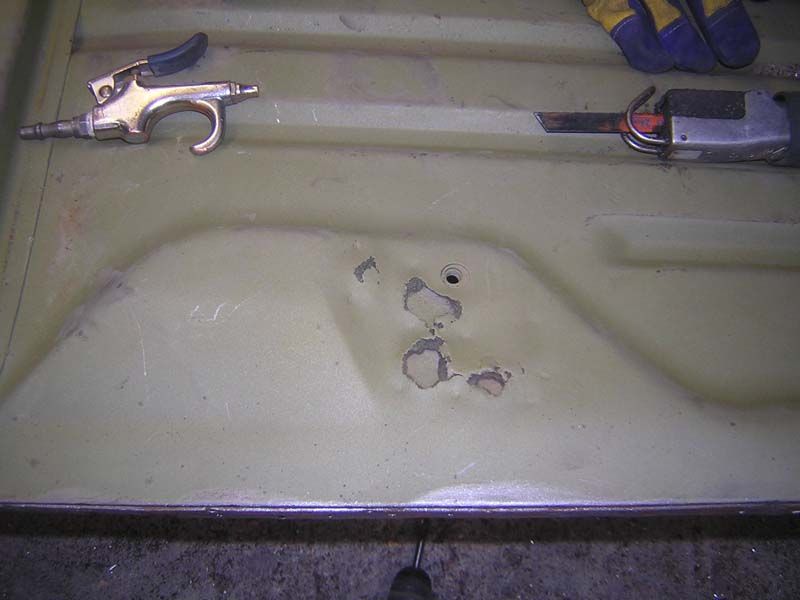
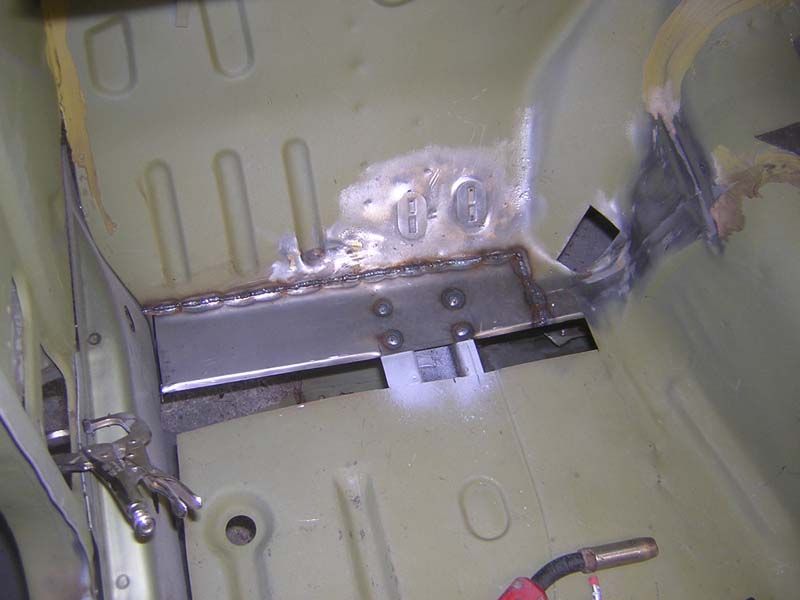
another multi layered area, the seat mount..

Image

spt welds drilled out to release the reinforcing plate below.
Image

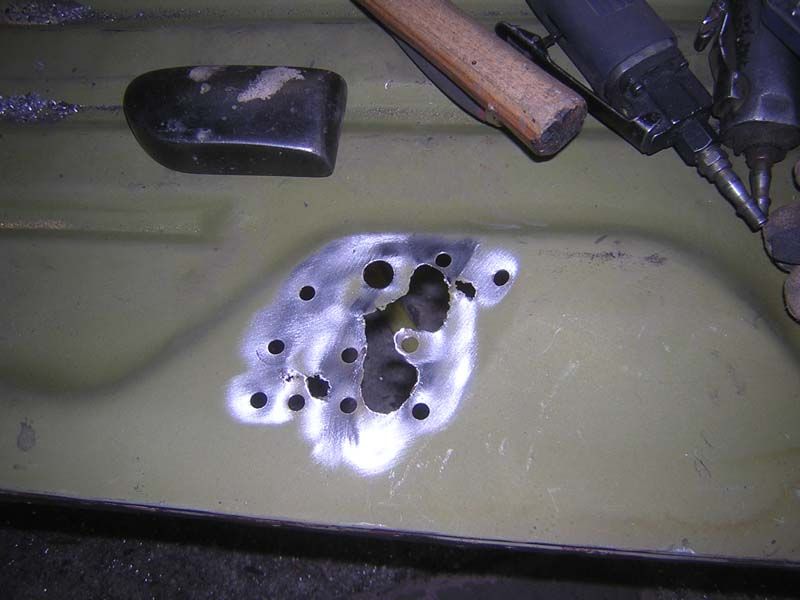
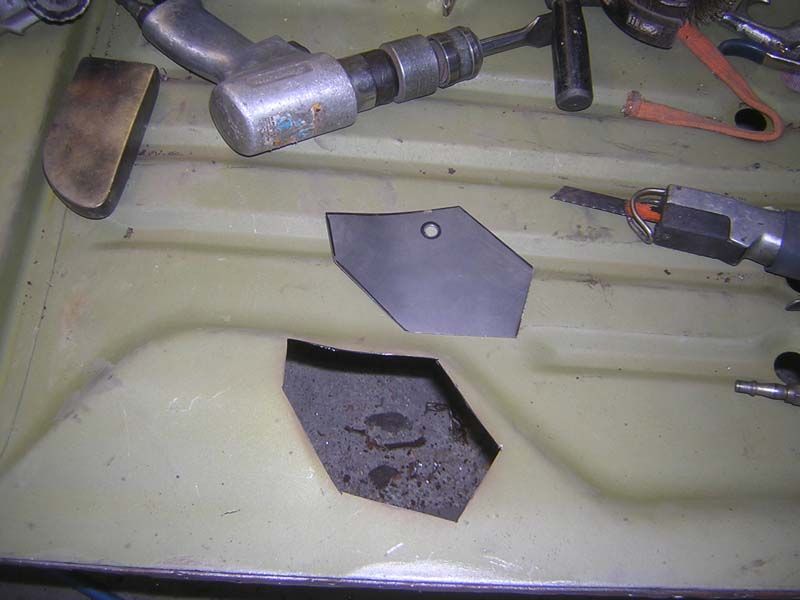
and the rusty metal cut out

Image

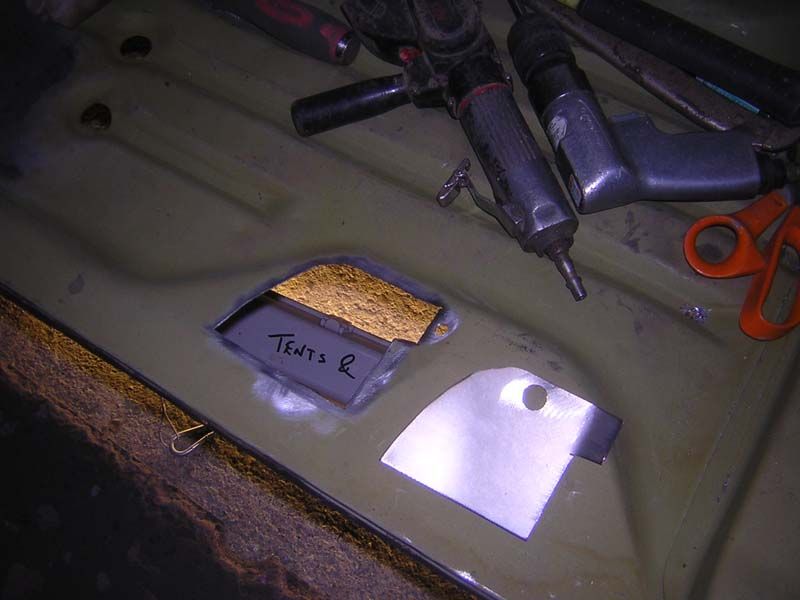
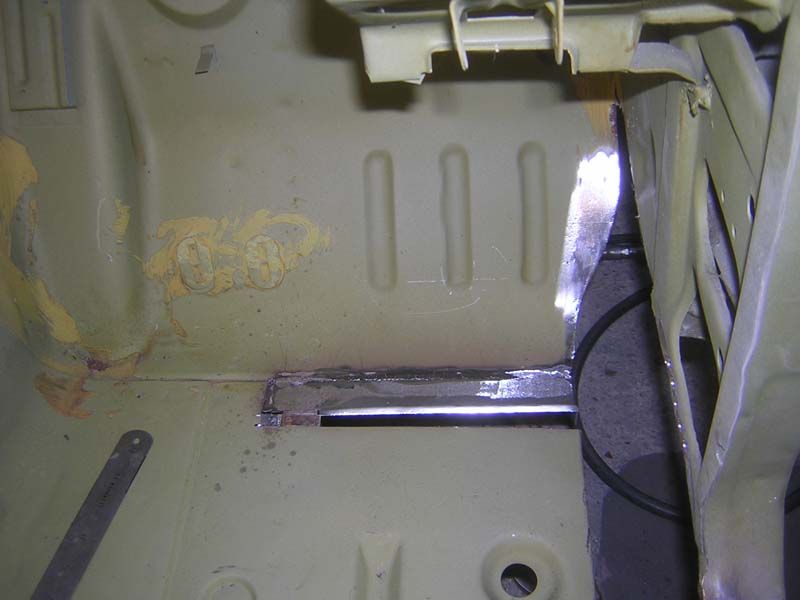
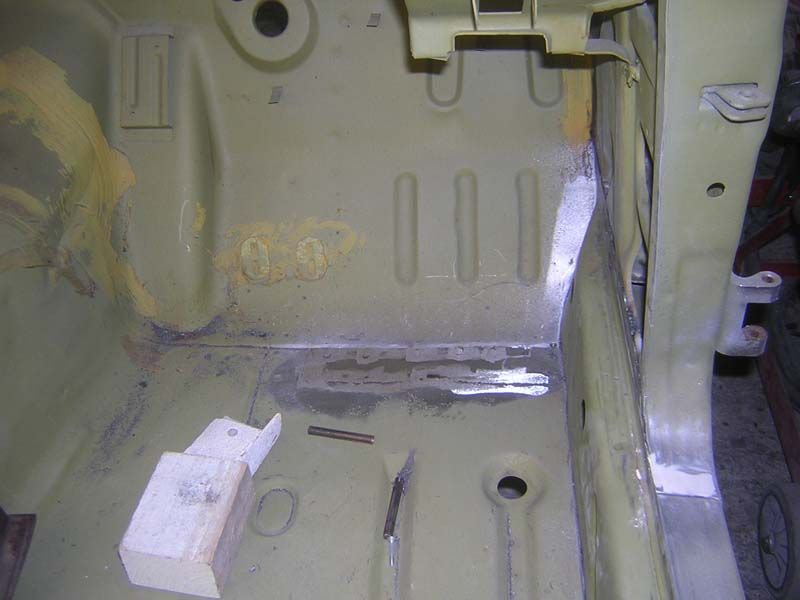
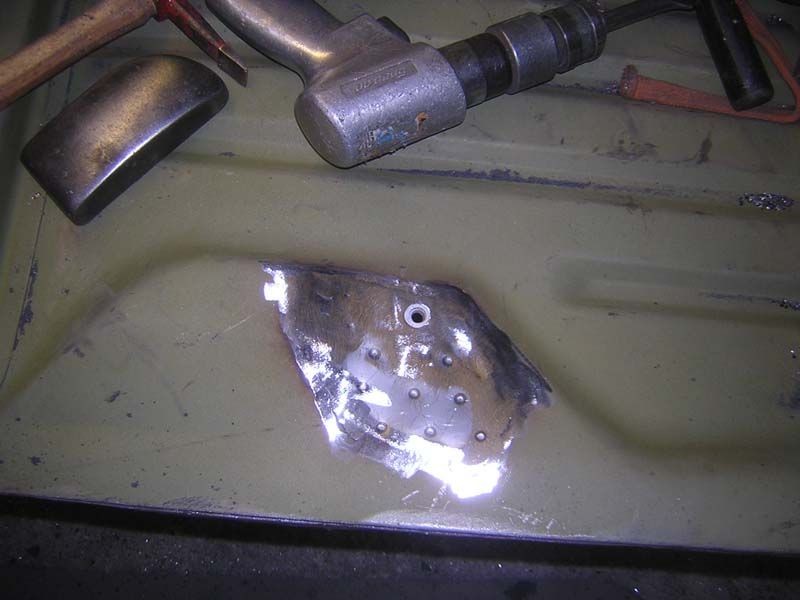
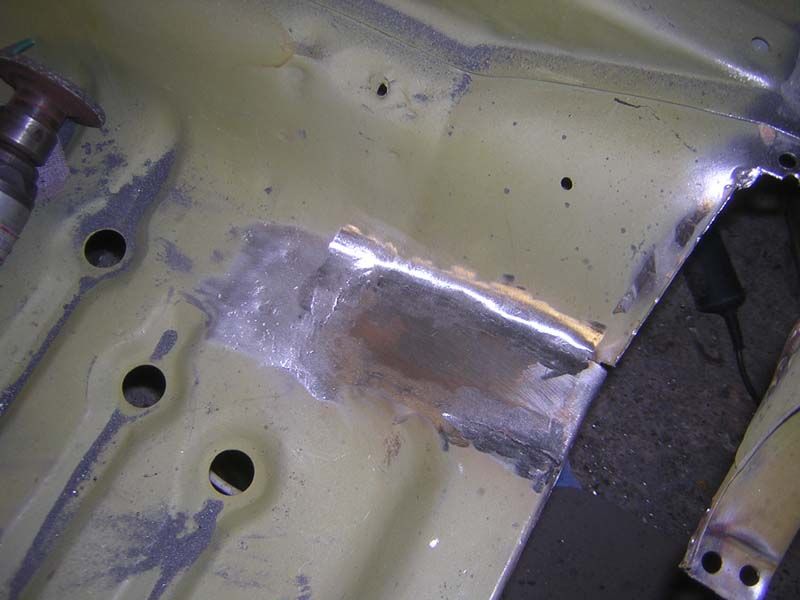
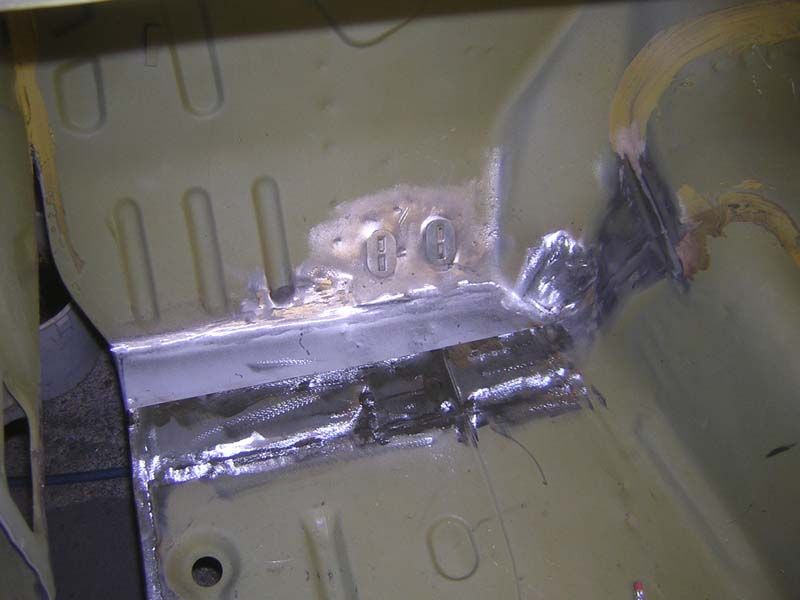
New plate welded in and reinforcing plate underneath re-spot welded into place
Image

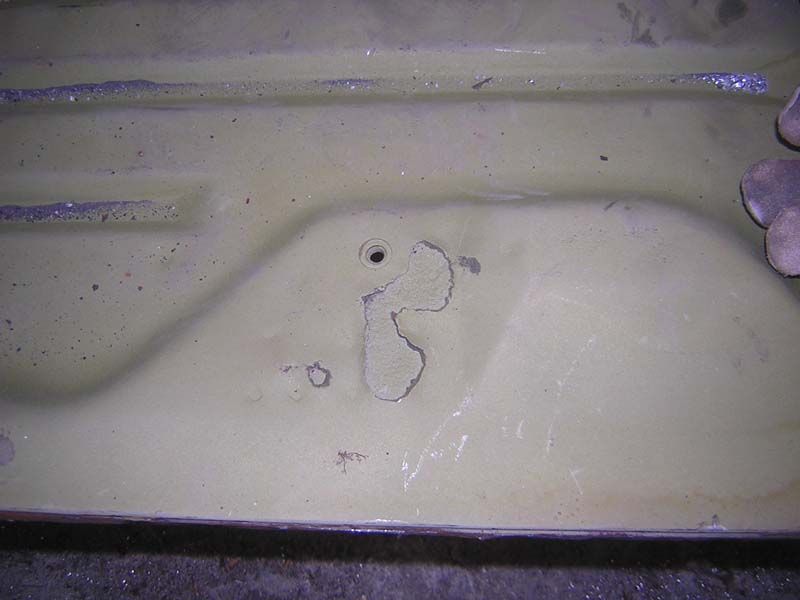
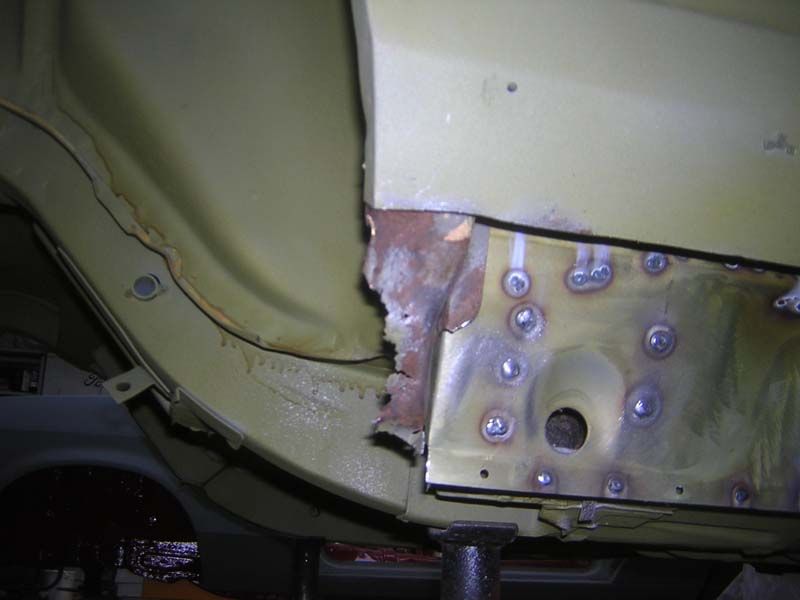
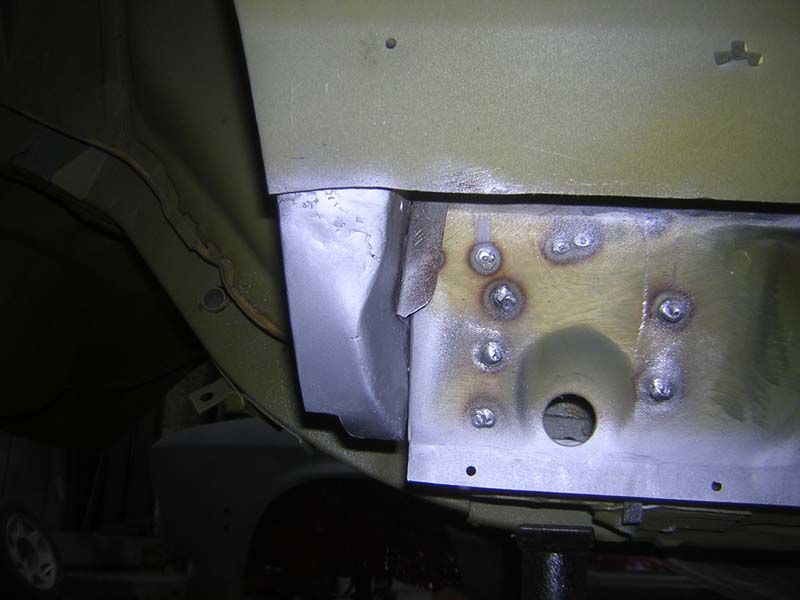
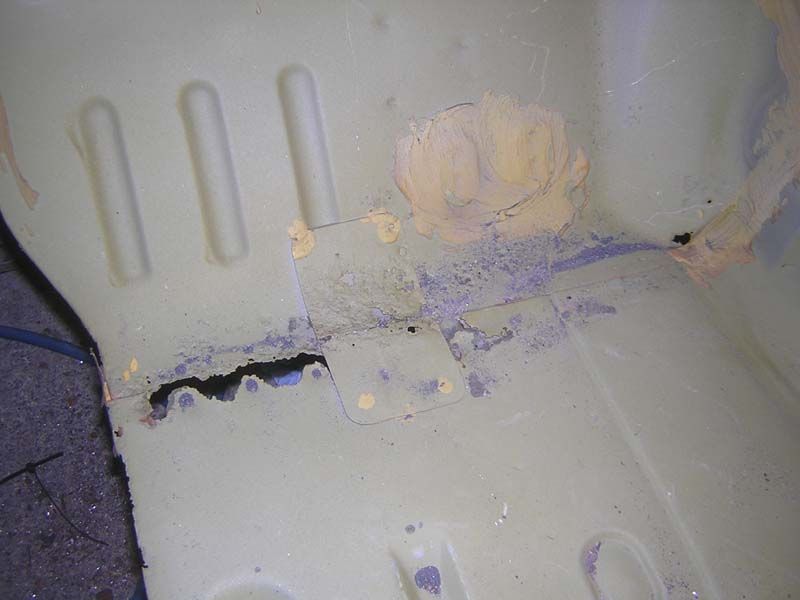
Another area at the back, just forward of the front rear spring mount. Another double layered area. This one has a large patch over it in the original photos.

Image

so once again, cut out the rot.
Image

and replace with new.
Image

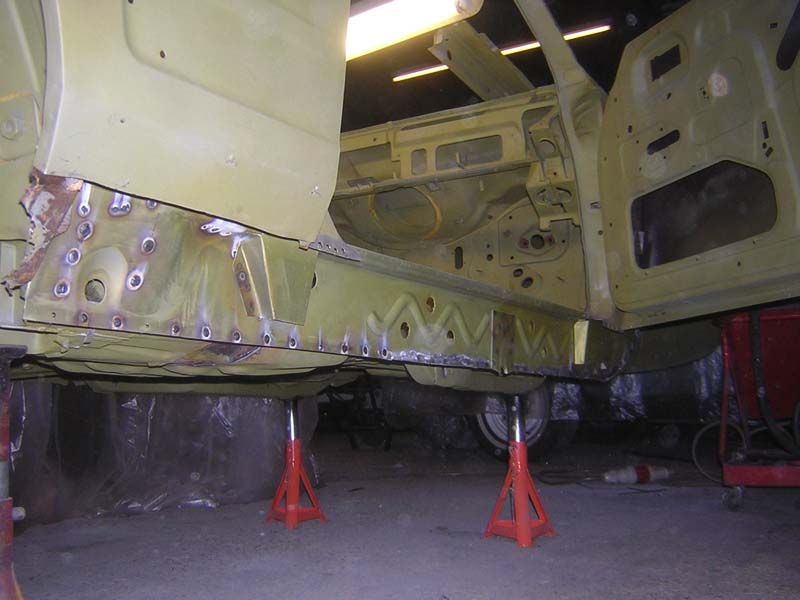
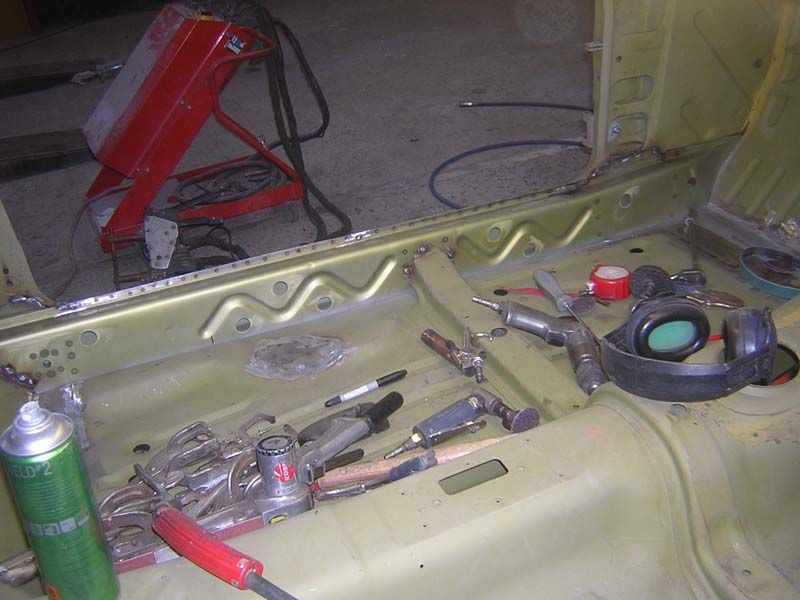
New inner sill in place

Image

Image

but the base of the outer wheel housing needs attention as well.

Image

so this is dealt with before the new outer sill can go on

Image

Image

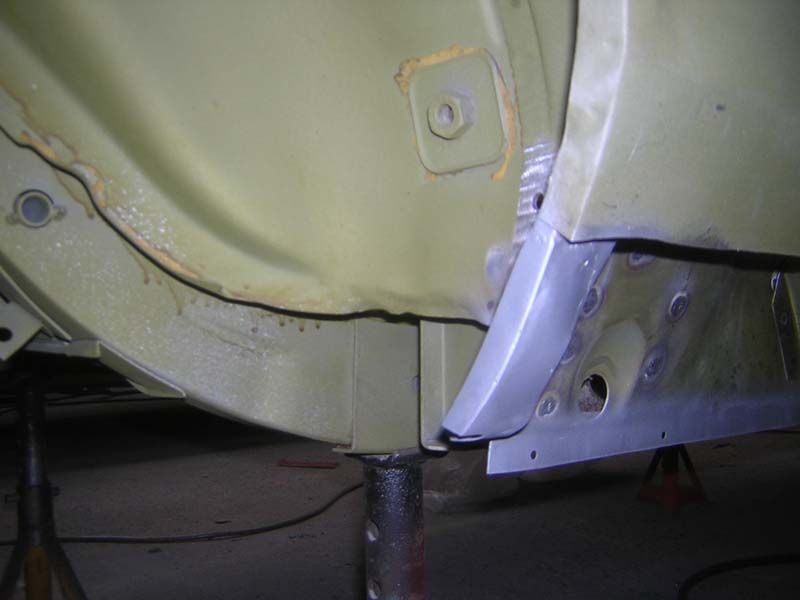
new inner sill from inside the car
Image

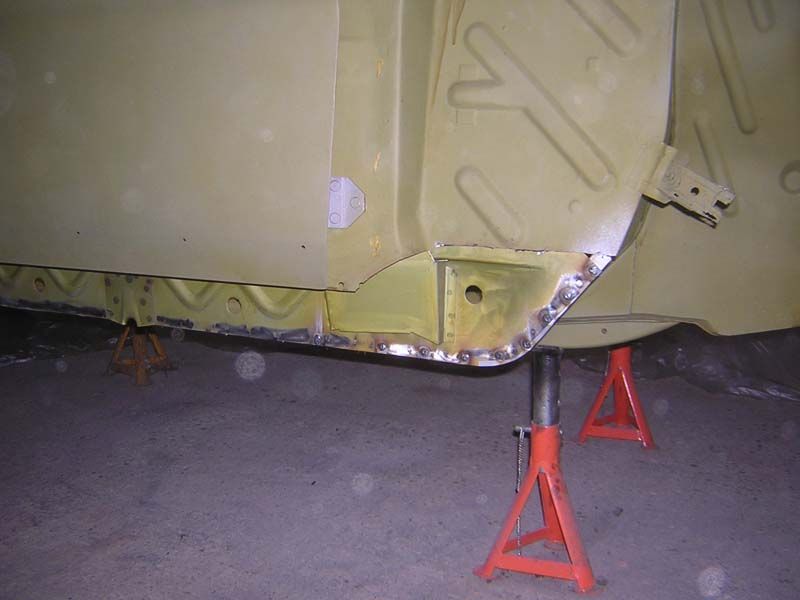
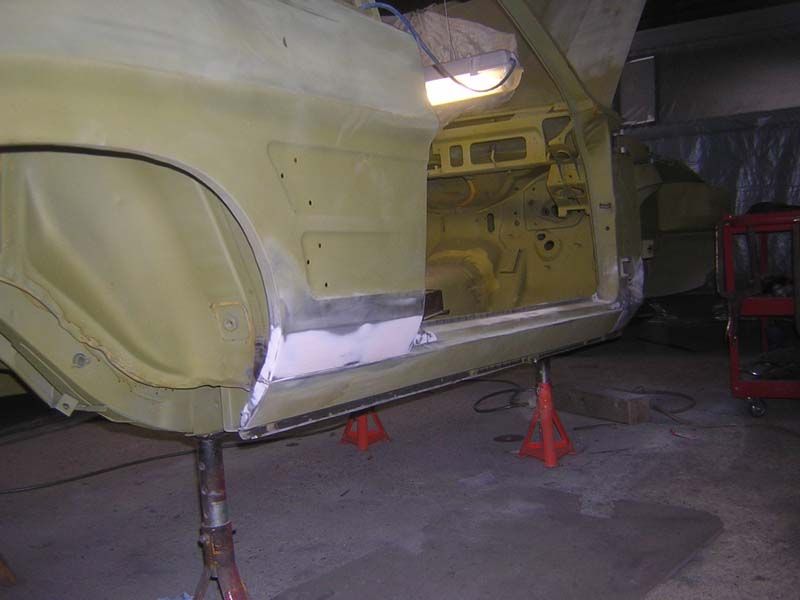
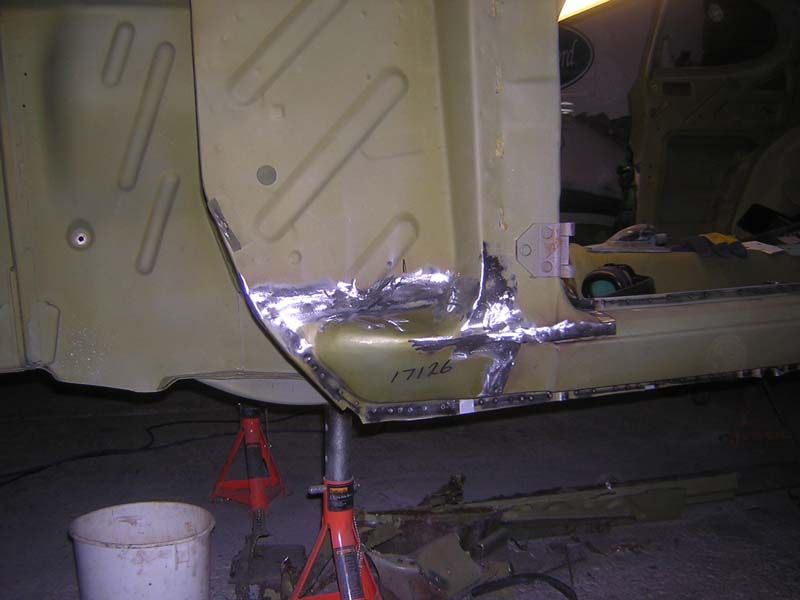
New outer sill in place along with the A post repair panel, sourced from express steel panels. All the welds are but welds, so they can be ground down and new and old metal blended into one..

Image

Another view of the outer sill. The bottom rear quarter to sill flange has been remade, butt welded with the thinest skim of filler to make the finish perfect.
Image

It's a similar story on the passenger side, so lower A post and sills, plus small floor repairs..
Image

off with the inner sill..
Image

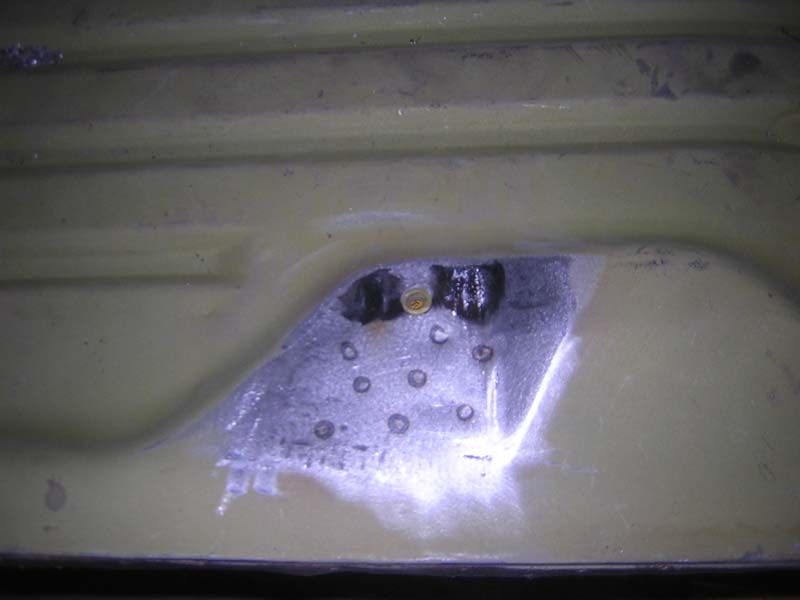
The same story with the seat mount..

Image

Image

New metal and bottom plate re-spot welded into place..

Image

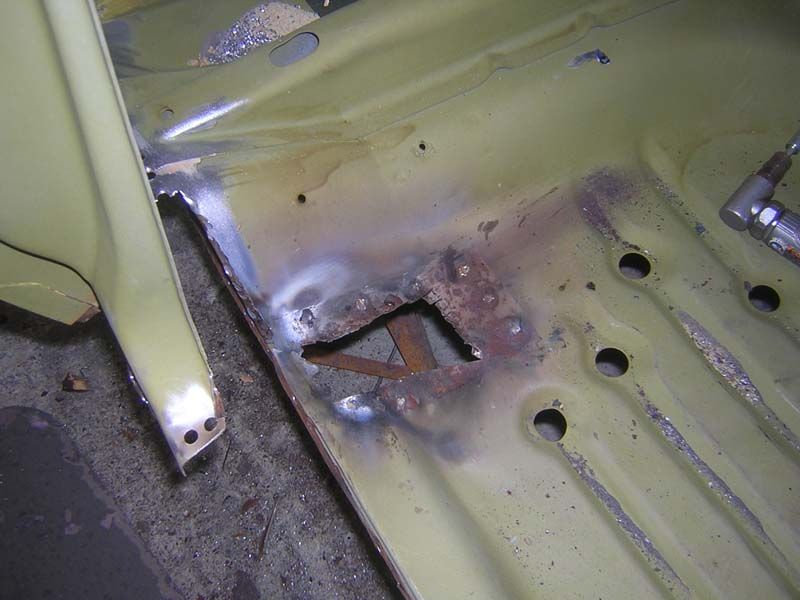
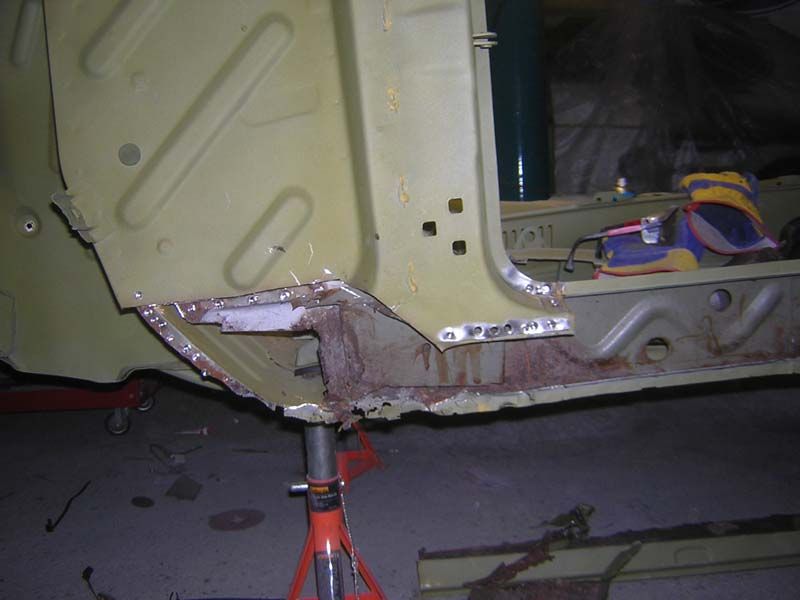
and a similar repair at the back, forward of the rear spring front mount..
Image

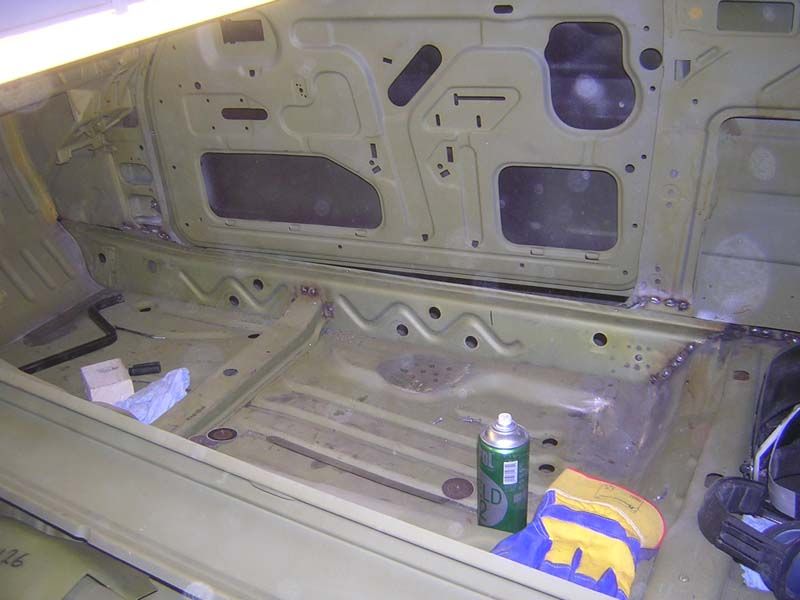
and then this mess in the passenger side foot well. I say mess, but I'm sure most have seen a lot worse!

Image

Sections cut out, including another small section.
Image

and the floor to scuttle seam recreated.
Image

inner sill now in.
Image

and finally outer sill

Image

Follwed by the lower A post repair panel

Image

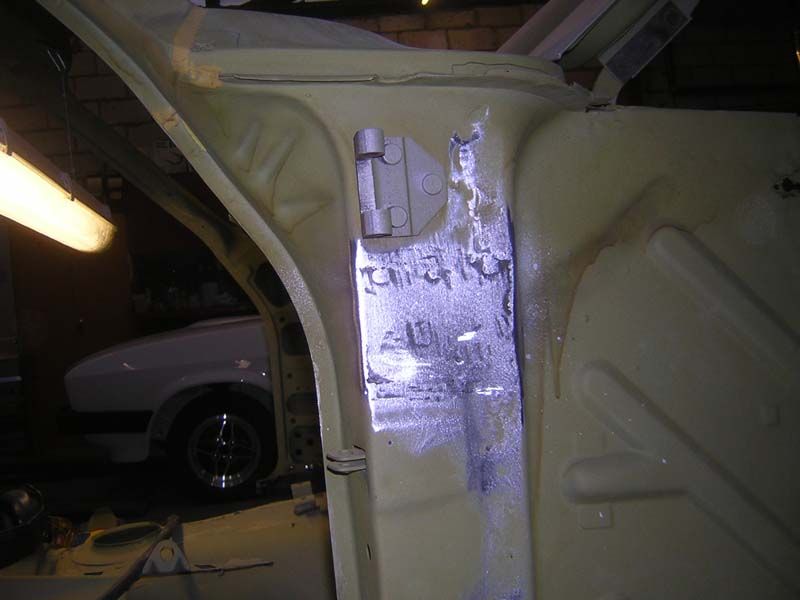
Anoter area of pin holes on the drivers side A post...
Image

Cut it out and replace

Image

Image

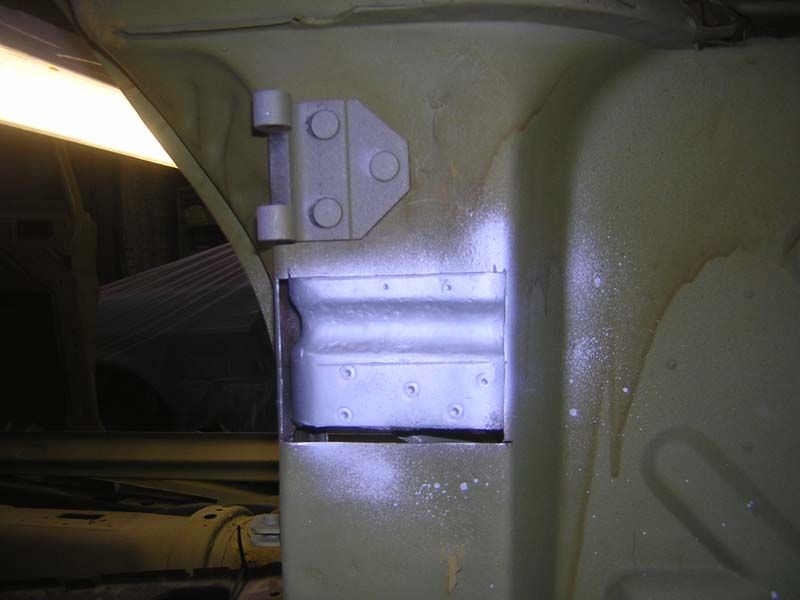
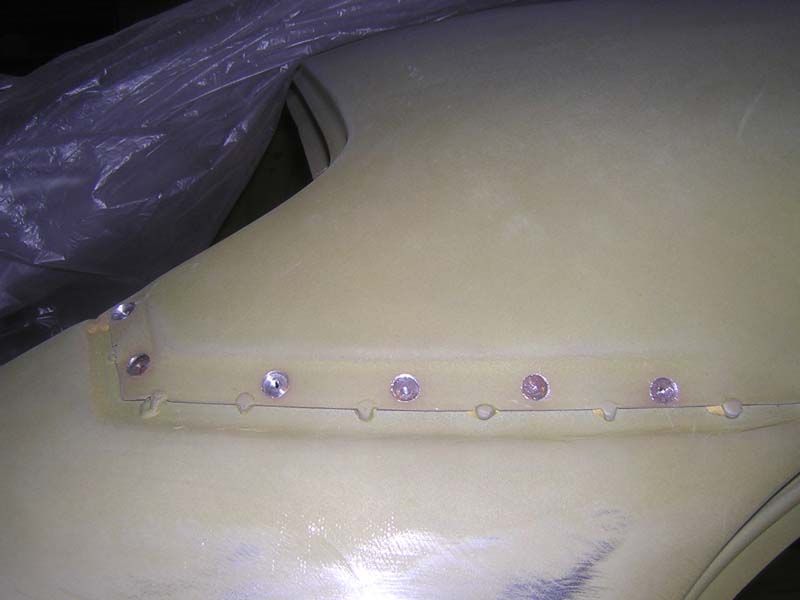
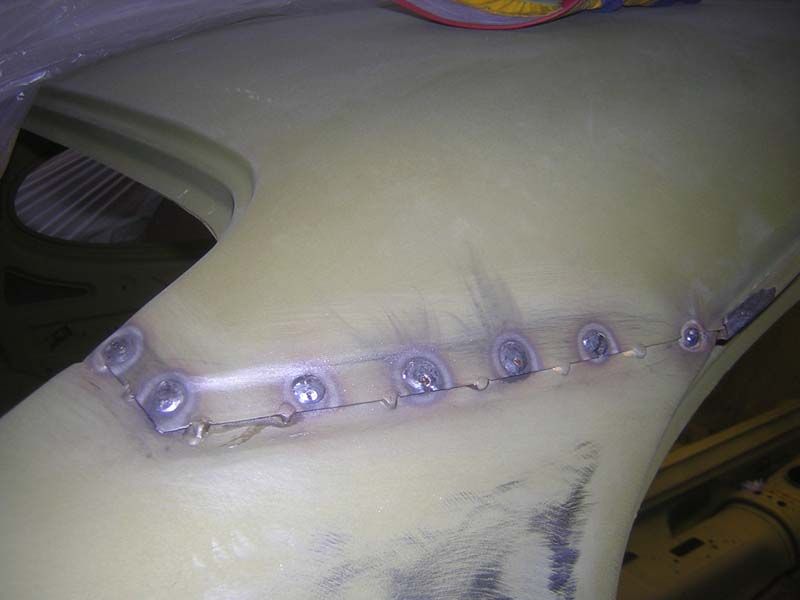
Finally, the roof drilled and plug welded to attach it more securely at these points:

Image

Image


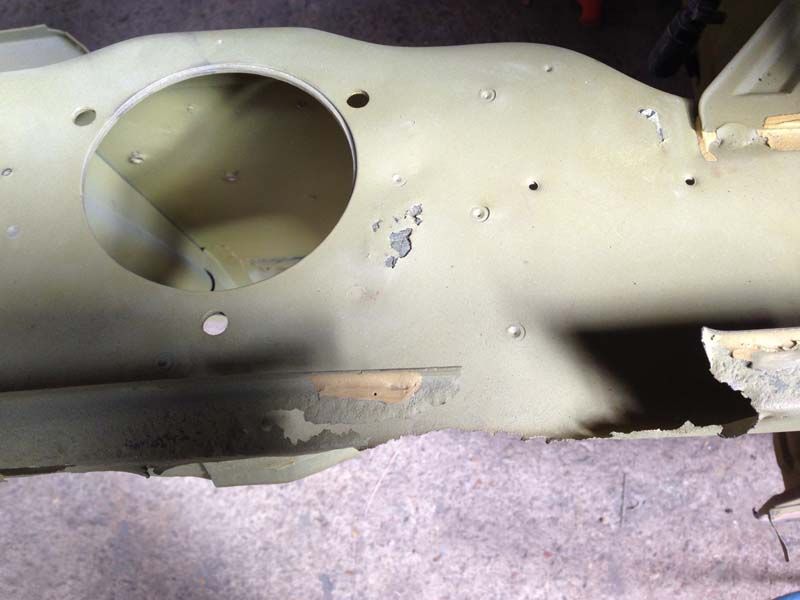
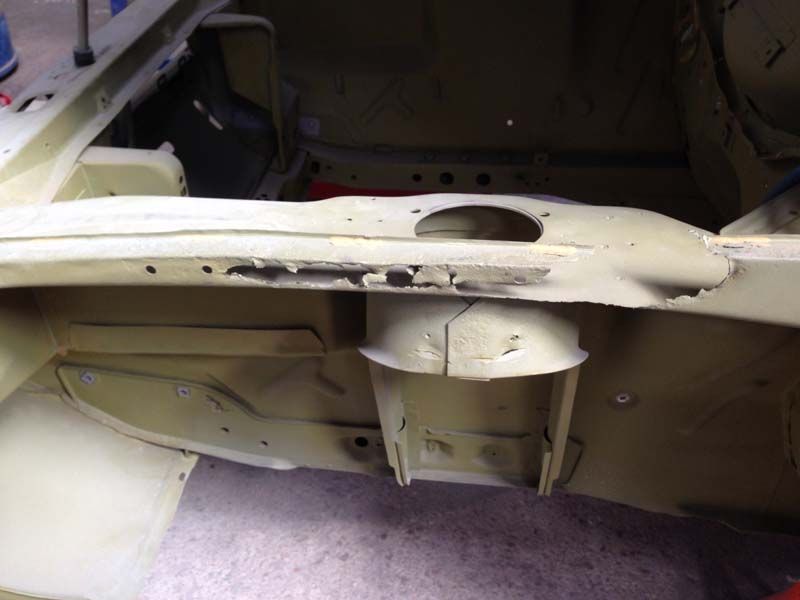
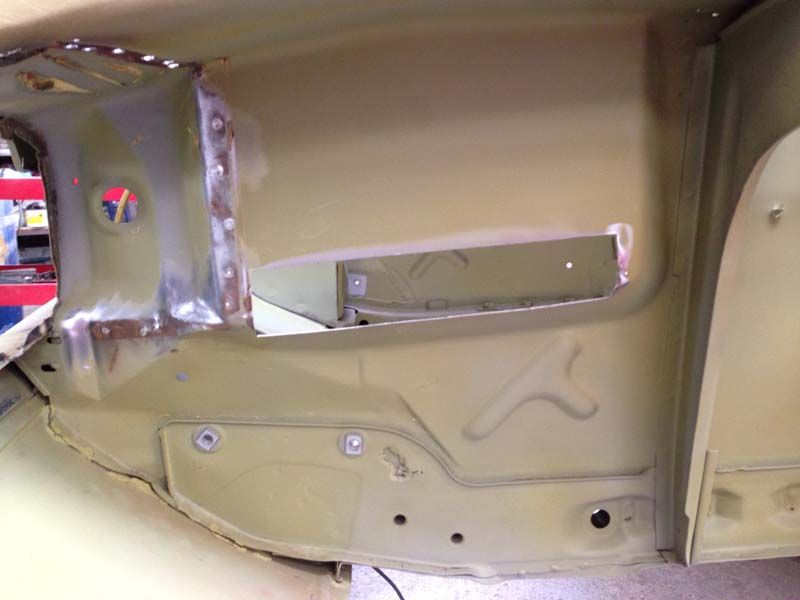
Passenger side strut top. Removing the top strengthener plate revealed an issue underneath, so this needs cutting out..

Image

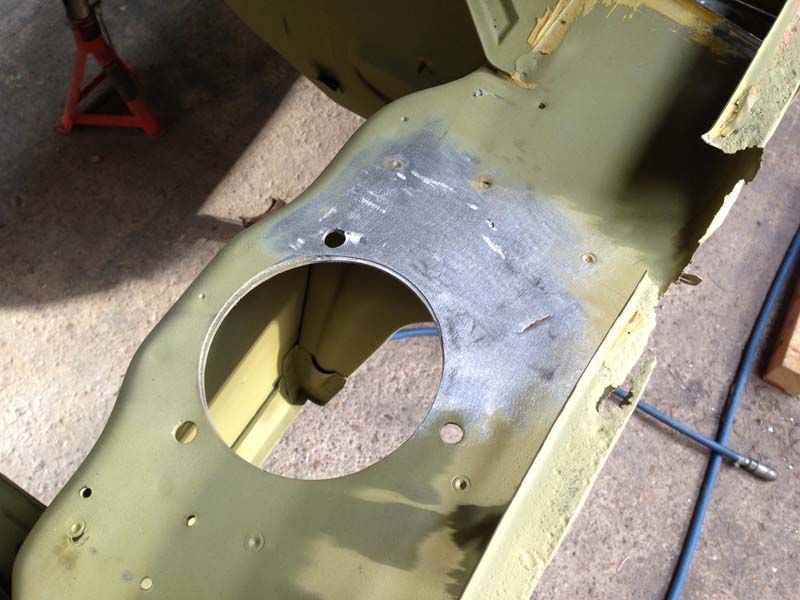
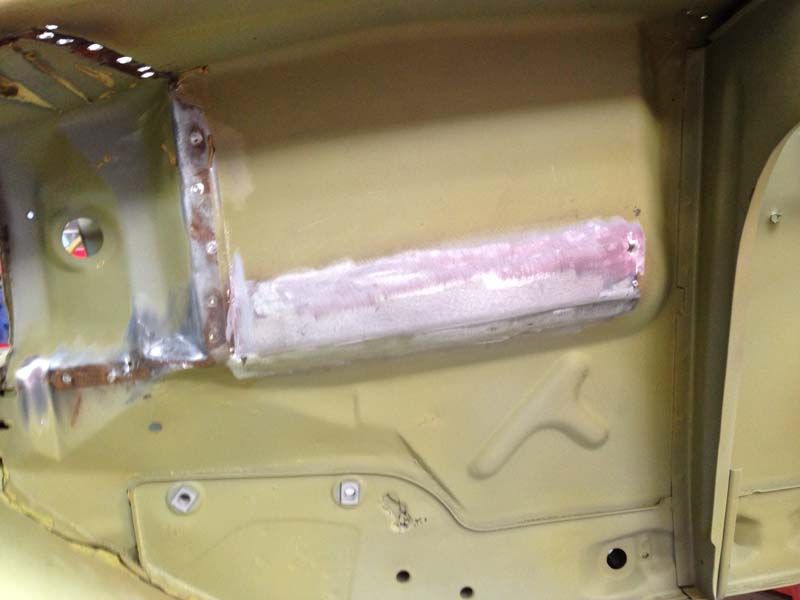
so this was cut out, all the rust you can see was removed, weld through primer applied and a new plate butt welded into place. Stuart does his repairs like this as they create an invisible repair and leaves no place for rust to hide as can happen if lapped repairs are carried out.

Image

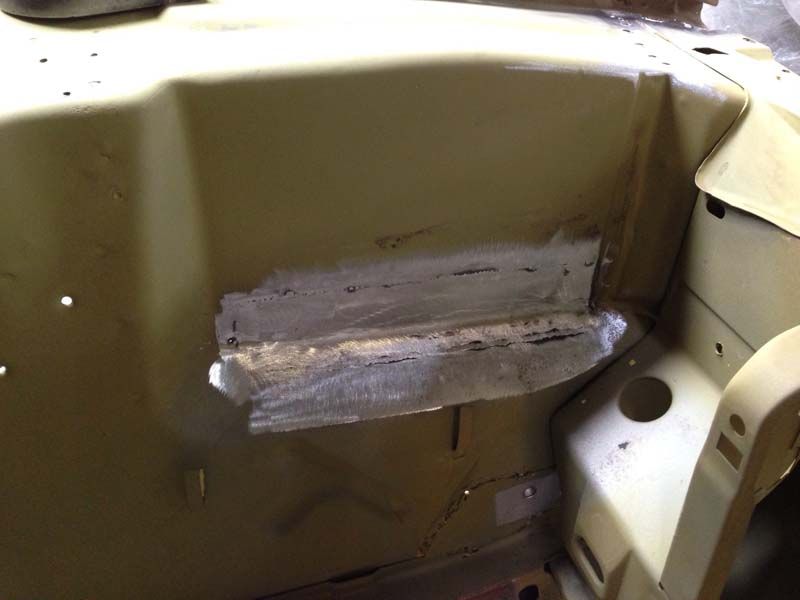
and the repair in place
Image

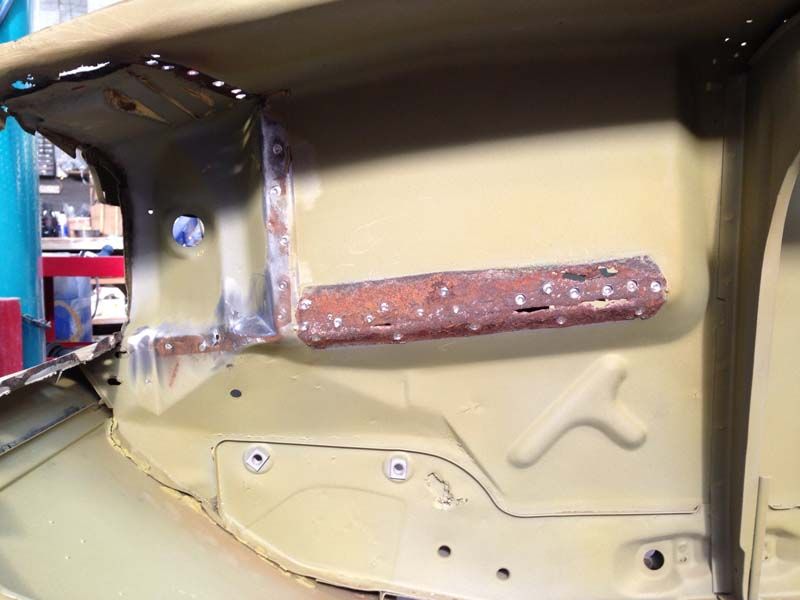
Here you can see thatt the inner wing stiffener has lifted (the battery tray is on the other side of this) and as ever has created a rust trap. Quite a common capri issue.
Image

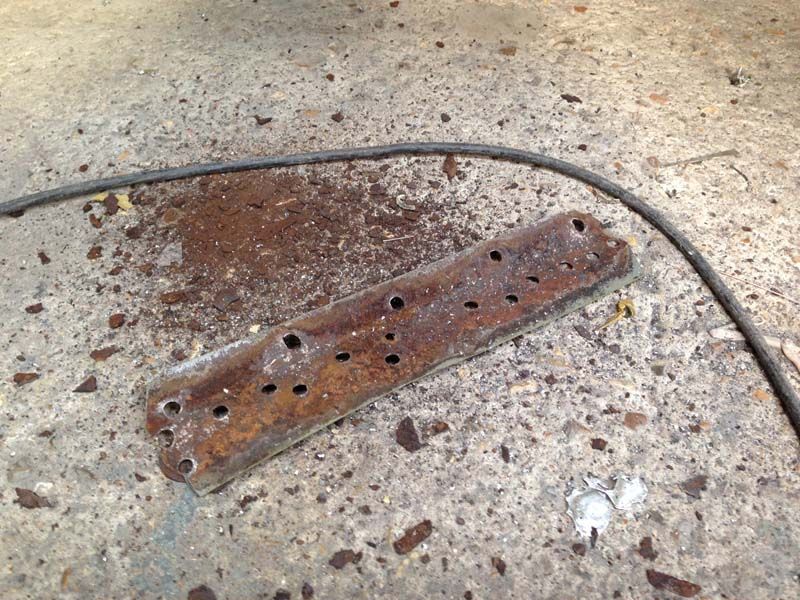
so off it comes. Oh dear...
Image

Hmm, this won't be going back on then!
Image

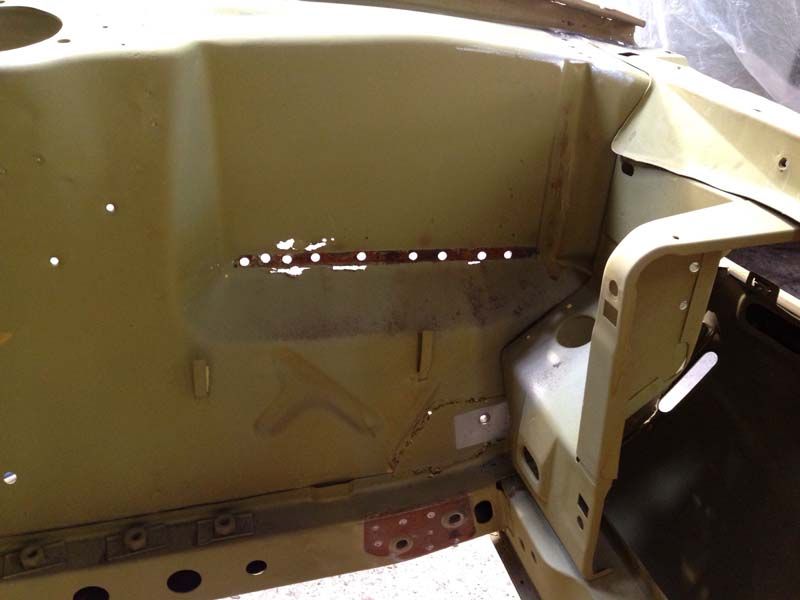
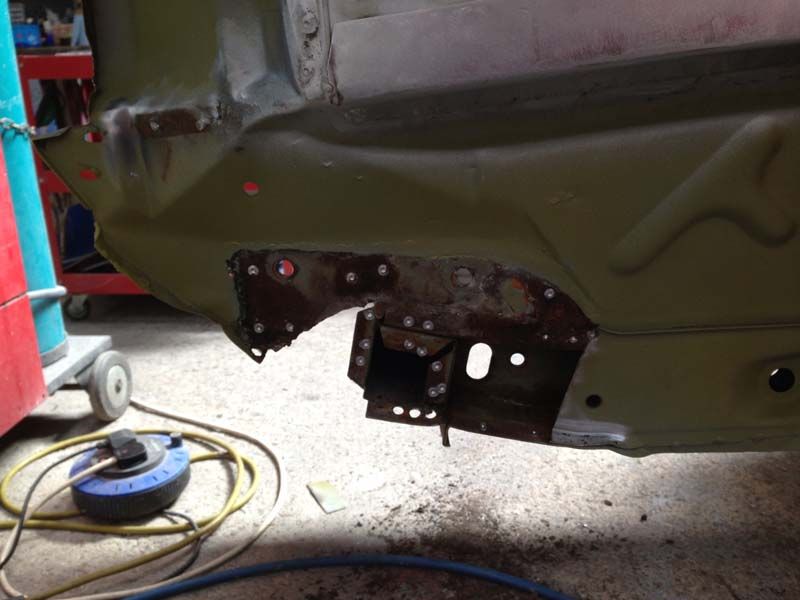
From inside the engine bay with the battery tray removed. There is another repair near the chassis rail. This will be sorted out soon as well.

Image

So the whole section is cut out. You can also see that the reinforcing section below needs attention. the other side of the patch you can see in the previous photo...

Image

A new section is made up and welded into place...

Image

Image

and a new strengthener made up to match the original panel. This will be plug welded into place, with the welds matching the placing of the original welds

Image

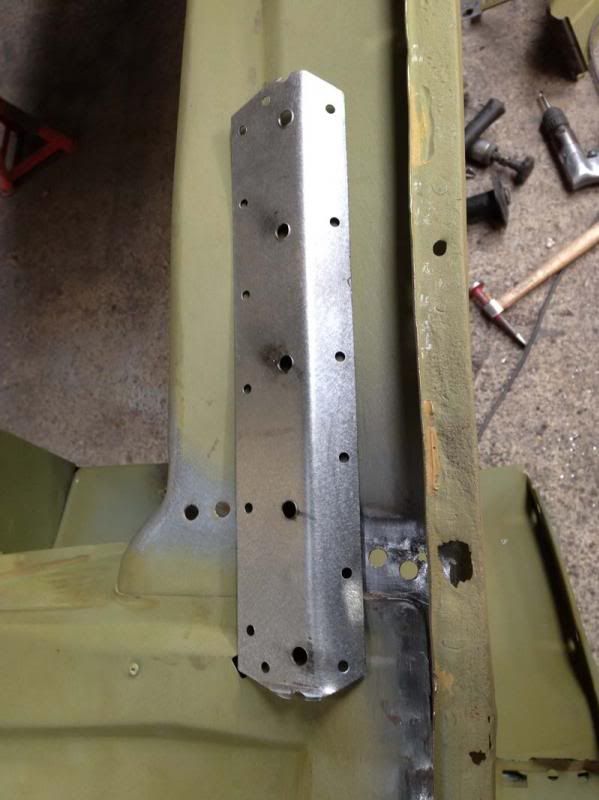
strengthener in place

Image

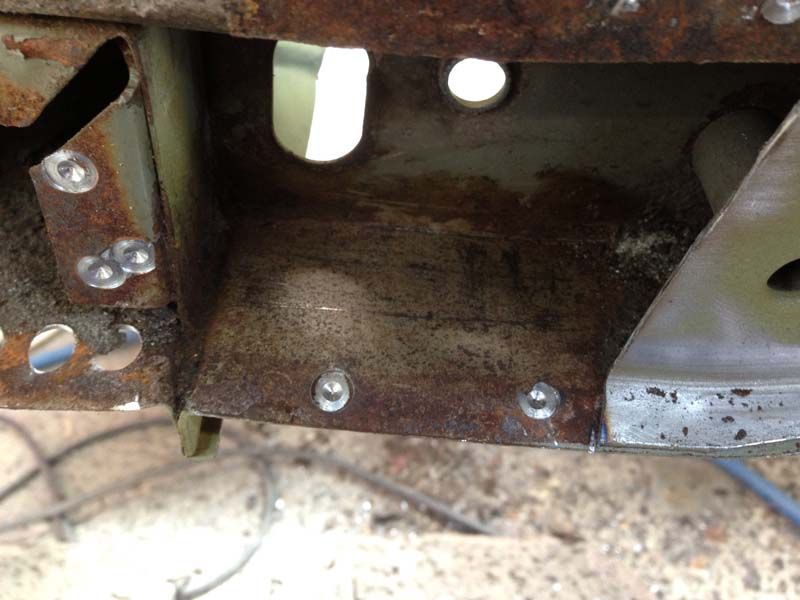
Now that section of the inner wing to chassis section is cut off...
Image

inside the section of chassis and it really is in great condition in there!
Image

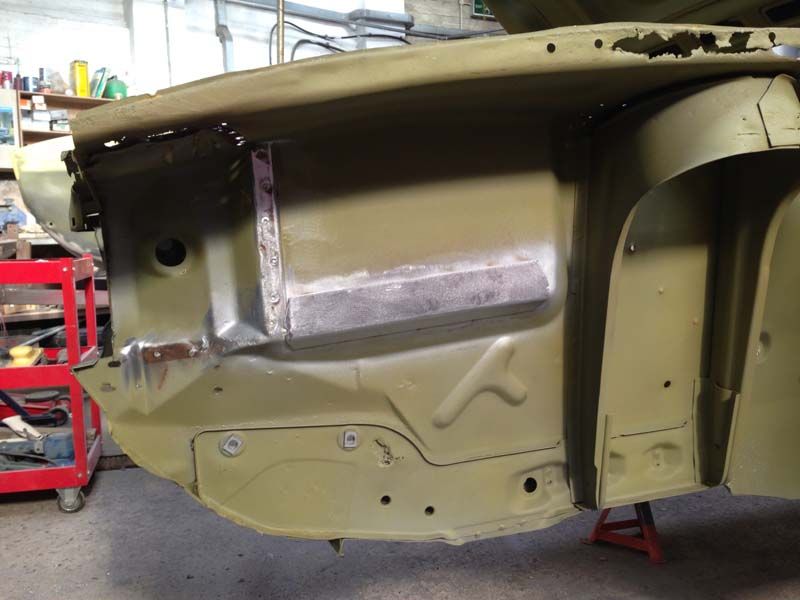
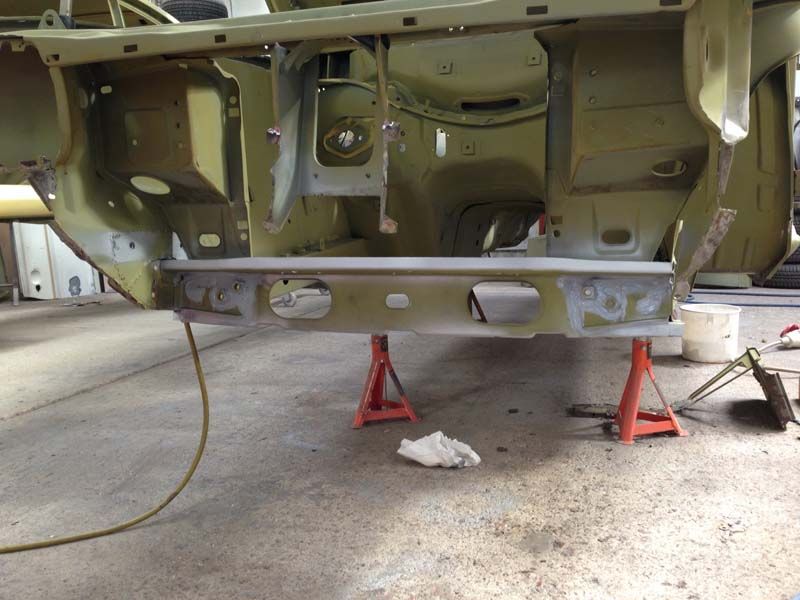
The front valance/panel and front box section has been removed. The front panel will be going back on, as it's in great condition, not to mention new ones going for £500 plus!

Image

New half of the cross member in place. It's all primed and sealed, just as Ford would have done. Had they been bothered!
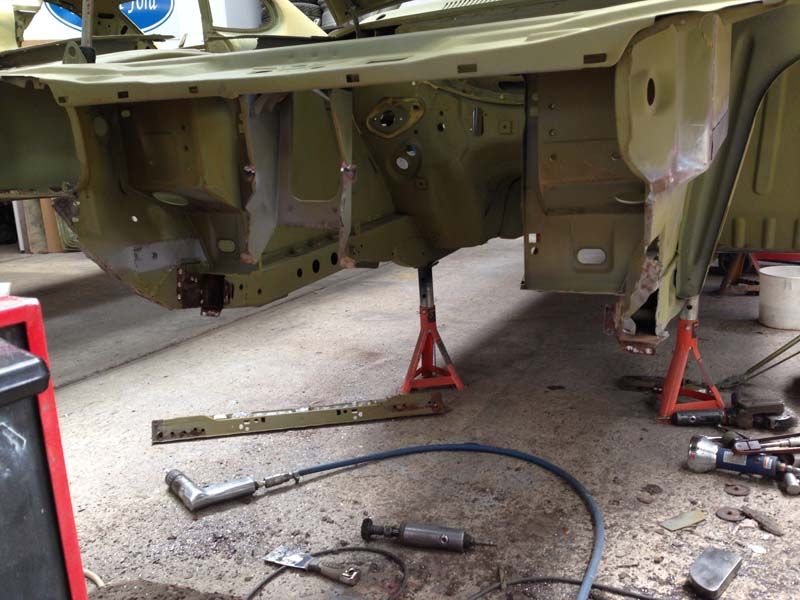
 :lol:/>/>

Image

This shows the new fromnt half of the cross me,ber in place. It's not welded to the drivers side inner wing just yet, as we are look at replacing the inner wing on that side, as it's quite a bit worse than the passenger side.

Image

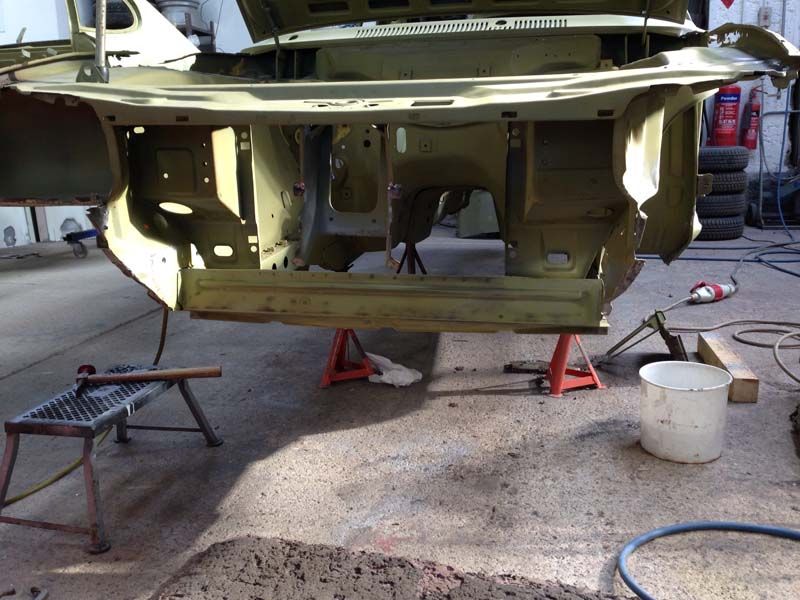
Cross member spot welded in place.
User avatar
347 V8
Posts: 92
Joined: Mon Dec 08, 2014 9:21 pm
Car(s): Mk2 V8, RS3100.

Re: RS3100 restoration

Post by 347 V8 »

These are some photos I took while delivery a new inner wing. The drivers side really need a lot of repairs, so the decision was made to replace it.

Rebuilding the top rear section of the inner wing where it meets the scuttle area
Image

and further along on the inner wing up to the soon to be wing hanging rail.
Image

New battery tray and tray support in.
Image

Another area repairer where the scuttle ends curve around and go vertically down. You can just see the welds at the bottom of the vertical part where it meets the spot welded seam. And of course, another small section to repair :roll:

Image

The passenger arch cut out, so this and the area where the rear quarter joins the sill will be replaced. The outer wheel house will have to be repaired first, however.

Image

Bottom of the inner wing now all repaired. This reinforcing section was cut off (see pictures in the previous post) and separated from the panel behind (what was left of it) and repaired. The panel behind all repaired with new metal and the reinforcing section re-welded back to the car to create a seamless repair. It's this sort of thing that makes Restore a fords work top notch in my eyes.

Image

Driver side inner wing shows a very similar patch as we found on the passenger side. Due to many other issues with this panel, the whole inner wing will be replaced on this side. It's just far more economic.

Image

Just one of the areas that means the inner wing will be replaced. If it was just this area, it would be repaired, but there are a lot of issues dotted around the wing, so while I'm all for keeping as much as the original shell as possible, this just made sense as I'd picked up a new panel recently.

Image

Another area to be repaired, along with replacing the wing hanging rail. This was full of lead.

Image
User avatar
347 V8
Posts: 92
Joined: Mon Dec 08, 2014 9:21 pm
Car(s): Mk2 V8, RS3100.

Re: RS3100 restoration

Post by 347 V8 »

the inner wing has been blasted and etch primed, so re assembly time. It was a new panel, but very surfacy...lots of surface rust, so it was dis assembled and blast cleaned.

Inner wing all etched..
Image

Image

and the kit of parts that make up the inner wing

Image

all welded back together

Image

Image

Image

Top plate ready to be refitted...
Image

and it's back on. The way the panels line up is out of out control really, but left it as Ford left it!

Image

Fianally all done! Probably the best [protected inner wing out there, assembled with weld through primer and etched primed throughout.


Image

So now for the inner wing to come off..

Image

Certainly some rust in there...

Image

so cleaned up and primed

Image

Image

but before the inner wing goes on, this needs sorting out first!

Image
User avatar
347 V8
Posts: 92
Joined: Mon Dec 08, 2014 9:21 pm
Car(s): Mk2 V8, RS3100.

Re: RS3100 restoration

Post by 347 V8 »

The inner wing is now on..

Image

Image

and time to test fit the outer panels...

Image

The wings are just held on with self tappers

Image

Image

The rails will be properly repaired.

....and everything looks really good. It appears to be freaking Stuart out, as normally, just placing the panels on, no panels held under tension using grips etc, it doesn't normally happen. Clearly, given the good/bad balance of the universe, someone must be having a pig of a time somewhere else in the world aligning these panels! :D/>

Image

Image

Image

Image

Image

Image

top of the A post, rust cut out

Image

and a repair plate let in...
Image

Then there was this rust damage to the scuttle/windscreen pillar area
Image

This is a multi layered area, so cutting the top layer off reveled more rust

Image

which needed to be cut out

Image

lower layer rebuilt...
Image

and then to top layer repaired...
Image

Another area earmarked for repair

Image

removed...
Image

replaced

Image

The wings, while they looked good on the car were badly pitted and tere was even some perforation going on...that wont do!

Image

Image

so in true restore a ford fashion, the effected area was cut out and new section made

Image

very neat job

Image

The wing rail also needed repairing, so the bad areas cut out..

Image

and new metal let in..

Image

Image

and before the repaired wing goes on, time to seam seal the under wing area

Image

Same issue on the drivers side wing...
Image

so once again, a repair panel made up...
Image

and all neatly butt welded in place

Image

Stuart is very good at making these panels, replicating the original folded over seam and dressing the welds in the back of the wing as well..
Image

Dificult to tell, but my bonnet, while sound, corrosion wise, had a number of dents, so very serious, so Stuart has been pulling them out, using a spot welder that welds a stout wire to the panel, allowing him to pull dents out. It's a long process. You have to chose your pulling points carefully, trying to reverse the damage in the right order..

Image

Image

Image

and finally, while I was drinking beer in Germany, Stuart was getting the wings back on and finishing off the bonnet work. There appears to be a lot of filler here, but it's extremely thin.

Image

Image

Image


Here we have the inner rear arch wheel house repaired...
Image

and this is how Stuarts gets those factory correct rear quarter to sill joins...plus the outer arch repaired. Obviously Stuart has run out of paper at the new place, so I'll have to bring him down a note pad to use!

Image

arch all done, but quite a lot of damage on this panel which has taken some effort to get sorted.

Image

but it's nearly there

Image

Now Stuarts just showing off. These gaps are clearly manufactured. Ford didn't get them as good!

Image

the metalwork is almost done, so time to seal up the seams underneath. I know it's not original, but this car is to drive and I don't want water/moisture getting into these seams and ruining all the good work.

Image

Image

so next up, get it ready for priming

Image

Image

Image

and as Stuart said, looking sweeeet!

Image

Image

Image

Once the outside is primed, time to get the anti drum pads in and ready to paint the inside...

Image

Image

Image
User avatar
347 V8
Posts: 92
Joined: Mon Dec 08, 2014 9:21 pm
Car(s): Mk2 V8, RS3100.

Re: RS3100 restoration

Post by 347 V8 »

back to the booth on the roll over jig to apply stone chip onto the underside. Notice how Stuart masks up the edges of the lower panels as well to protect them.

Image

Image

and then on top of that, we have colour!

Image

Image

colour under the arches..

Image

Image

Image

and of course, inside!

Image

Image

and the boot area:

Image

Image

Image

and right undermeath the rear parcel shelf

Image

Well, Stuart has been busy. He's got the axle and springs on and all painted (these were blasted with the shell what seems like a looong time ago. Looking good now. I hope he doesn't actually put it on while the car is at this angle!

Image

He's also painted the engine bay, making sure it gets paint everywhere you can see and all those places you can't:

Image

Image

Image

Image

Image


Masked up and ready to go:

Image

Image

Image

then for the top coats!

Image

Image

Image

Image

Looking very nice. I went down to have a look and drop off the petrol flap, so a few more pictures, We unwrapped the engine bay there and then and it was all looking superb in the flesh!

Image

Image

Image

Image

and a birds eye view...one of my doors in the background.

Image
User avatar
347 V8
Posts: 92
Joined: Mon Dec 08, 2014 9:21 pm
Car(s): Mk2 V8, RS3100.

Re: RS3100 restoration

Post by 347 V8 »

The doors are now painted
Image

and we open the booth doors and behold!

Image

Image

Image

Image

she's rolling on her wheels again!

Image

Image

front suspension all painted and polybushed..
Image

Rear shocks painted and on...

Image

the sight that greeted me on Sunday morning...
Image

Image

all safely tucked into the workshop garage...

Image

I know I should have done this before, but time to look at the engine:
Right, thought I would start on that big lump that keeps wanting attention every time I go into the garage...

Image

Let the strip down commence. There looked to be some leaking of the inlet manifold at one point, plus some 'interesting' plastic chips in the sump...hmm could have been from a past cam wheel, as this one looks fairly new, but it won't be going back on the engine...I've sorted out a steel item.

Image

heads off...lots of coking up in there, probably indicative of lots of short journeys.

Image

Definately +60 thou pistons in there, so a 3098cc capacity...and not much room for reboring, should this be required. I know that +90 pistons were available and Burton do some slightly bigger than 60 thou pistons as well.

Image

I have a growing mountain of 'bits' Some will be reused, others will be binned.

Image


Big end shell where you can just about read 'STD' so good to see, should a regrind be required.

Image

Just the cam and crank in the block. The jounals look good, but will be checked to see how round they really are, but they all look good on first inspection. The crank spins very easily in the block which is a good sign as well. No tight spots etc, but we'll look at the mains and see what they look like, as well as the thrust bearing.

Image

Image

no lip/wear ridge and still honing visible, indicating a fairly recent hone.

Image

I need to check these bores for size and ovality and take it from there.

Image

The cam retaining screws were a bit mangled, but cam out ok. I'll see if I have better ones in a spare engine.

Image

so I'll take the cam and crank out and decide where I go from there after some measuring. I may well get the head faces machined to clean, just to make sure they are straight.
User avatar
MattMe
Donator
Donator
Posts: 569
Joined: Thu Aug 21, 2014 10:43 am
Car(s): Mk3 2.8 injection
Previously owned:
Facelift Mk1 V8
Mk3 2.0 Laser
Mk3 2.8i

Re: RS3100 restoration

Post by MattMe »

:shock:
ESSEXV6ESSEX
Posts: 603
Joined: Tue Sep 28, 2010 7:45 pm
Car(s): Car

Re: RS3100 restoration

Post by ESSEXV6ESSEX »

Awesome mate. That is going to be brilliant. Love these cars, just look so right. Looking forward to seeing the end result. Well done. :boxing: knock out!
User avatar
Craigorypeck
Posts: 2338
Joined: Sat Feb 21, 2009 1:45 pm
Car(s): Mk III Capri- 2.0 YB cossie lump with eaton blower on bike carbs. Problem... its 4000 miles away.
MK1 resto- 2.3 Turbo or Charger, both probably
Chevy Cobalt
Location: Canada

Re: RS3100 restoration

Post by Craigorypeck »

HOLY MOLY... :o :o :o

This is pretty spectacular, being done right too.

I'll just go back to plodding away in my garage :wave: :wave:
:spam:
User avatar
347 V8
Posts: 92
Joined: Mon Dec 08, 2014 9:21 pm
Car(s): Mk2 V8, RS3100.

Re: RS3100 restoration

Post by 347 V8 »

Well, all this was some time ago, so I need to bring this up to date...

I've done the brake lines now. One of my pet hates at shows is brake lines that aren't even slightly straight, so I was determined to try and do better with mine.

I refurbished all the rear hand brake components. God I hate the mk1/early mk2 set up, but I have to keep this car standard.

Image

I borrowed an original brake line and copied it, after a fashion..
Image

Image

and the loop part, which was tricky. I've seen these with various configurations, but liked this style the best
Image

Engine bay lines, copied from my originals...which weren't bad, but when you have a shell like this, you start to look at everything that goes back on under the microscope and ask yourself 'is it good enough to go back on?' it's a bit of a curse!

Image

Image

Image

I made this small part twice, so it matched the drivers side!

Image


So, when I picked up the car, the boot wasn't done. Picked up the boot and spoiler only to find they no longer fitted together well...

Image

I had both the boot and spoiler soda blasted. The boot was quite badly damaged and had to have a lot of work done to shrink the skin back to make it tight. While not 100% sure, I suspect that a combination of damage to the boot and spoiler caused this...although it could have been the spoiler was off for so long. Having done this, I would recommend anyone looking at soda blasting to leave the boot, bonnet and roof out of the process and strip these by hand.

So, talking with Stuart at Restora a ford, we came to the conclusion that we'd have to bond the spoiler on. This is not an ideal situation and is one of the things I'm pretty upset about, but I also have to be pragmatic about this things. It doesn't look like it's bonded on as there is still a nice seam where the spoiler joins the boot.

Image

but looking good. To be honest, the spoiler thing really bugged me for a while and shut the garage door on this for a good few months, doing very little. Sometimes, you do have to take a break, plus I have other stuff going on in my life...but then this is a hobby, not an obligation!
Image

This pretty much brings the project up to date.

I've dropped the gearbox, bell housing and few small other bits off to be painted black, while I get on with the engine.

The engine went to Burtons for machining work...who actually use Rick Wood for their Essex work. The block was cleaned, honed, I have new forged pistons and some CNC ported heads. The CNC part just means that as they are done by a machining computer, they are all done identically and to a repeatable standard. The crank was also cleaned an polished, but did not need a re grind, so standard bearings. I can honestly say I've never had an engine black back from machining as nice as this.

Even though I have every confidence in the machining work, I still check these things.

so, the bottom end parts..
Image

Forged pistons and my micrometer to check the journals. All spot on for a standard crank.

Image

The block ready for fitting bearings for the mains.
Image

Main bearings. Carefully unwrap them. I needed to use a knife, but you have to be really careful you don't mark the bearing surfaces when you unwrap them!

Image

Here are the main bearings. Make sure they have 'std' on the back if you need standard parts and check for defects that could cause you problems with a tight crank. very light scratches are ok, but if you can feel it with your nail, you should take them back. These were all fine. Before fitting them, clean the main bearing carriers and the backs of the shells.

Image

Number 4 bearing in place
Image

and the reciprocating cap with bearing in place
Image

Now you should not need to do this, but since I have the measuring gear, I spend a couple of hours last night measuring the the journals and installed bearing dimensions and calculating the oil clearance after torquing the mains caps down. The results were fine, but I record these for the future.

Image

you can see I'm running between 0.0015 and 0.0025 bearing clearance. 0.0015 is about as tight as I would want it, so I'm happy with these!
Image
So this is how I left it last night, all bearings installed and checked.

Image
User avatar
Fordoholic Nick
Donator
Donator
Posts: 6206
Joined: Sat Apr 19, 2014 3:40 pm
Car(s): Ford Capri 2.0 Laser,
Ford Fiesta 1.6 TDCi
Location: Enfield, London

Re: RS3100 restoration

Post by Fordoholic Nick »

Absolutely Stunning RS3100. No other words :D

What a superb restoration thread to. You really get a feel for the work you done on it. Its looking incredible. Think you may need a large trophy cabinet :)

Cant wait to see it when finished. Nice one.

All the best

Nick
I was born a Fordoholic, They'll bury me a Fordoholic...
User avatar
MattMe
Donator
Donator
Posts: 569
Joined: Thu Aug 21, 2014 10:43 am
Car(s): Mk3 2.8 injection
Previously owned:
Facelift Mk1 V8
Mk3 2.0 Laser
Mk3 2.8i

Re: RS3100 restoration

Post by MattMe »

Amazing.

I share your feelings, if not your skills, for brake pipes. That'll be a job much further down the road for mine.

I can see this being one the best Capris out there once it's done.

Please do keep us to date with any work. Loving the pictures and reading through the descriptions of it all.
User avatar
3 Litre Power
Posts: 471
Joined: Tue Feb 24, 2015 4:41 pm
Car(s): 1975 Capri II 3000 Ghia factory manual, 505k kms, Sunset Red, BVR, B.I
1988 Ford Escort XR3i Cabrio, 177k kms, Red, Black Top ( Daily )
Location: In the garage...

Re: RS3100 restoration

Post by 3 Litre Power »

Absolutely amazing
My Mk2 Capri Facebook page https://www.facebook.com/FordCapriMk2
:burnout:

Oil and Coolant guru
Finnish but born and raised in Spain.
User avatar
347 V8
Posts: 92
Joined: Mon Dec 08, 2014 9:21 pm
Car(s): Mk2 V8, RS3100.

Re: RS3100 restoration

Post by 347 V8 »

There are a number of superb cars out there, RS3100 and otherwise. I've not done this to what they would call concourse, as it's going to be far better protected than something that came out of the factory, so there will be people at shows who will say 'that's not right, this isn't right' etc, but I'm doing this car for me. I've added improvements where I can, like better flexible brake lines in the hopes of improving the distinctly marginal brakes, so it's going to be good, and hopefully up there with the best, so that's the aim. No matter what car, there will more than likely be someone with a bigger/brighter/thicker anorak! It will be driven and I intend to enjoy my hard work.

Glad people like the informative side. I always try and pass on what I've learnt over the years! I'll be detailing the Essex build up from here on it, so hopefully people find it useful. The aim will be to be dropping the engine in and get the gear box and prop all in during a week off I have coming up in Feb. I'll then need to concentrate on wiring and getting that all back in.
User avatar
3 Litre Power
Posts: 471
Joined: Tue Feb 24, 2015 4:41 pm
Car(s): 1975 Capri II 3000 Ghia factory manual, 505k kms, Sunset Red, BVR, B.I
1988 Ford Escort XR3i Cabrio, 177k kms, Red, Black Top ( Daily )
Location: In the garage...

Re: RS3100 restoration

Post by 3 Litre Power »

:applaud:
My Mk2 Capri Facebook page https://www.facebook.com/FordCapriMk2
:burnout:

Oil and Coolant guru
Finnish but born and raised in Spain.
Linky
Posts: 23
Joined: Tue Dec 15, 2015 1:57 pm
Car(s): 79' 3.0s Capri
Subaru wide arch H6 3.3 TT hatch Race car

Re: RS3100 restoration

Post by Linky »

Looking very good indeed.... Look forward to seeing future progress
Post Reply