Page 5 of 6
Re: capri 1.6GL bareshell rebuild
Posted: Sat May 18, 2019 1:58 pm
by ian_s
Andrew 2.8i wrote: ↑Sat May 18, 2019 7:11 am
Hi,
I love what you're doing here. So often we see restoration threads where the end product looks a bit iffy, but that is definitely not the case here. All your work looks absolutely top notch.

Andrew.
Well thanks for the compliment I do appreciate your comments on here. I do try to get things as accurate as possible and try to upload as much detail as I can because that way I have both a good record of the work I have carried out and also hopefully others who look at this can get ideas on how to carry out some of this themselves. I have used this forum for that very reason myself so I know from experience how much it helps when you simply don't know how best to do things. Will take me forever to do though doing it this way.

Re: capri 1.6GL bareshell rebuild
Posted: Sun May 19, 2019 8:57 pm
by ian_s
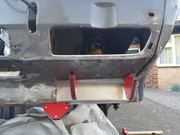
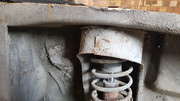
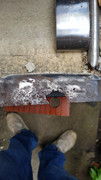
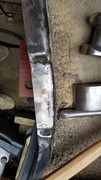
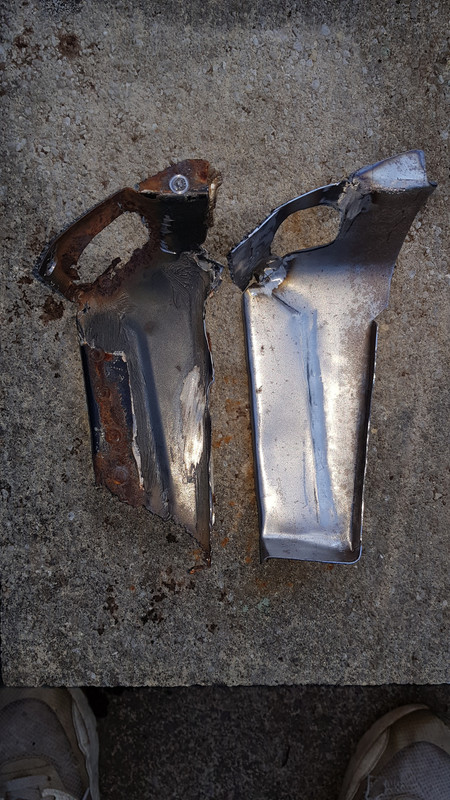
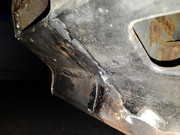
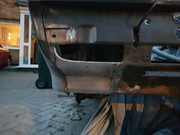
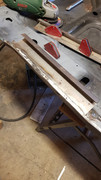
Managed to get the new parts roughly welded in (too much dirt from behind the panel was a hindrance and a mistake however lesson learned I shall not make that mistake again) but I am pleased with the shape and finish of the repair panel. It went better than i could have hoped. One other slight mishap was I cut too shy at the top of the panel however that is easy to rectify. Overall I am very happy and confident to take on the other side of the valance.

url=
https://postimg.cc/MvZw3pbC]
[/url]
Re: capri 1.6GL bareshell rebuild
Posted: Tue May 21, 2019 6:31 pm
by ian_s
Re: capri 1.6GL bareshell rebuild
Posted: Wed May 22, 2019 8:11 am
by D366Y
Impressive stuff, looking good!
Re: capri 1.6GL bareshell rebuild
Posted: Wed May 22, 2019 10:46 am
by pbar
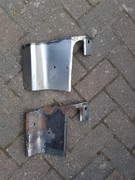
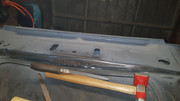
Nice little repair piece on the valance that is.
Re: capri 1.6GL bareshell rebuild
Posted: Sun Oct 06, 2019 3:31 pm
by ian_s
Just a little update. I had been making some good progress but unfortunately just over a month ago I had an accident where i passed out and on the way down i cracked my head off the sink. Unfortunately i havent been able to work since. I think i am on the mend now but it's a slow process and not a pleasant experience. However idle hands mean i have managed to negotiate a unit so fingers crossed it will be in the dry by Christmas and i can do this thing properly.
The things we do so we have something to look forward to.
Re: capri 1.6GL bareshell rebuild
Posted: Fri Apr 10, 2020 12:43 am
by sparks
Dayum!
Been a while since ive logged in and just read your thread!
Thats some top quality repair work right there! Loving the work.
Sorry to hear about your fall! Hope your alright and back to it soon!
Re: capri 1.6GL bareshell rebuild
Posted: Wed May 27, 2020 5:45 pm
by ian_s
Ok so following my last post it took me four months to recover from my head injury. Turns out I had post concussion syndrome. It was like having concussion for months on end. Needless to say I did get through it but it was tough as you start to think you may never recover. However I am back and picking up where I left off.
I now have a unit which i have started a business in called oak to bespoke. A hobby which got out of hand.
This means though for the first time in seven long years the capri is in the garage

so I iam starting at the front and working my way backwards through the car
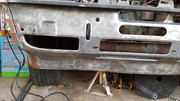
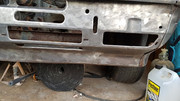

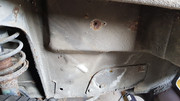
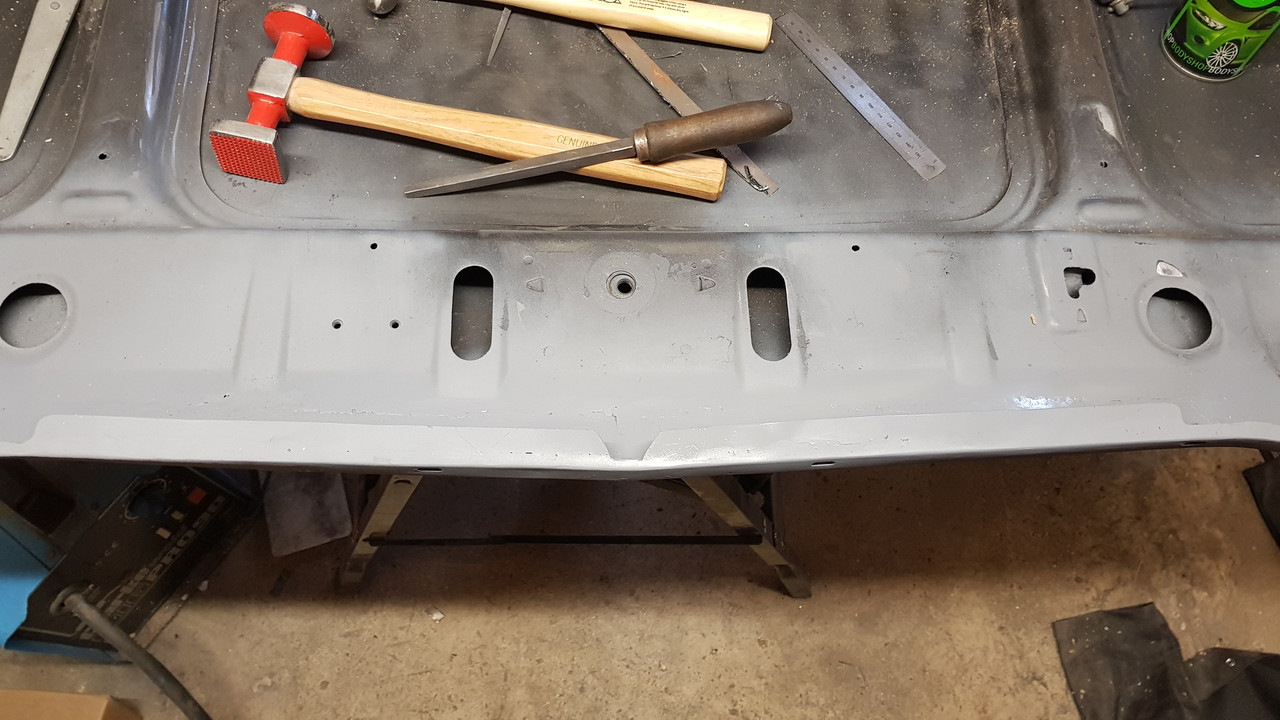
There is a bit of fettling still to be done but I think that balance looks very close now and great to see it all down to bare metal ready for it's new protective coating.
Re: capri 1.6GL bareshell rebuild
Posted: Sat May 30, 2020 10:50 am
by Caprifan Rob
Great to see this coming along, Lots of good work going on. Glad you’re over your accident, keep the updates coming & good luck.
Re: capri 1.6GL bareshell rebuild
Posted: Sat May 30, 2020 7:41 pm
by ian_s
Caprifan Rob wrote: ↑Sat May 30, 2020 10:50 am
Great to see this coming along, Lots of good work going on. Glad you’re over your accident, keep the updates coming & good luck.
Cheers, yeah glad to be getting back into it.
While I was waiting for some blast media to arrive to clean up the light bowls I decided to get back onto the bonnet
I had my repair piece ready and I used my jig for creating the depressions in the leading edge to meet the front of the bonnet where the bolt holes come through for the plastic lip.

I am really pleased with how well it worked. I have also decided to leave the slight Pull at the bottom edge in order to allow water to escape. I know this was an issue on these bonnets but it isnt too obvious when its fitted which will be tomorrow's job.
Re: capri 1.6GL bareshell rebuild
Posted: Sun May 31, 2020 6:53 pm
by ian_s
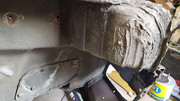
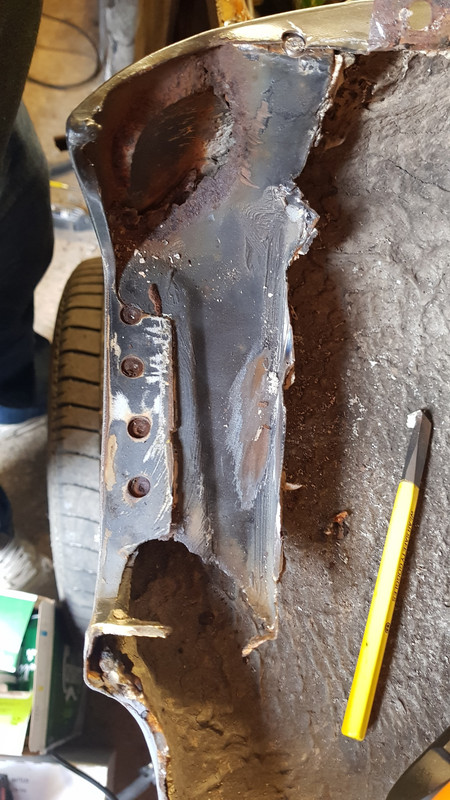
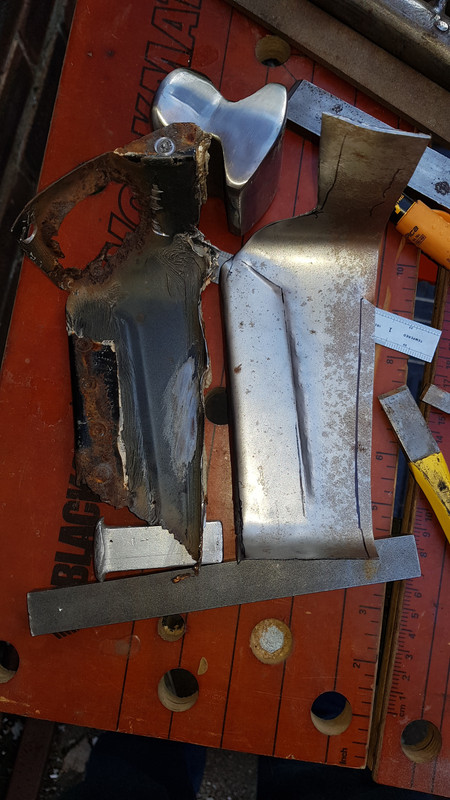
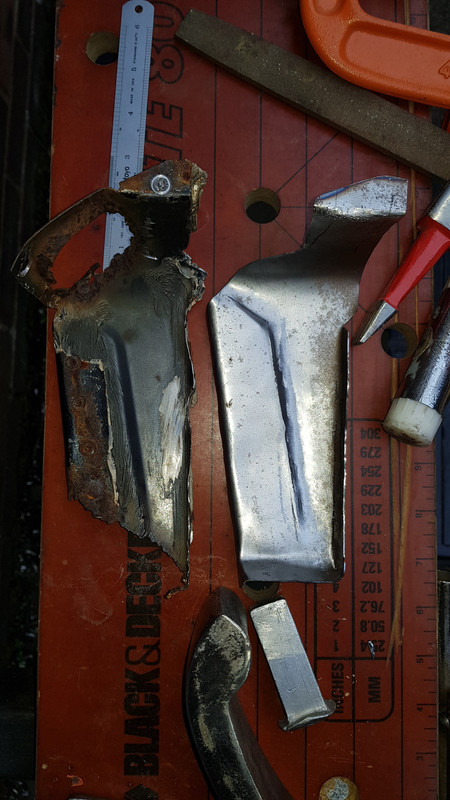
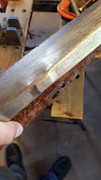
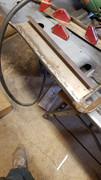
Ok so grafted in the new repair panel for the front lip. The raised points land perfectly giving it no pinching. A bit of a faff but its saved the bonnet. I also used a lot of rust treatment and primed with etch primer prior to welding. Once finished I'm going to throw a lot of extra protection down there so I dont have to do it again in a few years.

Not the best photos but you get the idea. Pleased with its position and the overall result. Still some fettling to do but me lad has gone to bed and loud noise stops play. Should have it finished by tuesday.
Re: capri 1.6GL bareshell rebuild
Posted: Mon Jun 01, 2020 4:16 pm
by ian_s
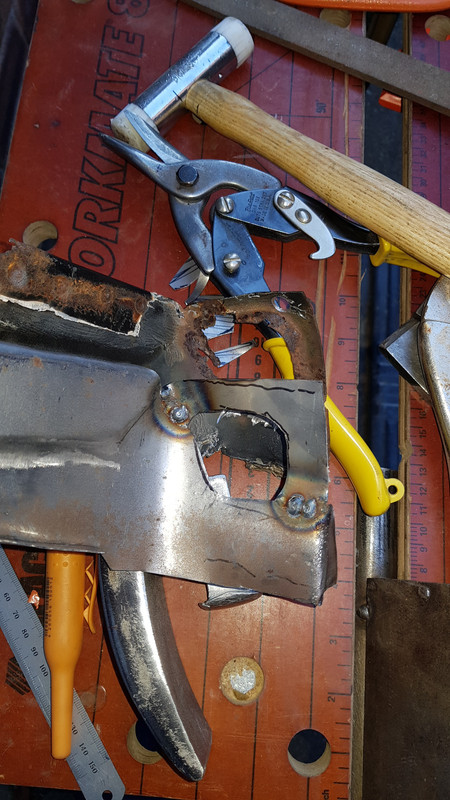
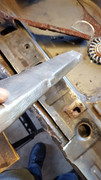
Just thought I would share a neat trick for welding thin flat strips. I had to replace the crusty lip under the leading edge. If I just used the straight flat piece to weld straight back in it would ripple and cause problems. By using a slightly larger piece with a fold in it then it keeps it nice and flat then you cut off the excess. ( I know most of you will know this but someone might not have thought about it and it is quite helpful.)
Just a little tip I thought I'd share
Re: capri 1.6GL bareshell rebuild
Posted: Mon Jun 01, 2020 7:07 pm
by ian_s
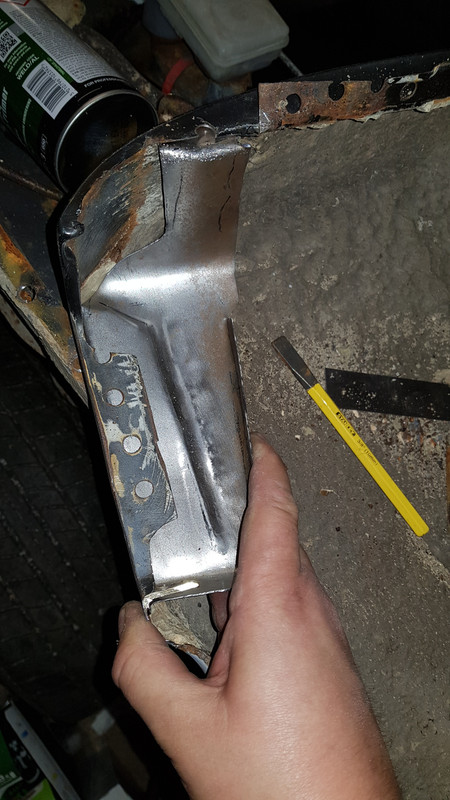
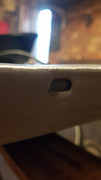
Right so that's the lip welded in and the repair panel. I'm pretty pleased with it. Will give it a light skim when the rest of the car is done. I will do all the skimming at the same time at the end. But just need to drill the holes out for the plastic lip and that's the bonnet finished for now. Another tick off the list.
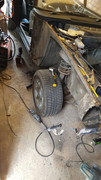
Next job is take drivers door off to get the wing off and hopefully the sand blast media will arrive and then start cleaning up the surface rust that's difficult to get to.
Re: capri 1.6GL bareshell rebuild
Posted: Tue Jun 09, 2020 4:39 pm
by ian_s
Re: capri 1.6GL bareshell rebuild
Posted: Sun Jun 14, 2020 8:15 am
by mjcapri
I’m sure you’ll sort that based on your work so far, your fab skills look really good!
Quick question, what do you use the shrinking hammer for? I gave up on them years ago, in fact I don’t think I have one anymore, as all they (or I!) seemed to do was mark the metal up with no noticeable shrinking.... I prefer to use a small torch or a shrinking disc but I’m always willing to learn!
Re: capri 1.6GL bareshell rebuild
Posted: Tue Jun 16, 2020 6:29 pm
by ian_s
mjcapri wrote: ↑Sun Jun 14, 2020 8:15 am
Quick question, what do you use the shrinking hammer for? I gave up on them years ago, in fact I don’t think I have one anymore, as all they (or I!) seemed to do was mark the metal up with no noticeable shrinking.... I prefer to use a small torch or a shrinking disc but I’m always willing to learn!
Firstly thanks, I'm learning all the time on this. I think that I bore people with questions but when I have the opportunity to talk to someone that has skills I dont have then I just drain them for everything I can get.
In terms of the shrinking hammer I have only ever needed to use it once and that was on the wing. The idea is that it does damage the surface but so that it pulls the metal in. I think it usually is better to heat it to blue and use the hammer you can use a wet rag on it too. I think trevs blog had a good you tube instructional video on it. I never worry about damaging the surface as you cant make an omelette without cracking a few eggs. Trial and error is the best way to learn really. Stretch some scrap metal and spend some time trying to pull it in. Hope that helps.
Re: capri 1.6GL bareshell rebuild
Posted: Tue Jun 16, 2020 6:33 pm
by ian_s
Re: capri 1.6GL bareshell rebuild
Posted: Tue Jun 16, 2020 8:28 pm
by mjcapri
ian_s wrote: ↑Tue Jun 16, 2020 6:29 pm
mjcapri wrote: ↑Sun Jun 14, 2020 8:15 am
Quick question, what do you use the shrinking hammer for? I gave up on them years ago, in fact I don’t think I have one anymore, as all they (or I!) seemed to do was mark the metal up with no noticeable shrinking.... I prefer to use a small torch or a shrinking disc but I’m always willing to learn!
Firstly thanks, I'm learning all the time on this. I think that I bore people with questions but when I have the opportunity to talk to someone that has skills I dont have then I just drain them for everything I can get.
In terms of the shrinking hammer I have only ever needed to use it once and that was on the wing. The idea is that it does damage the surface but so that it pulls the metal in. I think it usually is better to heat it to blue and use the hammer you can use a wet rag on it too. I think trevs blog had a good you tube instructional video on it. I never worry about damaging the surface as you cant make an omelette without cracking a few eggs. Trial and error is the best way to learn really. Stretch some scrap metal and spend some time trying to pull it in. Hope that helps.
I know what you mean about boring people with questions, I know a couple of skilled tin bashers and I like to tap into their knowledge whenever I can. To be fair I think they like helping out, especially when you’re not asking daft questions and are clearly developing your skills. It’s a cottage industry these days really.
I do follow Trev’s Blog, I followed him before he relaunched the channel actually, but I may have missed the shrinking hammer tutorial. I do remember him talking about shrinking with a torch so I probably just need to rewatch that episode. I never tried using the hammer in conjunction with heat but I may give it a go purely for educational purposes (I’ll need to buy one first though, I definitely don’t have one in the panel beating draw). I think I was put off by not seeming to achieve much with it, and the common online consensus that they’re a waste of time.... If I try again and still don’t have any success at least I’ll have a good meat tenderiser....

Re: capri 1.6GL bareshell rebuild
Posted: Tue Jun 16, 2020 10:05 pm
by ian_s
Yes I think for best results you need a soft backing like the pads so that it puts those little dents in and that then pinches it up. Heating it makes it softer so easier to produce that. Again I'm no expert but that is the understanding I have. It's a very specific skill but I am lucky to work with people who did it day in day out. The lads I work with built the light weight e type when jag built the 6 a few years ago. All hand skills. If I get chance I break away for a day from my job to assist and learn from watching them.
Re: capri 1.6GL bareshell rebuild
Posted: Fri Jun 19, 2020 8:02 pm
by ian_s