Restoration: The Big Fast Red One

Use this forum to post threads of ongoing Capri projects and restorations.
User avatar
Capri_Andy
Donator
Donator
Posts: 1077
Joined: Mon Jul 28, 2008 10:18 pm
Car(s): Laser 2.9 efi resto (in many pieces)
Location: Cambs

Restoration: The Big Fast Red One

Post by Capri_Andy »

My project for the winter is to get my 2.9 back to its former glory. Only a couple of years ago it was a very tidy and shiny laser shell, and now its looking very sorry for itself. Faded paint, damage from 3 seperate spanish women driving into it, and rust. Its done me well this summer, covered 10,000 miles away from home without too much trouble, so i owe it lots of TLC!

I want to do as much of the work myself, so im going to buy a welder and air comp, and will eventually get the whole car resprayed after all the repairs. Firstly its been to the bodyshop to fix the damaged rear panel and genny ford front wing....

Before:
Image

After:
Image

Before:
Image

After:
Image

And some bonus work they did for me (I would have attempted this bit myself but cant complain!)...
Before:
Image

After:
Image

So far so good. Next job is to cut off the rotten drivers side pattern wing. Watch this space.
Image
The big fast red one!
User avatar
Beakster
Donator
Donator
Posts: 3980
Joined: Sun Jul 27, 2008 10:16 pm
Car(s): 1983 Ford Capri 2.9 24V Cosworth Injection
Location: Toronto, Canada
Contact:

Re: Restoration: The Big Fast Red One

Post by Beakster »

Nice one Andy! :xd:
Image
User avatar
Peter-S
Donator
Donator
Posts: 7455
Joined: Mon Jul 28, 2008 7:57 am
Car(s): 1985 Capri 2.0
1983 Capri 2.8i
Location: Kent
Contact:

Re: Restoration: The Big Fast Red One

Post by Peter-S »

Looks like they've done a nice job on the rear panel. Best not let it get wet though if possible as primer will absorb water :(
ImageBanner by Peter Smith, on Flickr
User avatar
Capri_Andy
Donator
Donator
Posts: 1077
Joined: Mon Jul 28, 2008 10:18 pm
Car(s): Laser 2.9 efi resto (in many pieces)
Location: Cambs

Re: Restoration: The Big Fast Red One

Post by Capri_Andy »

Very sunny but cold this morning, perfect wing removing weather!

The pattern wing was so rotten that i could stab the end of a ratchet through it...
Image

Cut it off in several peices and managed to do it without taking the door off...
Image

The A pillar and headlight bowl appear to be in very good condition...
Image

I know pattern wings fit badly but WTF! Is that a nut theyve used as a spacer!?
Image

Still have to remove the remains of the wing from the drip rail and A pillar. Ill give the whole area a clean up with the wire brush grinder attachment, and get some paint on.
Image
The big fast red one!
User avatar
Capri18
Posts: 343
Joined: Wed Jul 30, 2008 6:49 am
Car(s): Mk2 Ford Capri (off the road due to sheep) Mk1 escort Mexico (current car due to said sheep)

Re: Restoration: The Big Fast Red One

Post by Capri18 »

:lol: love the nut as a spacer!! i did a similar thing with my bumper bracket :oops: looking good though Andy! I spy coil overs, What poundage and length of springs are you using?
Image
User avatar
Capri_Andy
Donator
Donator
Posts: 1077
Joined: Mon Jul 28, 2008 10:18 pm
Car(s): Laser 2.9 efi resto (in many pieces)
Location: Cambs

Re: Restoration: The Big Fast Red One

Post by Capri_Andy »

Capri18 wrote:I spy coil overs, What poundage and length of springs are you using?
220 rate 10.5", my friend. Its just right, I tried 180 rate and they were too soft and bottomed out all the time with a heavy engine. Could probably benefit from using 12" springs though.

I've been admiring your thorough resto job, its keeping me motivated!
Image
The big fast red one!
User avatar
Capri_Andy
Donator
Donator
Posts: 1077
Joined: Mon Jul 28, 2008 10:18 pm
Car(s): Laser 2.9 efi resto (in many pieces)
Location: Cambs

Re: Restoration: The Big Fast Red One

Post by Capri_Andy »

Finally some progress. Ive borrowed a welder and ive been practicing a little on some scraps. Other than that all ive done is poked some more holes in the car, got the engine in bits, cut the rad mounts and battery tray out.

Its a really good little welder...
Image

The dirty engine bay happenings...
Image

It had rotten through where the reinforcement plate goes on the other side of the battery tray...
Image

More to cut out...
Image

My first welding attempt on the car!!! (Gas starting running out, new bottle at the ready)...
Image

It was a mission grinding an fileing everying to make it fit right, just tacked it together for now...
Image
Image

Next i have to butt weld all the way round. It will be good practice for tricker things, like this...

Image


Watch this space.
Image
The big fast red one!
Supercharged Nat
Donator
Donator
Posts: 5474
Joined: Mon Jul 28, 2008 4:13 pm
Car(s): Supercharged 2.1 (daily driver- when it works)

Re: Restoration: The Big Fast Red One

Post by Supercharged Nat »

good stuff! keep at the mig'in it gets easier eventually! Then youl want to be Tig'in like Beakster, its the nuts!
Image
User avatar
Capri_Andy
Donator
Donator
Posts: 1077
Joined: Mon Jul 28, 2008 10:18 pm
Car(s): Laser 2.9 efi resto (in many pieces)
Location: Cambs

Re: Restoration: The Big Fast Red One

Post by Capri_Andy »

Some progress.

Image

Needs, a skim of filler, will be all good.
Image

Image

I cant help thinking, if only when I bought the car, if id poured loads of old engine oil into all the cavities, sills, and chassis rails, this sort of thing wouldnt have happened.
Image
Image
The big fast red one!
User avatar
Capri_Andy
Donator
Donator
Posts: 1077
Joined: Mon Jul 28, 2008 10:18 pm
Car(s): Laser 2.9 efi resto (in many pieces)
Location: Cambs

Re: Restoration: The Big Fast Red One

Post by Capri_Andy »

Another day of grot finding and welding.

The screwdriver says filler and paint wont do...
Image

Cut the top layer off in a nice square shape.
Image

Scrape the crap out, this will need treating with kurust and some paint...
Image

I made a repair peice with a dish shape by pressing a socket into a 26mm spanner in the vice...
Image

Welded...
Image

Woohoo!
Image
Image
The big fast red one!
capri_sam
Posts: 1273
Joined: Mon Jul 28, 2008 5:08 am
Car(s): Cosworth BOA, big exhaust, little bitty axle, bright yellow interior. Not exactly subtle.
Location: South, Midlands, and North. :D

Re: Restoration: The Big Fast Red One

Post by capri_sam »

Genius Andy! The old beast is coming along well :)
Total number of friends who have so far managed to open the passenger door first time: 1.
Image
User avatar
Capri_Andy
Donator
Donator
Posts: 1077
Joined: Mon Jul 28, 2008 10:18 pm
Car(s): Laser 2.9 efi resto (in many pieces)
Location: Cambs

Re: Restoration: The Big Fast Red One

Post by Capri_Andy »

Thanks Sam, i suprise myself what i can do sometimes! :xd:

More cut out...
Image

Like you'd never know....
Image

I started to get abit trigger happy with the angle grinder though. I decided i didnt like other peoples patchwork on my car. I want this restoration work to last so i want it right.
Image

Plan was to cut the outer skin just where its rusty into squareish shapes to make it easier than fabricating a whole new A piller.
Image

A satisfying pile of rusty bits...
Image

But like i say, the cutting never stops. Now im wishing i never started this... :cry:
Image

All I wanted to do was fit a new wing, I wasnt planning any of this! Its so time consuming as well. I offered the new wing up and I can tell straight away that its gonna be a mission to line up right. At least I dont have to do the other side, its kinda like I only have to restore half a car down the middle, the other side its amazingly rust free!
Image
The big fast red one!
andrewg1323
Posts: 2259
Joined: Mon Jul 28, 2008 6:50 pm
Car(s): 2.0 Cabaret Auto - Soon to be daily driver
2.0 Cameo - Currently being Zetec'd
Peugeot 406 - Daily Driver and dull as!
Location: Ipswich, Suffolk

Re: Restoration: The Big Fast Red One

Post by andrewg1323 »

Was the paint worse on that side where it'd been parked sunny side out :lol:
User avatar
Capri18
Posts: 343
Joined: Wed Jul 30, 2008 6:49 am
Car(s): Mk2 Ford Capri (off the road due to sheep) Mk1 escort Mexico (current car due to said sheep)

Re: Restoration: The Big Fast Red One

Post by Capri18 »

How are you getting on with the resto mate?
Image
User avatar
Capri_Andy
Donator
Donator
Posts: 1077
Joined: Mon Jul 28, 2008 10:18 pm
Car(s): Laser 2.9 efi resto (in many pieces)
Location: Cambs

Re: Restoration: The Big Fast Red One

Post by Capri_Andy »

Long time no progress. Im back at it now, with updates as I go along.

Heres the latest on the A piller...

Image

Image

Image

Image

Image

Image

Image

Image

Image
Last edited by Capri_Andy on Sat Sep 11, 2010 8:55 pm, edited 1 time in total.
Image
The big fast red one!
andrewg1323
Posts: 2259
Joined: Mon Jul 28, 2008 6:50 pm
Car(s): 2.0 Cabaret Auto - Soon to be daily driver
2.0 Cameo - Currently being Zetec'd
Peugeot 406 - Daily Driver and dull as!
Location: Ipswich, Suffolk

Re: Restoration: The Big Fast Red One

Post by andrewg1323 »

Looking good, been fillering the visable sides of my a pillars tonight and it sucks!
User avatar
Peter-S
Donator
Donator
Posts: 7455
Joined: Mon Jul 28, 2008 7:57 am
Car(s): 1985 Capri 2.0
1983 Capri 2.8i
Location: Kent
Contact:

Re: Restoration: The Big Fast Red One

Post by Peter-S »

Nice work Andy, good to see you back on the job :)
ImageBanner by Peter Smith, on Flickr
User avatar
Capri_Andy
Donator
Donator
Posts: 1077
Joined: Mon Jul 28, 2008 10:18 pm
Car(s): Laser 2.9 efi resto (in many pieces)
Location: Cambs

Re: Restoration: The Big Fast Red One

Post by Capri_Andy »

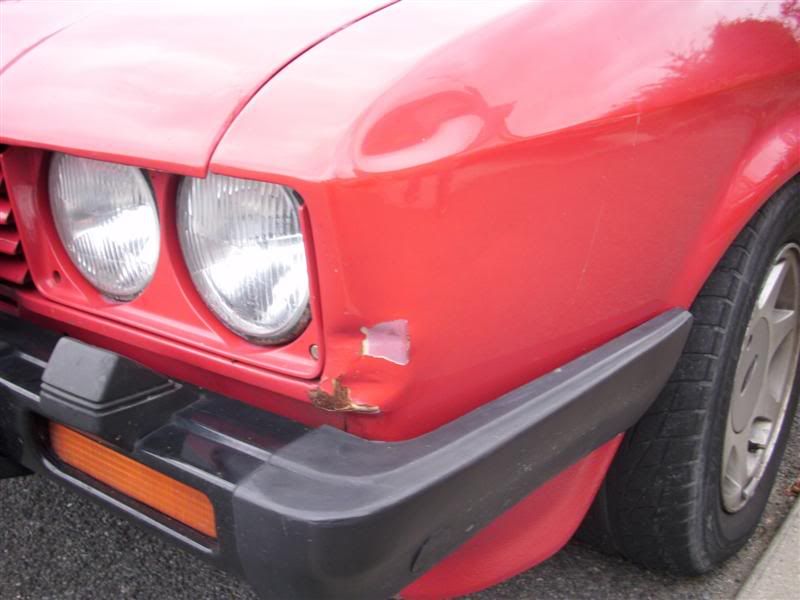
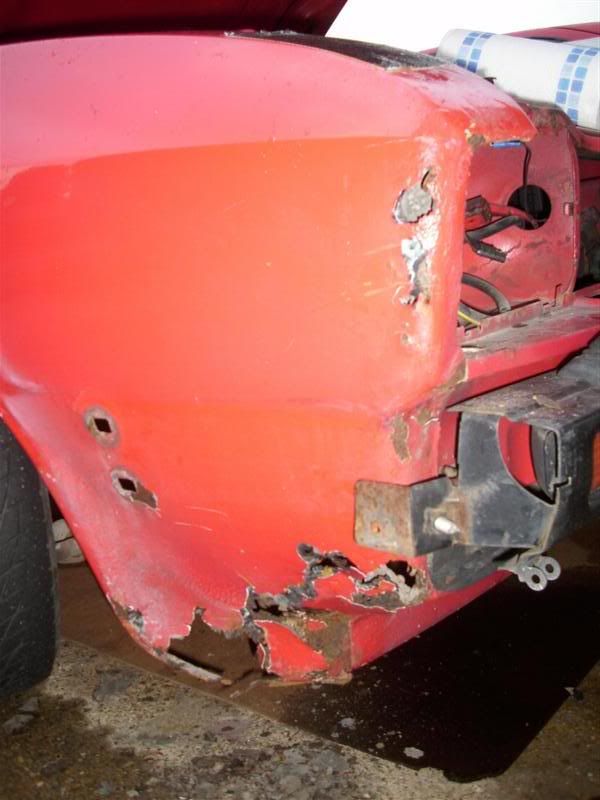
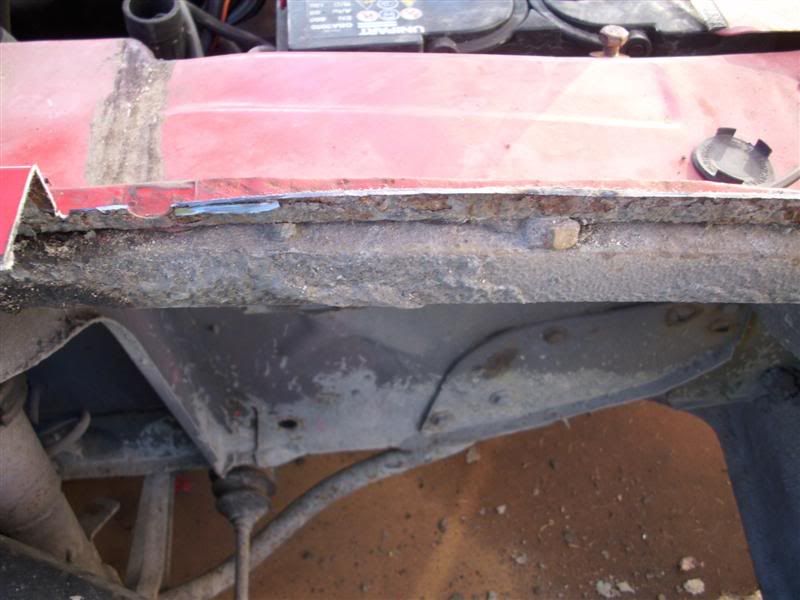
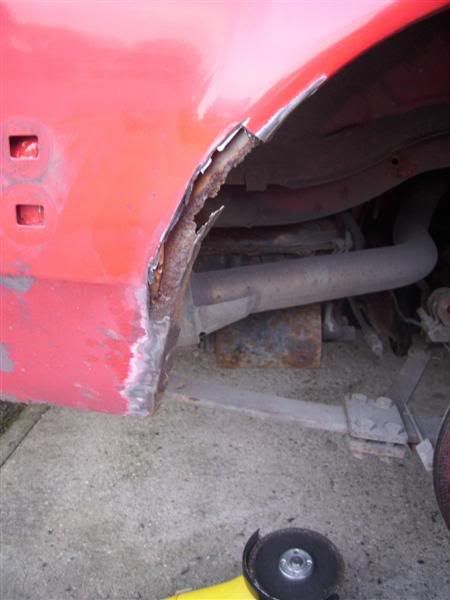
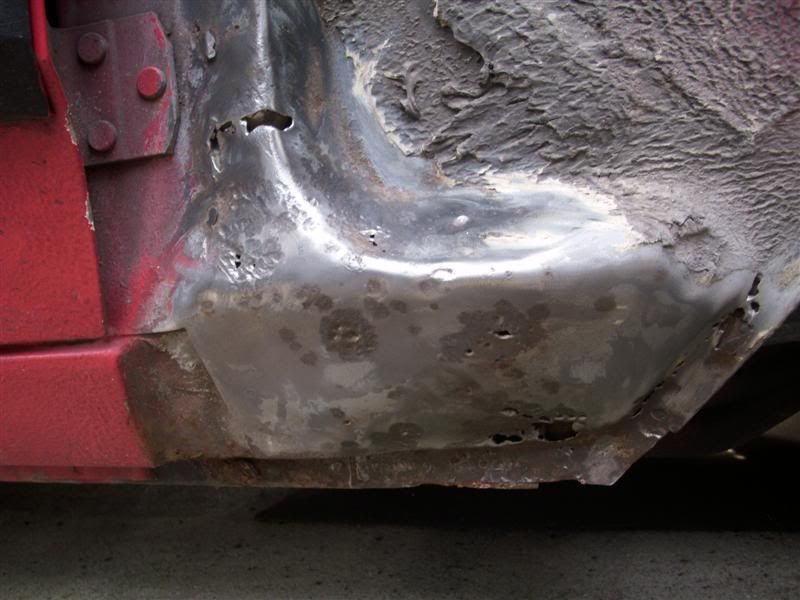
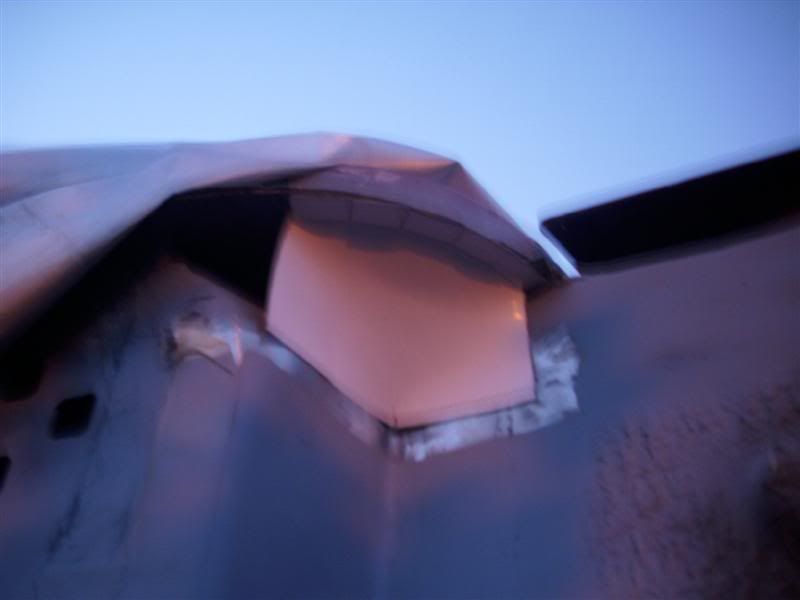
More of the same this weekend. I've realised why this A pillar is in such a bad way compared to the rest of the car. Its been getting wet inside from dripping water from the rusty corner of the windscreen, probably for a very long time. The good news is theres no rusty windscreen on the other side, confirming my wishful thinking that the other A pillar is still solid under the genny wing.

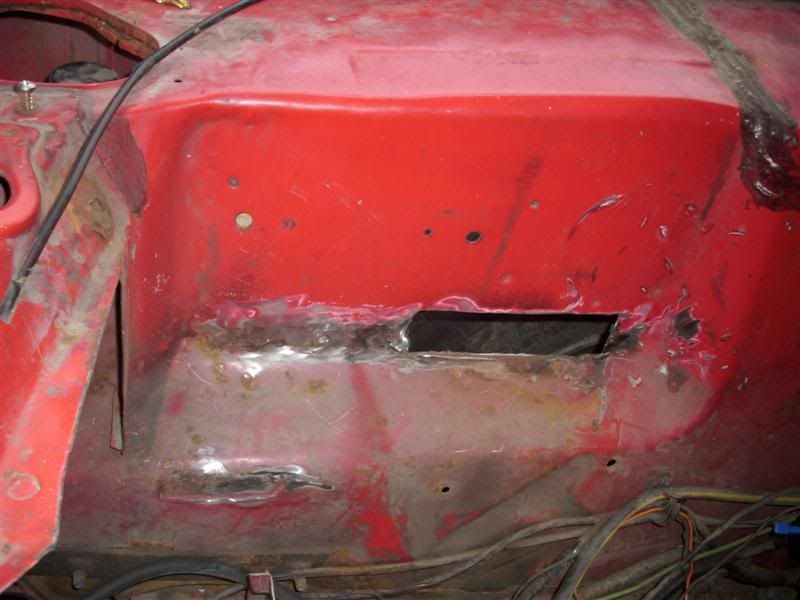
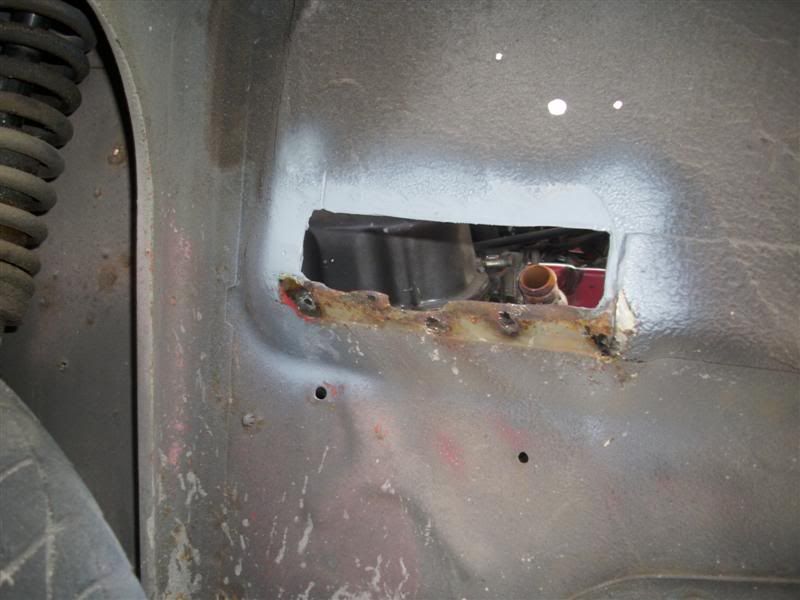
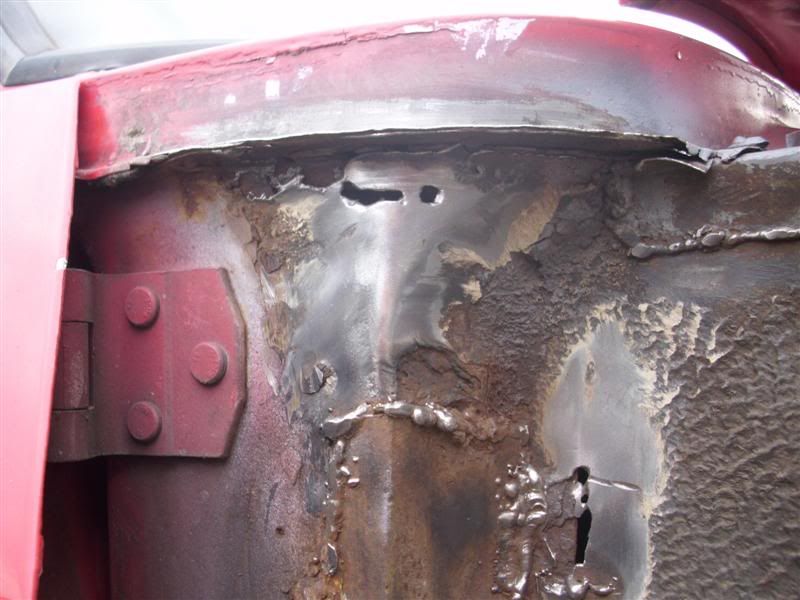
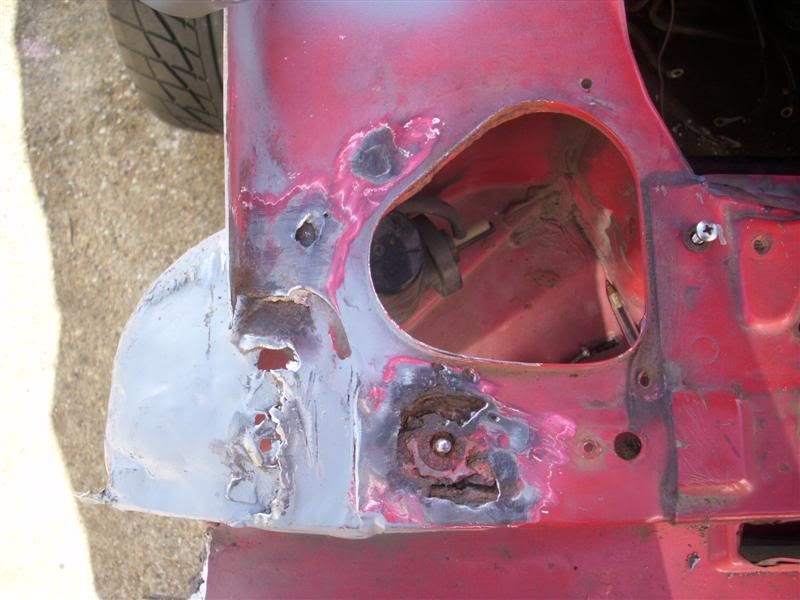
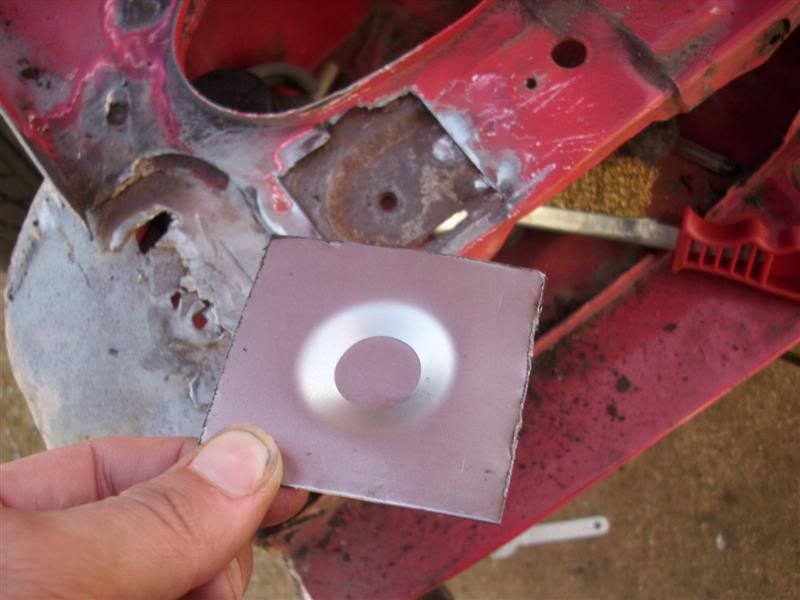
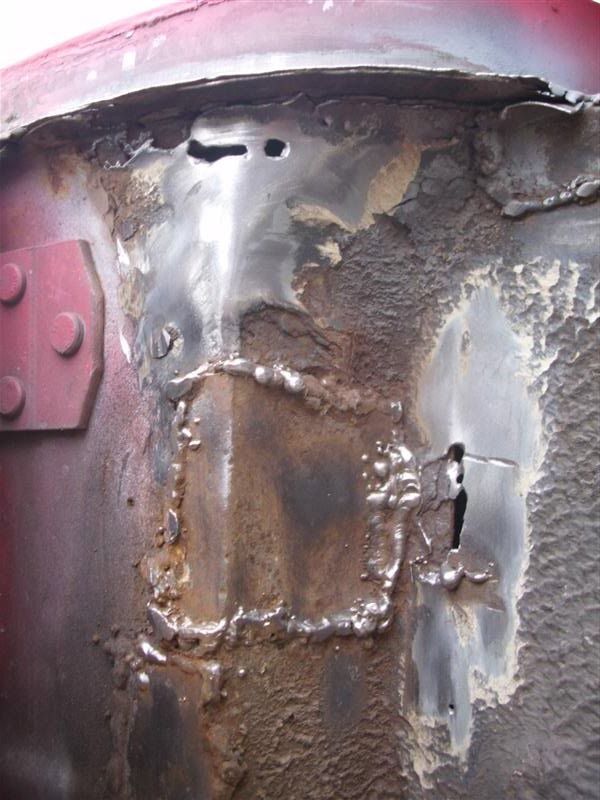
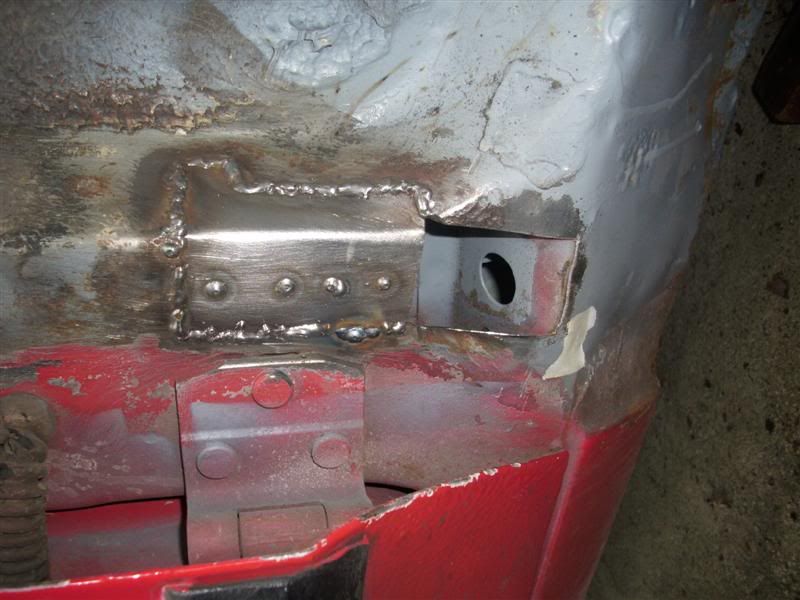
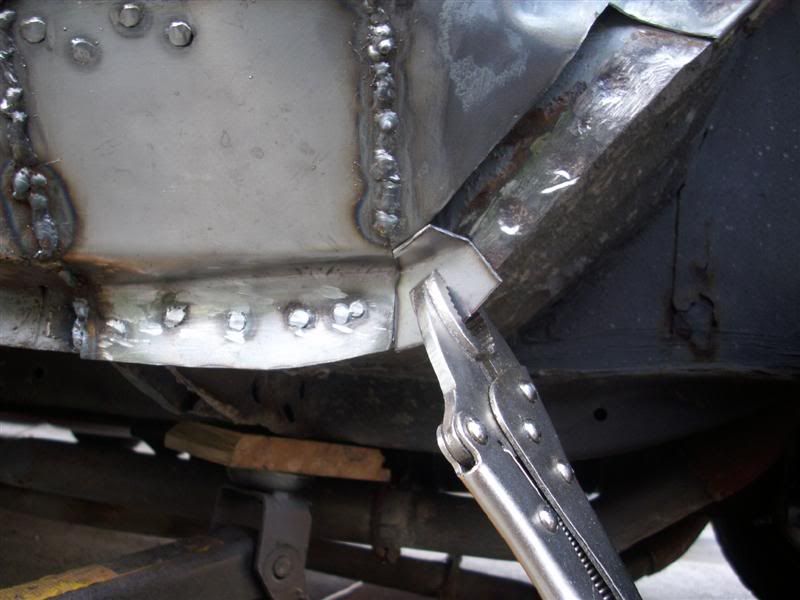
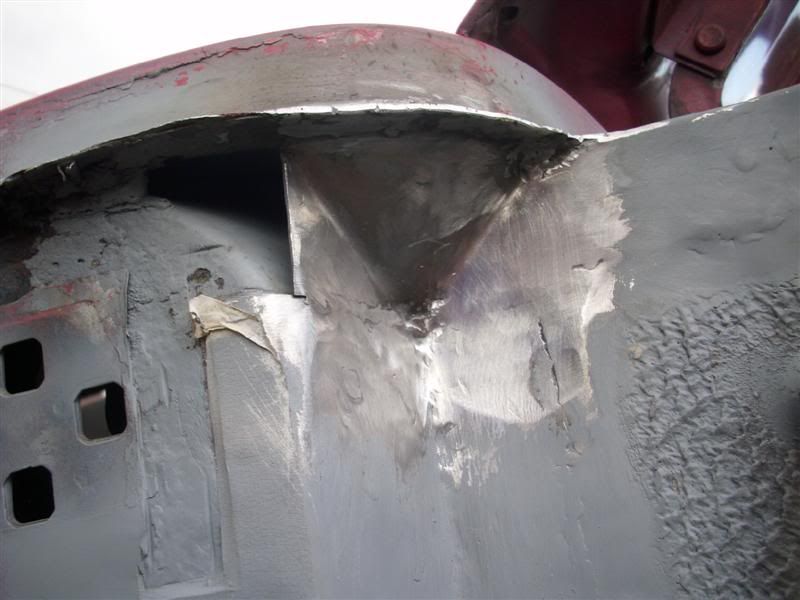
A repair to the middle skin where it is tripple skinned....
Image

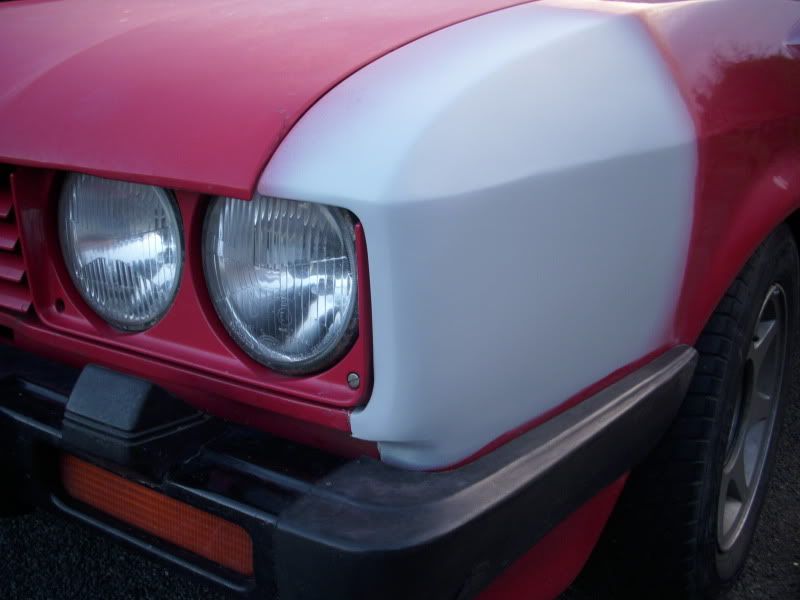
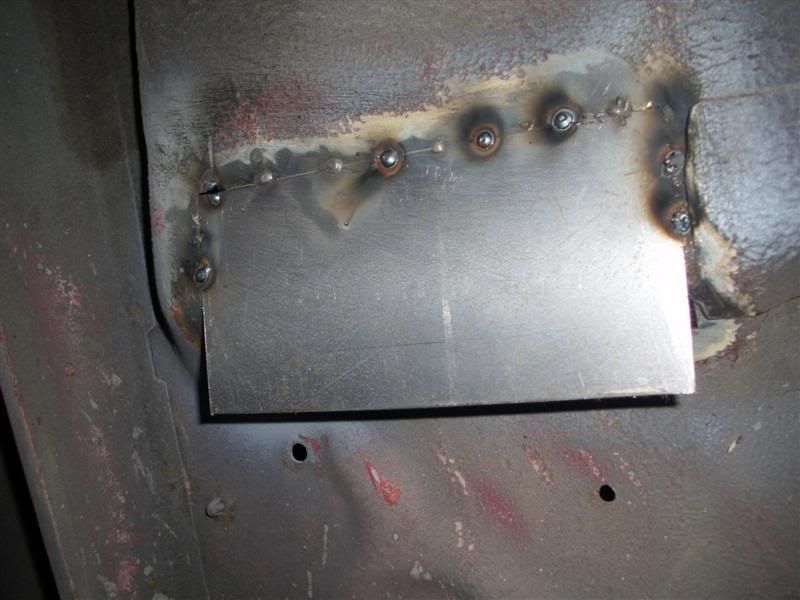
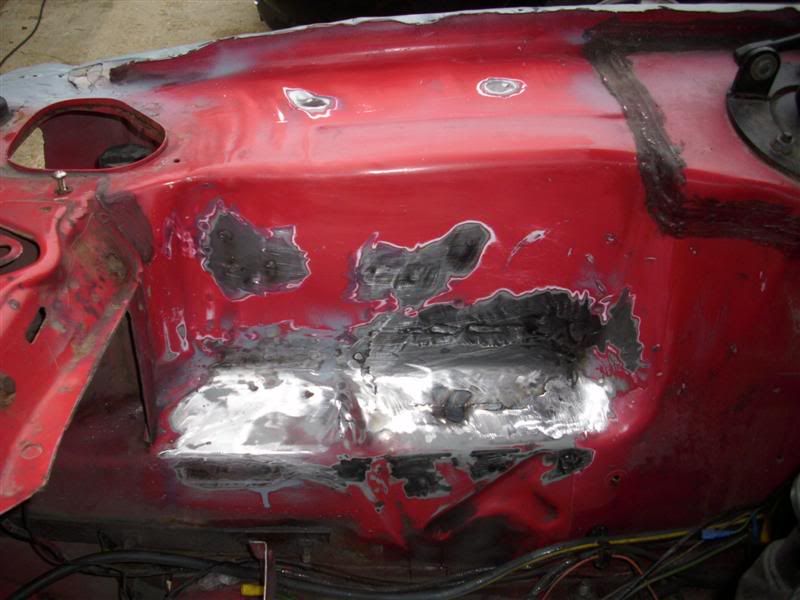
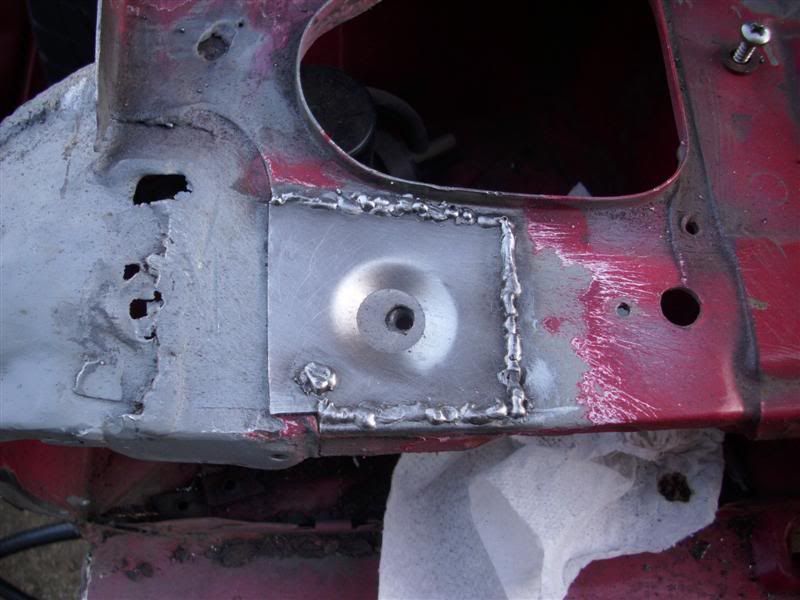
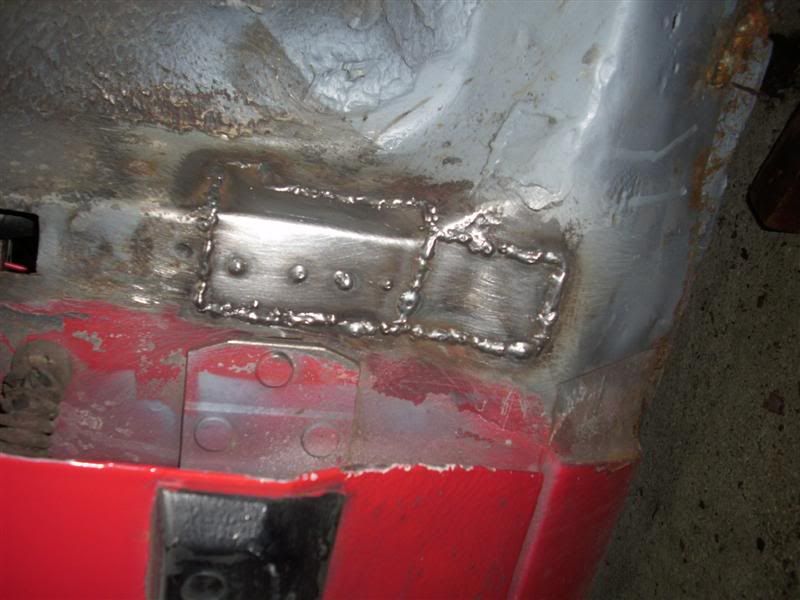
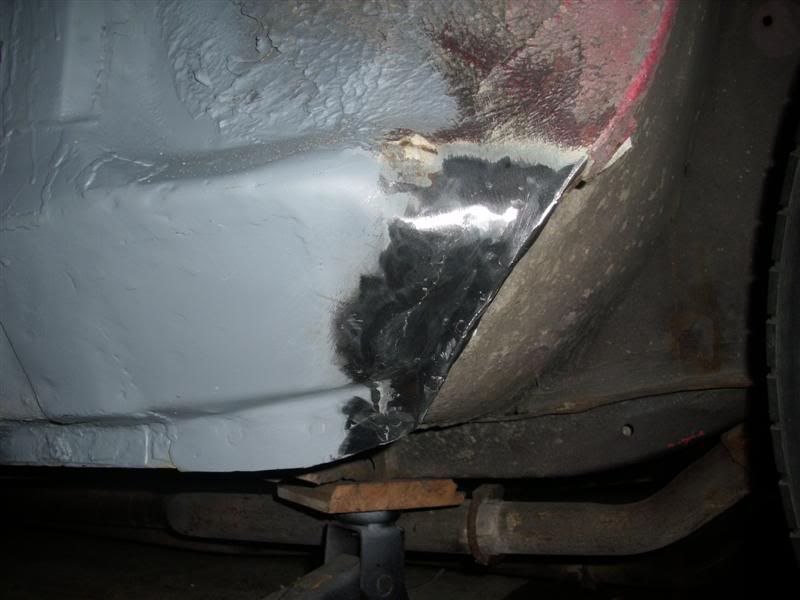
Fully welded, ground smooth and primered ready for outer skin...
Image

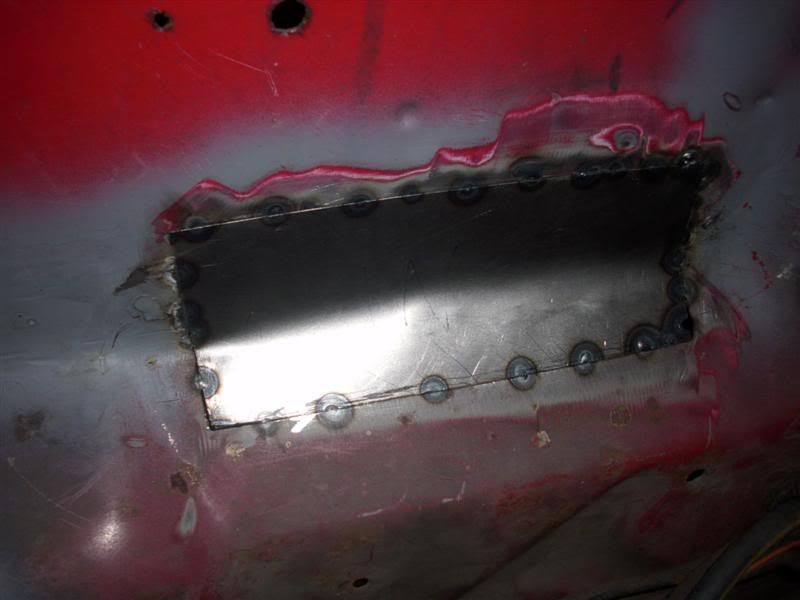
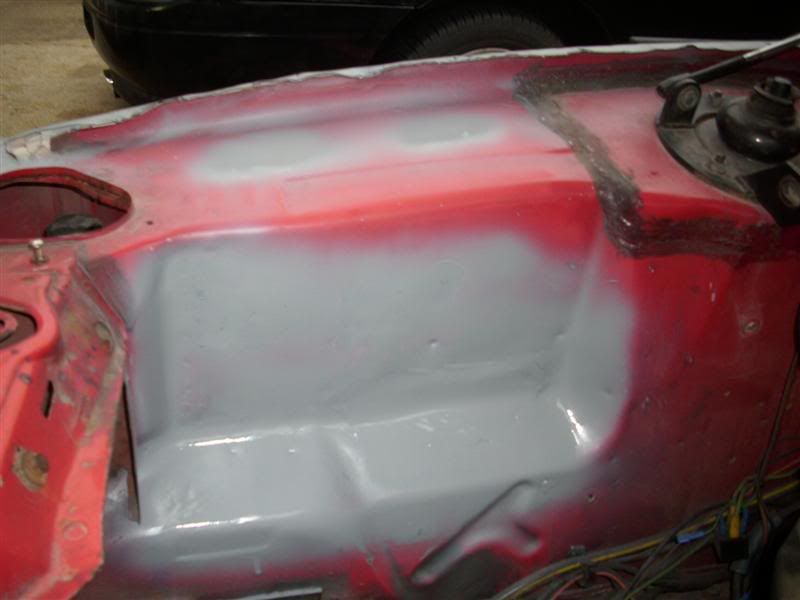
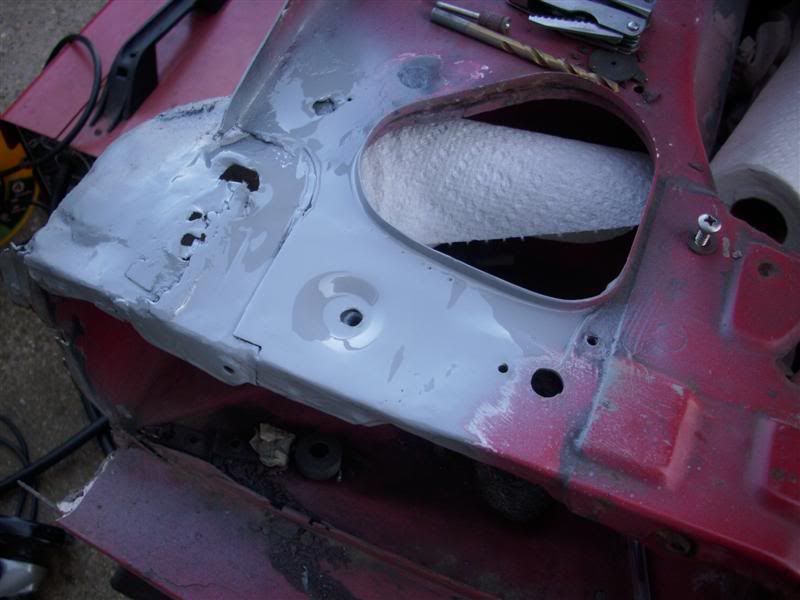
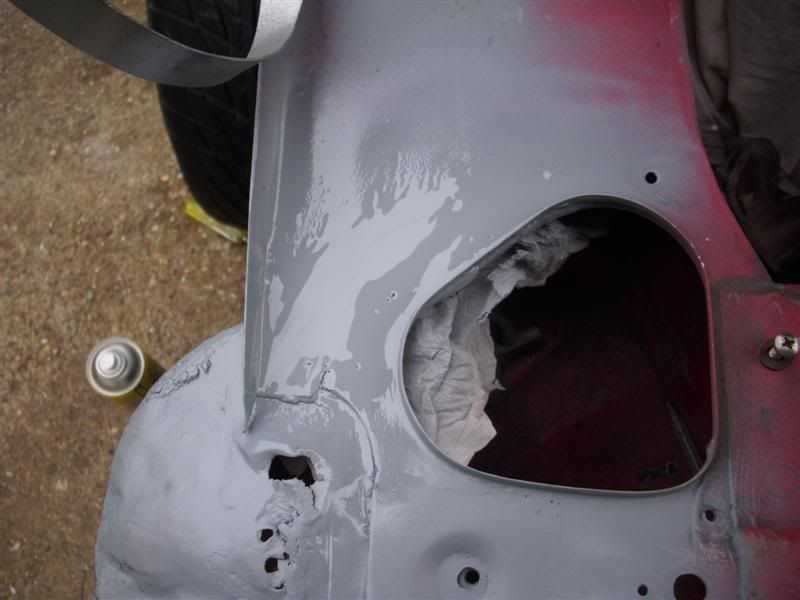
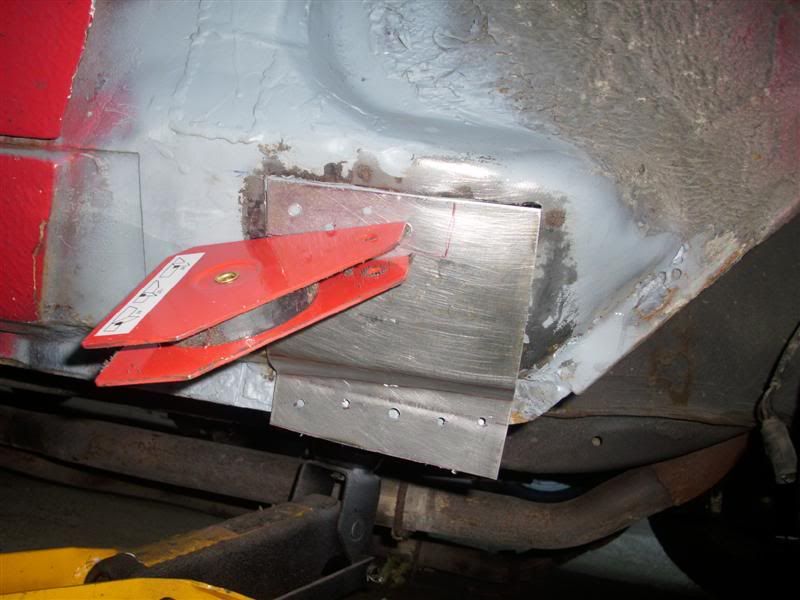
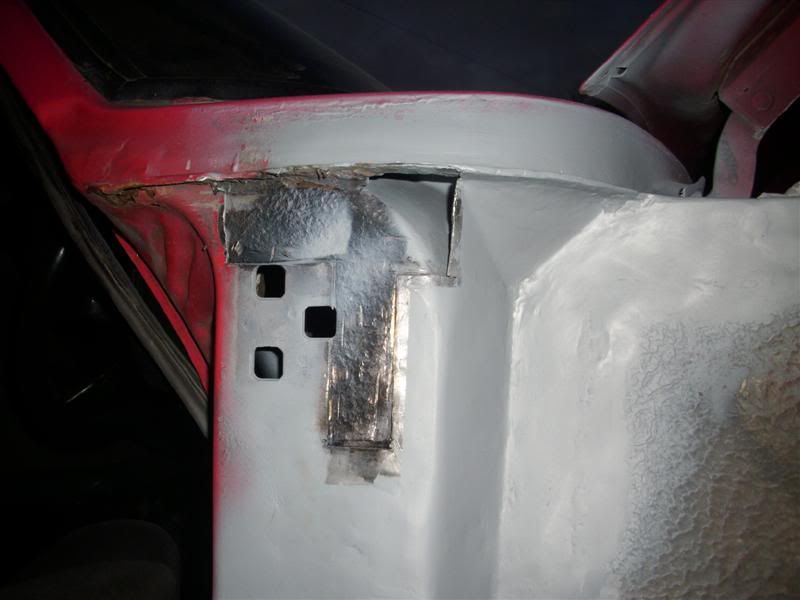
Outer skin taking shape with plenty of holes to plug weld it to the skin below...
Image

Image

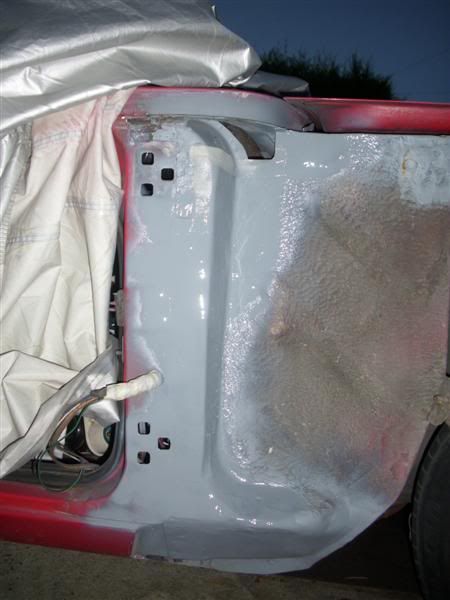
Now, I seem to be missing some pictures, I must have got too engrossed in my work to take any. But here it is with the door off and a little more welding completed.
Image

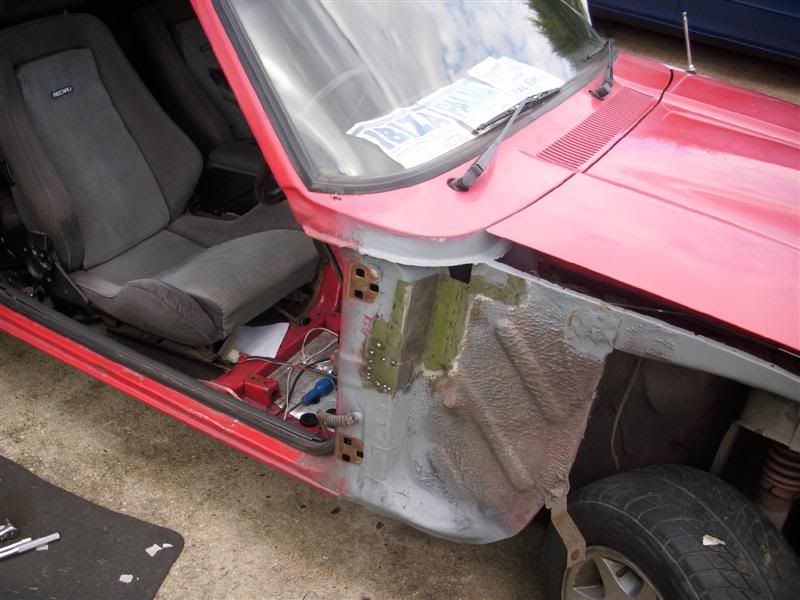
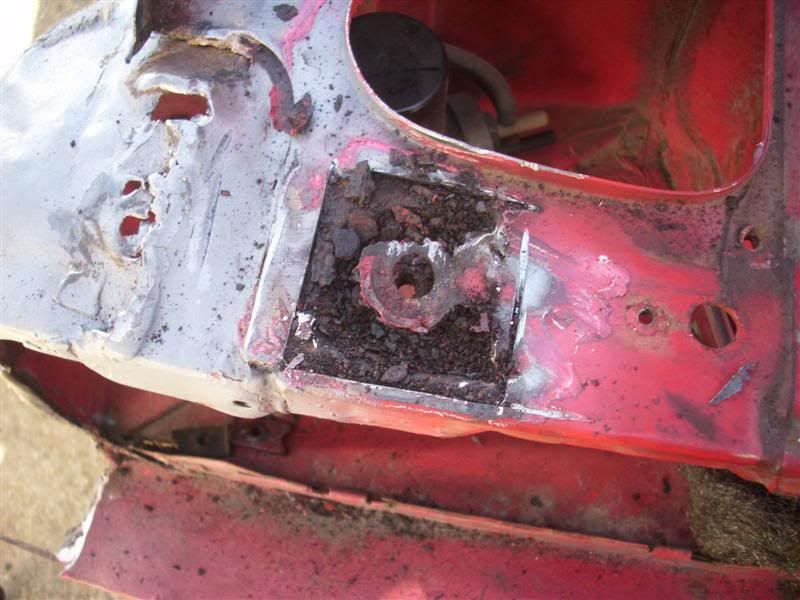
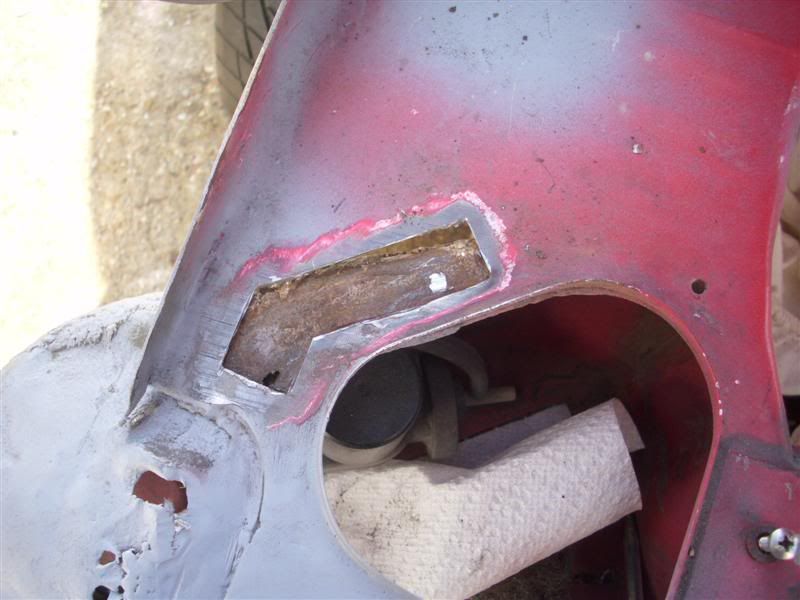
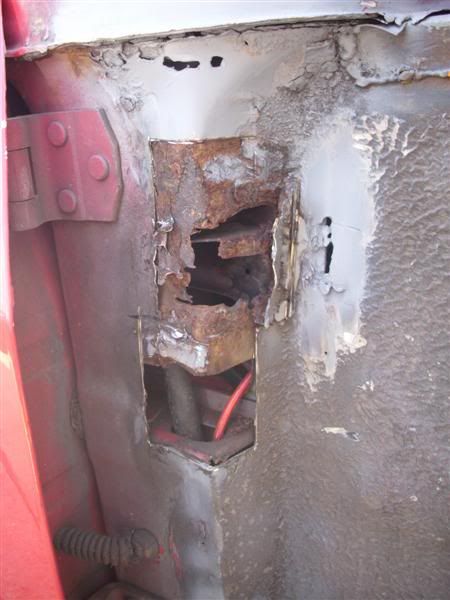
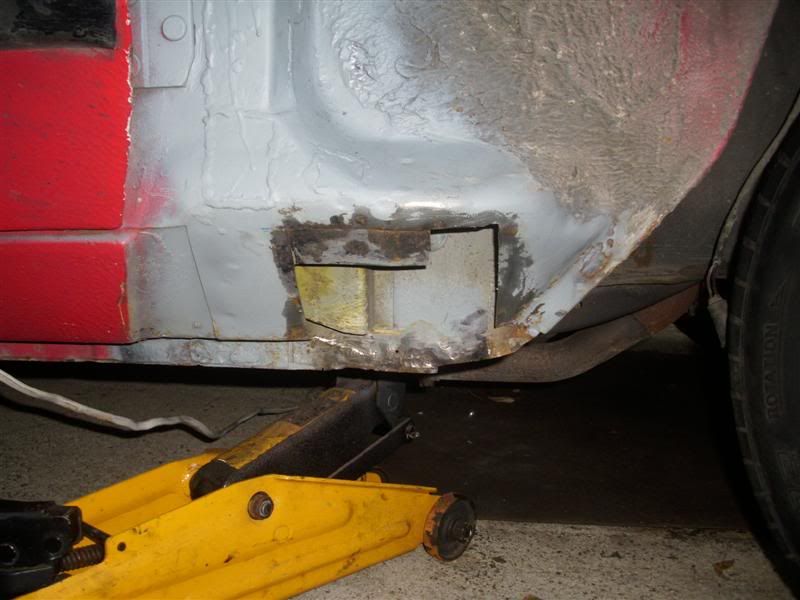
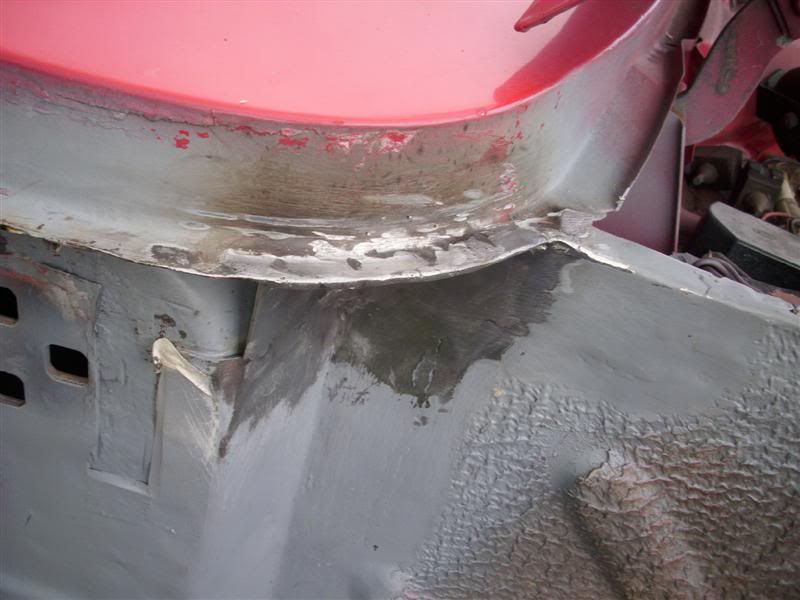
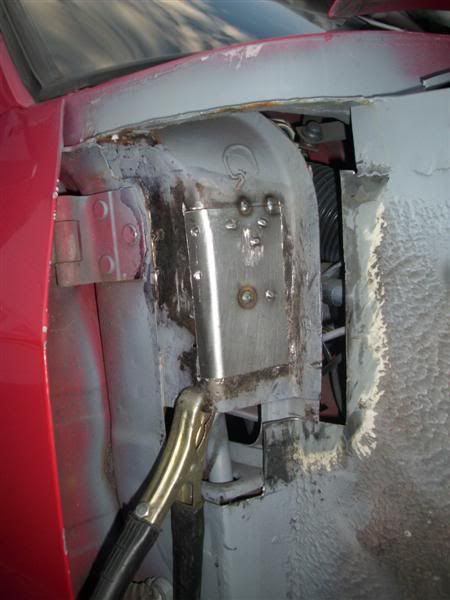
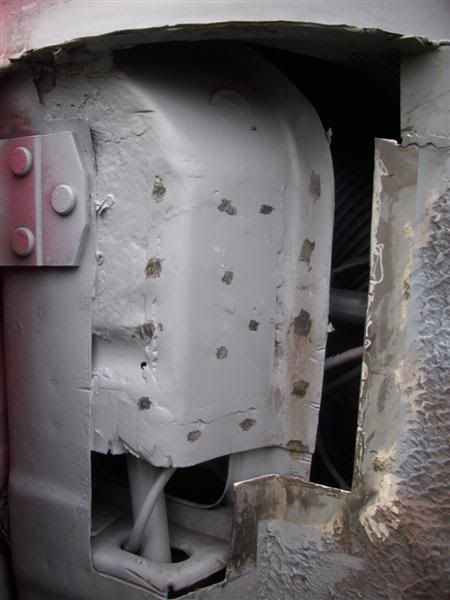
I was expecting more rot under the hinges but its not too bad...
Image

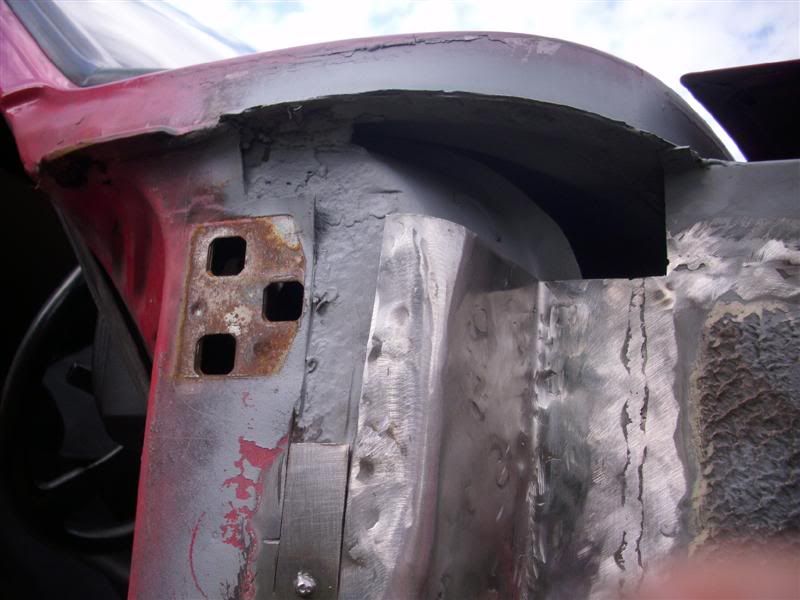
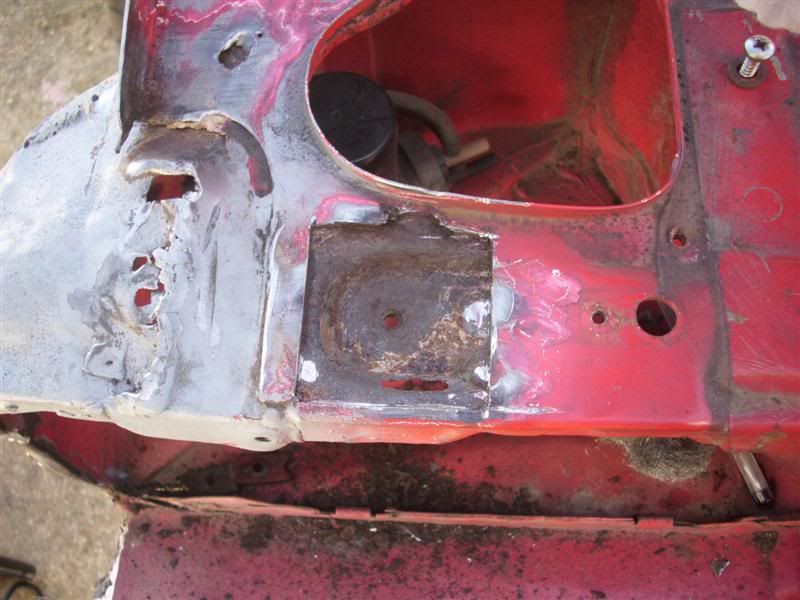
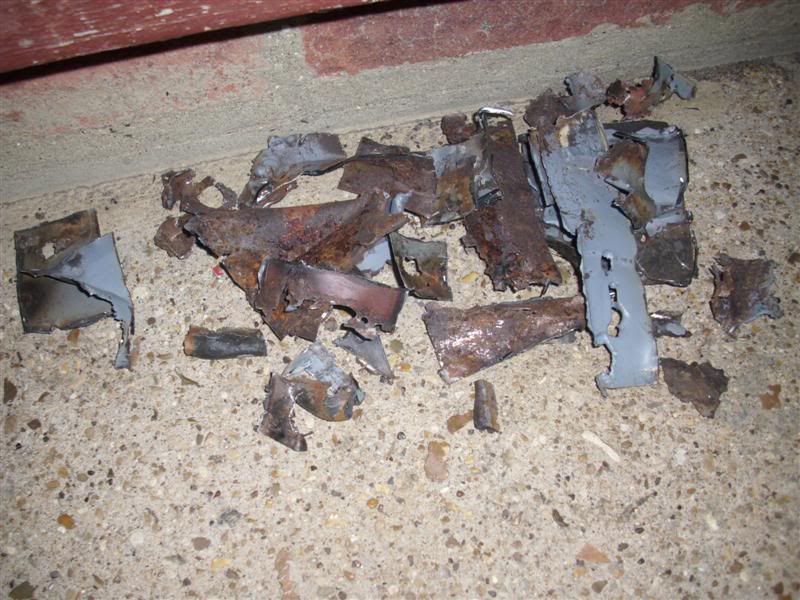
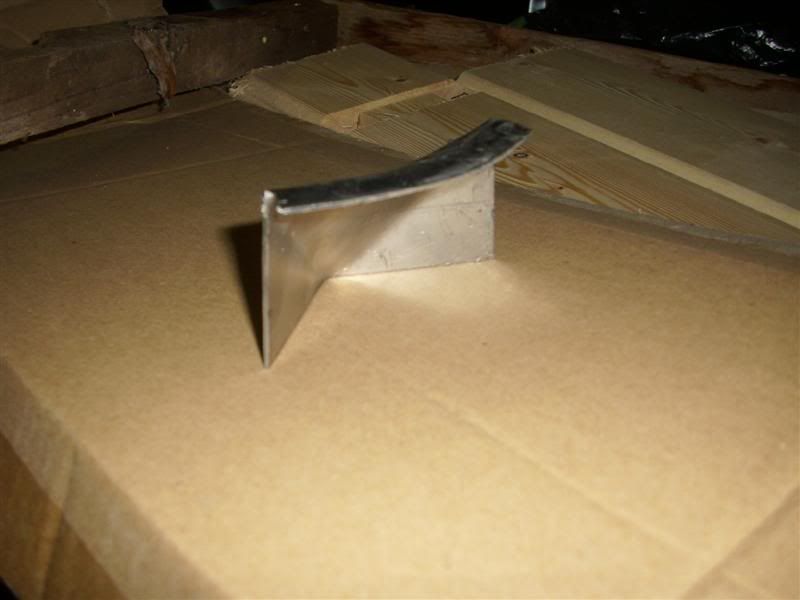
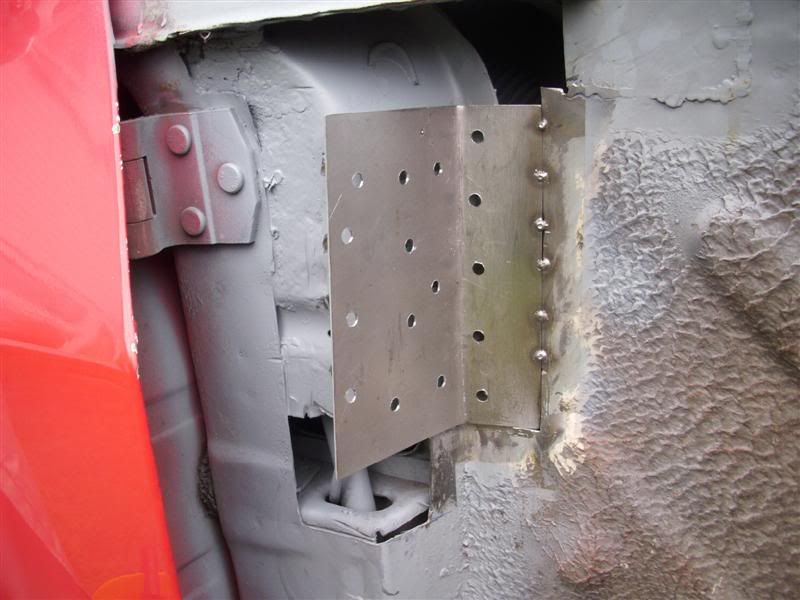
These repair sections are starting to end up in wierd shapes but there is a method to my madness, honest...
Image

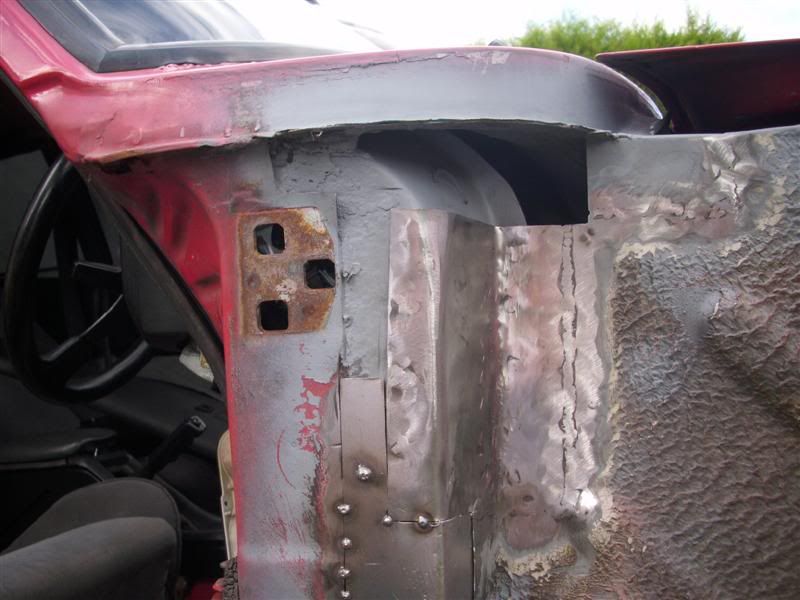
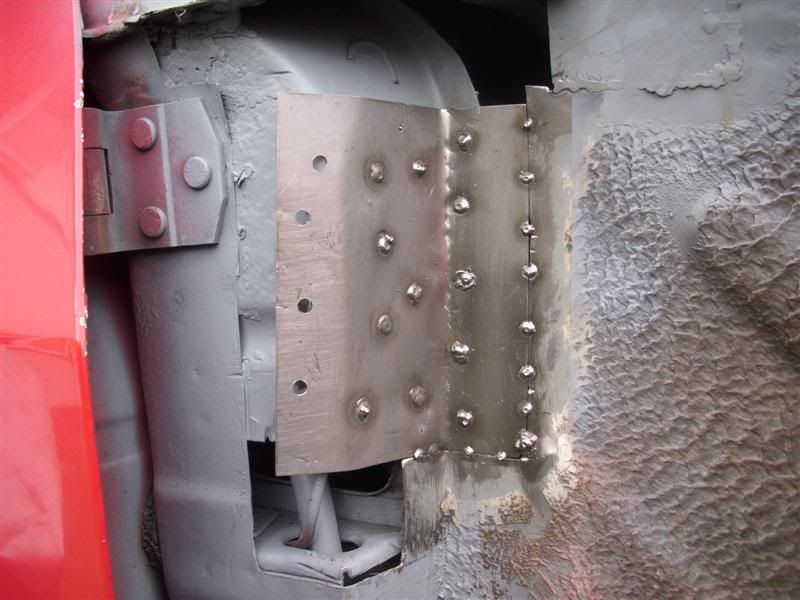
Ground smooth. Its all starting to take shape.
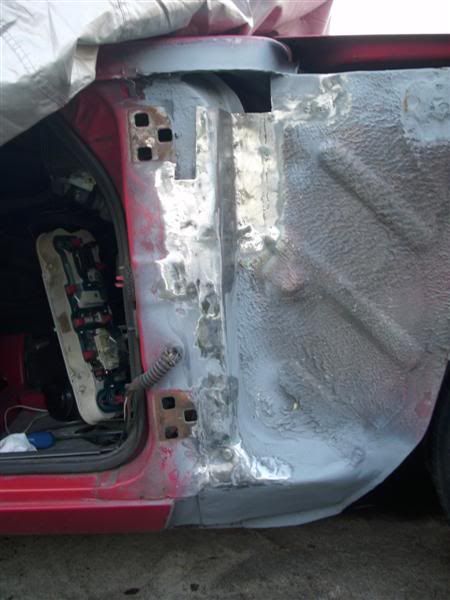
Image

Primered!
Image
Image
The big fast red one!
User avatar
Capri_Andy
Donator
Donator
Posts: 1077
Joined: Mon Jul 28, 2008 10:18 pm
Car(s): Laser 2.9 efi resto (in many pieces)
Location: Cambs

Re: Restoration: The Big Fast Red One

Post by Capri_Andy »

So, I made a start on the tricky corner bit, where the top edge has to curve outwards, and the bottom edge has to be an angle inwards. I just couldnt get my head round how to make a repair section that has to curve in 2 different directions. I had a play about with bits of card and eventually came up with a template.

See how it fits!
Image

Made into steel. All the bending and hammering to make it the right shape and checking it against the car was tedious work.
Image

It fitted perfectly. Welded in...
Image

Plug welded, and also seam wealded along the lip to stop water seeping into the join...
Image

Paint! (Only a small bit left to finish now).
Image
Image
The big fast red one!
andrewg1323
Posts: 2259
Joined: Mon Jul 28, 2008 6:50 pm
Car(s): 2.0 Cabaret Auto - Soon to be daily driver
2.0 Cameo - Currently being Zetec'd
Peugeot 406 - Daily Driver and dull as!
Location: Ipswich, Suffolk

Re: Restoration: The Big Fast Red One

Post by andrewg1323 »

Depressing how long it takes for something you cant see aint it! Looking bloody good though!
Post Reply