Beaksters 2.8i Resto + 24V

Use this forum to post threads of ongoing Capri projects and restorations.
Supercharged Nat
Donator
Donator
Posts: 5474
Joined: Mon Jul 28, 2008 4:13 pm
Car(s): Supercharged 2.1 (daily driver- when it works)

ive had that exact same problem!

Post by Supercharged Nat »

the curve/ radius changes as you move along the inner wing/ drip rail. i ended up getting something half right and then using filler to get it to mirror the other side BUT it was atleast 2 days solid sanding!

sorry but i cant help much, the only thing i can think of is to take it to a place where they have a roller- they should be able to roll the sheet with a varying radius like that (itl basically be a cone)

keep at it though your doing a fine job!

Image

"Understeer" is when you hit the fence with the front of the car.
"Oversteer" is when you hit the fence with the rear of the car.
"Horsepower" is how fast you hit the fence.
"Torque" is how far you take the fence with you.
Image
User avatar
Beakster
Donator
Donator
Posts: 3980
Joined: Sun Jul 27, 2008 10:16 pm
Car(s): 1983 Ford Capri 2.9 24V Cosworth Injection
Location: Toronto, Canada
Contact:

Re: Hows that 2.8 front end of yours coming along beakster??

Post by Beakster »

Making a bit more progressnow, but gave up early tonight cos my back was hurting.

Image

Image

Image

Image

Image

Had a look at my drip rail repair section that I bought and realised its a load of crap.

It looks like it was cut by a monkey with a pair of safety scissors, the edge is all over the place:

Image

Image

And it doesn't even follow the contour of the wing!

Image

So I'll probably end up fabricating my own. That'll be another 10 grinding discs I'll be buying then... :(Image
Image
andrewg1323
Posts: 2259
Joined: Mon Jul 28, 2008 6:50 pm
Car(s): 2.0 Cabaret Auto - Soon to be daily driver
2.0 Cameo - Currently being Zetec'd
Peugeot 406 - Daily Driver and dull as!
Location: Ipswich, Suffolk

Getting there!

Post by andrewg1323 »

Got 2 days off work next week to work on mine all day long! Hope the weather stays good!

Hopefully my welder wont break like it does every fecking time i try and weld anything these days!---------------
Andy
Image
User avatar
Beakster
Donator
Donator
Posts: 3980
Joined: Sun Jul 27, 2008 10:16 pm
Car(s): 1983 Ford Capri 2.9 24V Cosworth Injection
Location: Toronto, Canada
Contact:

Progress =)

Post by Beakster »

Got my repair section tacked on. I'm quite happy it with. It's the most complicated repair section I've ever made and I reckon its quite good :)

The bits I wont be able to get at later have been cleaned up and zinc primered:

Image

Image

Image

Image

I've started seam welding it too and its looking ok so far. Hoping to get it finished tomorrow and then move on to the headlamp bowls. :)Image
Image
Supercharged Nat
Donator
Donator
Posts: 5474
Joined: Mon Jul 28, 2008 4:13 pm
Car(s): Supercharged 2.1 (daily driver- when it works)

looking good

Post by Supercharged Nat »

its really starting to take shape now, head lamp bowls are easy compared to that!Image

"Understeer" is when you hit the fence with the front of the car.
"Oversteer" is when you hit the fence with the rear of the car.
"Horsepower" is how fast you hit the fence.
"Torque" is how far you take the fence with you.
Image
User avatar
Beakster
Donator
Donator
Posts: 3980
Joined: Sun Jul 27, 2008 10:16 pm
Car(s): 1983 Ford Capri 2.9 24V Cosworth Injection
Location: Toronto, Canada
Contact:

Re: looking good

Post by Beakster »

Had a 2 hour grinding session today. Its looking good so will just need a very minimal skim of filler to completely disguise it.

Image

Image

Image

ImageImage
Image
User avatar
Beakster
Donator
Donator
Posts: 3980
Joined: Sun Jul 27, 2008 10:16 pm
Car(s): 1983 Ford Capri 2.9 24V Cosworth Injection
Location: Toronto, Canada
Contact:

Beak's 2.8 Resto - Passenger Side Inner Wing

Post by Beakster »

Last thread was gettin a bit chunky so here we are. I got busy with the angle grinder on the passenger side tonight:

Image

Image

Image

Image

I'm going to go to B&Q and get a heat gun (as soon as the new fan belt arrives for my Laser) to help get all this underseal off. I don't know what it is but its black and crust and its been put all over the previous bodge.

There's a nother really rust bit up by the slam panel so that might have to come off! :(

Image


Questions....

1) How can I make the indents in the footwell/A Pillar in a flat sheet of metal. Are the indents there for strengthening?

2) How can I create shapes like this in the inner wing from a flat sheet of metal. And are these there to provide some extra rigidity?

ImageImage
Image
User avatar
Peter-S
Donator
Donator
Posts: 7455
Joined: Mon Jul 28, 2008 7:57 am
Car(s): 1985 Capri 2.0
1983 Capri 2.8i
Location: Kent
Contact:

Indents

Post by Peter-S »

Yep, I believe they are there for extra strength, presumably press formed originally. I guess you could try hammering them into shape over a wodden block with a shallow channel chiselled out of it but I don'y know how successful it would be.
ImageBanner by Peter Smith, on Flickr
User avatar
Beakster
Donator
Donator
Posts: 3980
Joined: Sun Jul 27, 2008 10:16 pm
Car(s): 1983 Ford Capri 2.9 24V Cosworth Injection
Location: Toronto, Canada
Contact:

Re: Indents

Post by Beakster »

hmmm.

Im thinking of just making the sections for A pillar and floor out of flat steel. The cutting out another piece the same shape size as the indent and plug and seam welding it on. Although it will look completely different, I am guessing it will give some strength in the required area?Image
Image
andrewg1323
Posts: 2259
Joined: Mon Jul 28, 2008 6:50 pm
Car(s): 2.0 Cabaret Auto - Soon to be daily driver
2.0 Cameo - Currently being Zetec'd
Peugeot 406 - Daily Driver and dull as!
Location: Ipswich, Suffolk

Yes they're for strength

Post by andrewg1323 »

But TBH i'm just doing away with em in mine yes its possible to put them back in with a chisel theres a threqd on some vw forum of a guy in thailand making complete floorpans with ridges out of sheet steel and a how to guide but its stupidly labour intensive.

Realistically after that much welding to a car its structural integritys gona be totally diferent to when new anyways so i dont think the ribs will make too much difference...---------------
Andy
Image
User avatar
Beakster
Donator
Donator
Posts: 3980
Joined: Sun Jul 27, 2008 10:16 pm
Car(s): 1983 Ford Capri 2.9 24V Cosworth Injection
Location: Toronto, Canada
Contact:

"structural integritys gona be totally diferent"

Post by Beakster »

Different good, or different bad? :)

Image

I got a heat gun and cleaned off all that white stuff. What is it? It is similar to seam sealer. I guess I want to apply it in the same way Ford did in the factory, but how???

Also, what kind of primer did for use on the metal originally? It seems dark grey in colour. I'm going to be using U-POL Weld Thru on it after the repairs. Will this do the job for corrosion protection or would I be better with something more similar to what Ford used?

CheersImage
Image
andrewg1323
Posts: 2259
Joined: Mon Jul 28, 2008 6:50 pm
Car(s): 2.0 Cabaret Auto - Soon to be daily driver
2.0 Cameo - Currently being Zetec'd
Peugeot 406 - Daily Driver and dull as!
Location: Ipswich, Suffolk

My opinion is

Post by andrewg1323 »

No matter how well you weld it its gonna bend and break different to the original one solid panel so you never quite know how or where its gonna fold in an accident! Either way you'll be fine (unless you;re going that fast!) ---------------
Andy
Image
User avatar
Beakster
Donator
Donator
Posts: 3980
Joined: Sun Jul 27, 2008 10:16 pm
Car(s): 1983 Ford Capri 2.9 24V Cosworth Injection
Location: Toronto, Canada
Contact:

Floors

Post by Beakster »

Yo,

Got the carpet out of the way so I don't set fire to it welding the A pillars. Once the carpets were up I found lots more rust as well as lots of plates that have been welded on before.

Image

ImageImage
Image
User avatar
Beakster
Donator
Donator
Posts: 3980
Joined: Sun Jul 27, 2008 10:16 pm
Car(s): 1983 Ford Capri 2.9 24V Cosworth Injection
Location: Toronto, Canada
Contact:

Nasty looking floors, sills, inner sills

Post by Beakster »

How do I fix this mess?

Image

Image

ImageImage
Image
Supercharged Nat
Donator
Donator
Posts: 5474
Joined: Mon Jul 28, 2008 4:13 pm
Car(s): Supercharged 2.1 (daily driver- when it works)

are floor pans available?!

Post by Supercharged Nat »

theres some serious work there buddy, but youve gone this far..

i replaced the outer sill on mine and cut out and welded in fresh metal on the inner sills and where its joint the floor where needed.

the actual floor its self would be like what youve already done. the structural piece which has been mangled by jacking is available i think.... Image

"Understeer" is when you hit the fence with the front of the car.
"Oversteer" is when you hit the fence with the rear of the car.
"Horsepower" is how fast you hit the fence.
"Torque" is how far you take the fence with you.
Image
User avatar
Beakster
Donator
Donator
Posts: 3980
Joined: Sun Jul 27, 2008 10:16 pm
Car(s): 1983 Ford Capri 2.9 24V Cosworth Injection
Location: Toronto, Canada
Contact:

Re: are floor pans available?!

Post by Beakster »

Yeah, I think I'll have to take the outer sill of then. :(

I've seen those structural bits, so that will come off and get replaced.

So I'm looking at about £20 for the structural bit, £30 for a sill. I'm not paying £130+VAT for a floor section so I'll fabricate the what I need there I think.

I seem to be getting a bit unproductive recently. Last night I pulled the heater matrix out then sat for an hour poking a chisel at rust bits. :(

I had a look on the projects section of OSF to cheer me up. Seeing the mess of some of the cars these guys start with always gives me hope. There's a guy with a mk5 cortina which has a floor much worse then mine and he is getting on with it, so I'll try and do the same.

Tonight I'm just gonna get in there with the angle grinder and cut out anything crusty. :)Image
Image
User avatar
Peter-S
Donator
Donator
Posts: 7455
Joined: Mon Jul 28, 2008 7:57 am
Car(s): 1985 Capri 2.0
1983 Capri 2.8i
Location: Kent
Contact:

This is mine

Post by Peter-S »

Not as bad as yours mate but I had to patch the footwell on mine a few years back

Image
ImageBanner by Peter Smith, on Flickr
Supercharged Nat
Donator
Donator
Posts: 5474
Joined: Mon Jul 28, 2008 4:13 pm
Car(s): Supercharged 2.1 (daily driver- when it works)

I really wish i had taken pictures when i did mine

Post by Supercharged Nat »

i spent 2 years working on mine (on and off) and it had all the same problems as yours, some not quite as bad though, but then i think if i was doing it now, the extent of the problems wouldnt be far off yours!

It is all do-able! im going to be replacing rear archs, some of the section in front of the rear arches, sections of inner arches/tubs and probably the rear valance this summer.....

im hoping it would take more than a few weeks of nights and weekends to get completed.

Im actually toying with the idea of doing a mass strip down, acid dip, all welding that it shows up, full etch prime and a **** hot paint job (orignal colour, just a good quality one) and then chuck everything back on it... but it will cost some!Image

"Understeer" is when you hit the fence with the front of the car.
"Oversteer" is when you hit the fence with the rear of the car.
"Horsepower" is how fast you hit the fence.
"Torque" is how far you take the fence with you.
Image
Supercharged Nat
Donator
Donator
Posts: 5474
Joined: Mon Jul 28, 2008 4:13 pm
Car(s): Supercharged 2.1 (daily driver- when it works)

oooh

Post by Supercharged Nat »

and then fill all inclosed spaces with waxoyle, lots of waxoyle!Image

"Understeer" is when you hit the fence with the front of the car.
"Oversteer" is when you hit the fence with the rear of the car.
"Horsepower" is how fast you hit the fence.
"Torque" is how far you take the fence with you.
Image
User avatar
Beakster
Donator
Donator
Posts: 3980
Joined: Sun Jul 27, 2008 10:16 pm
Car(s): 1983 Ford Capri 2.9 24V Cosworth Injection
Location: Toronto, Canada
Contact:

Grrrr!!!!!!!!

Post by Beakster »

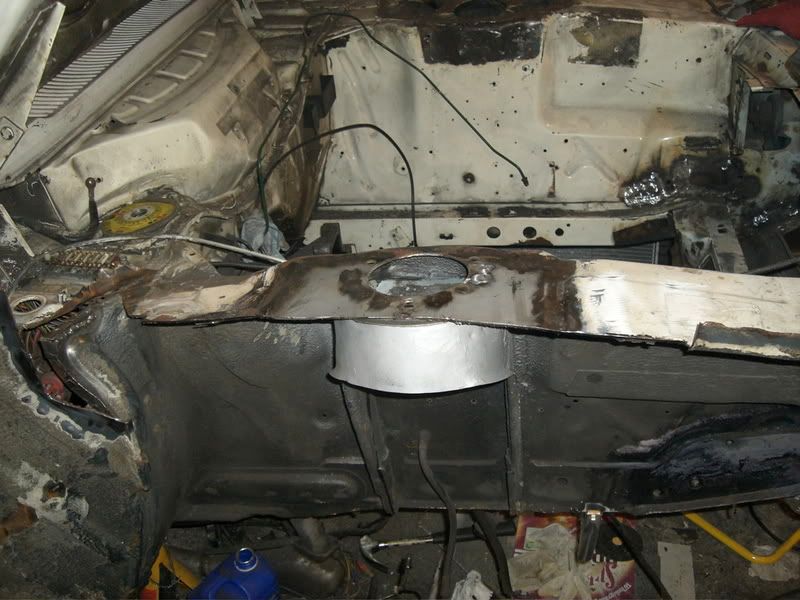
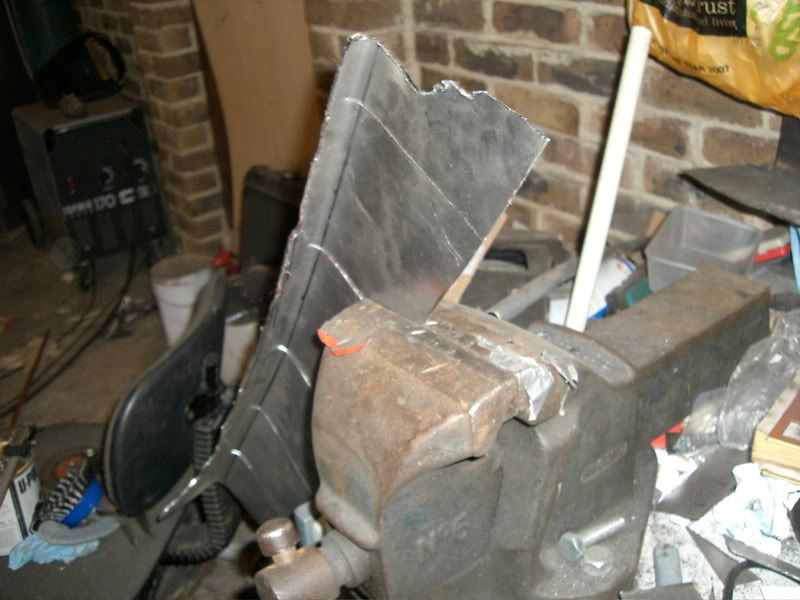
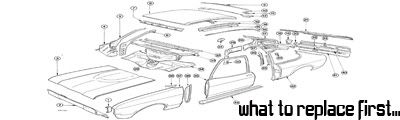
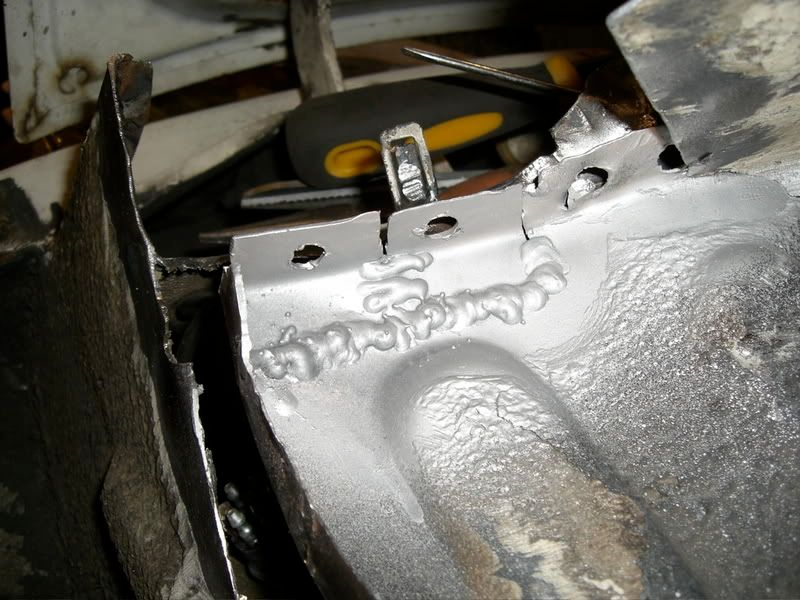
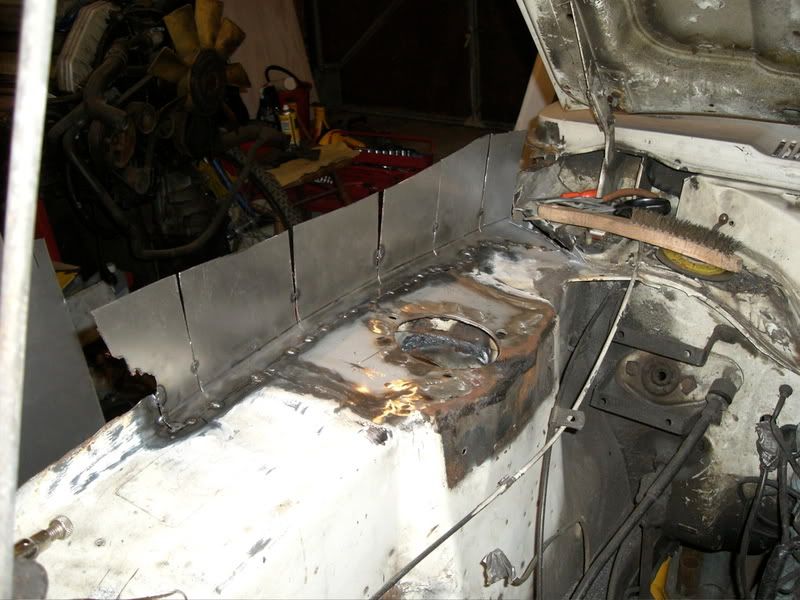
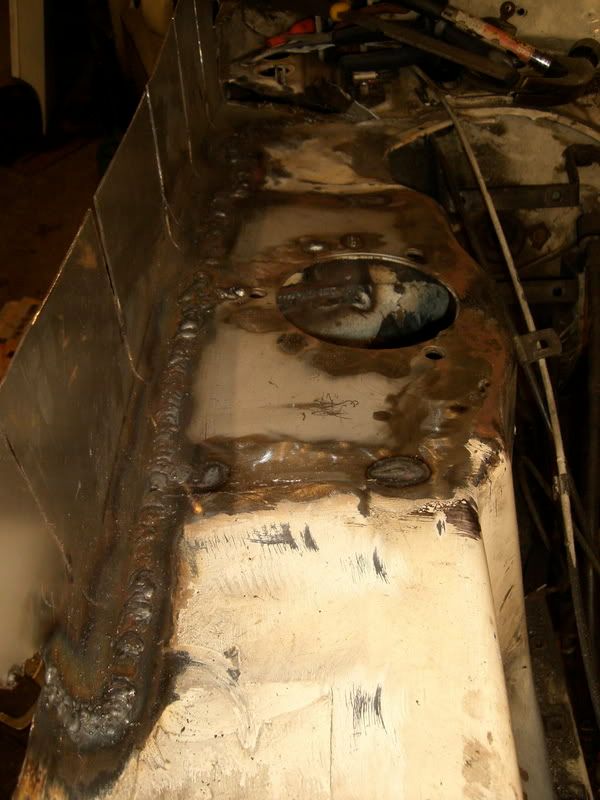
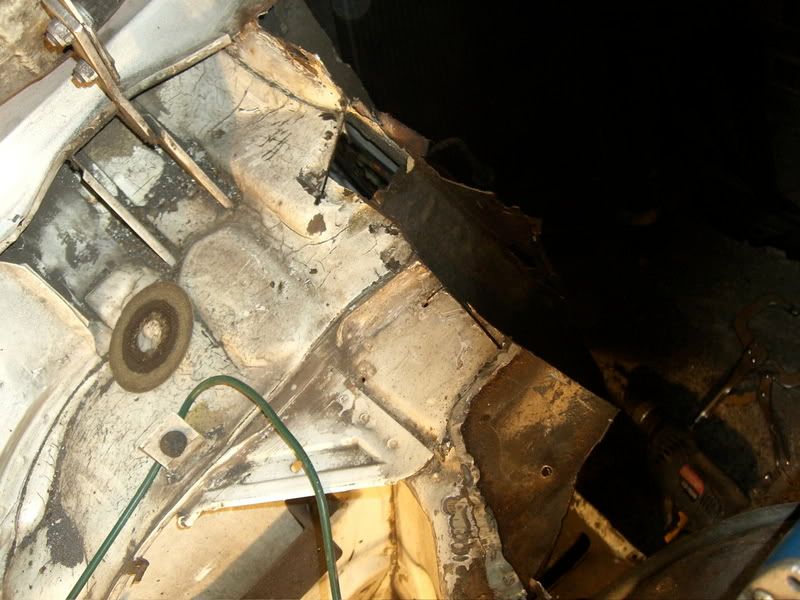
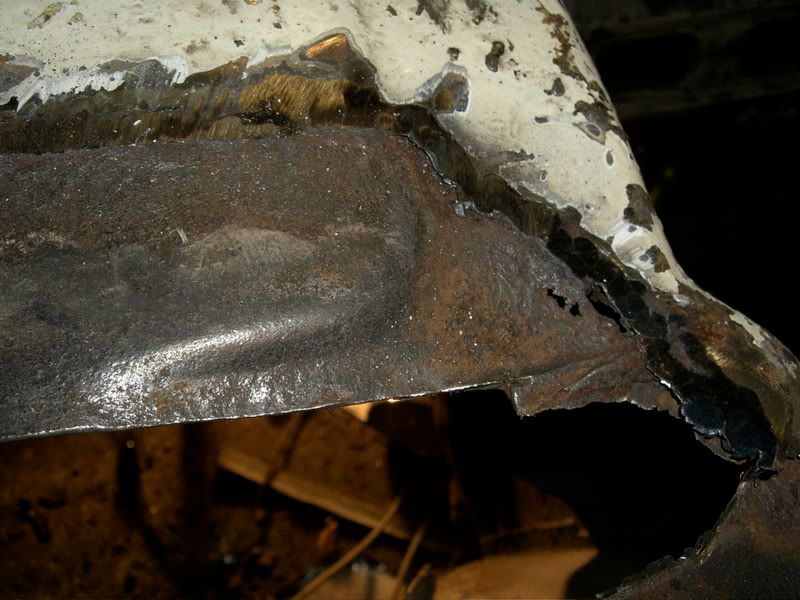
Ok, done some chopping:

Image

Image

Image

Image

Image

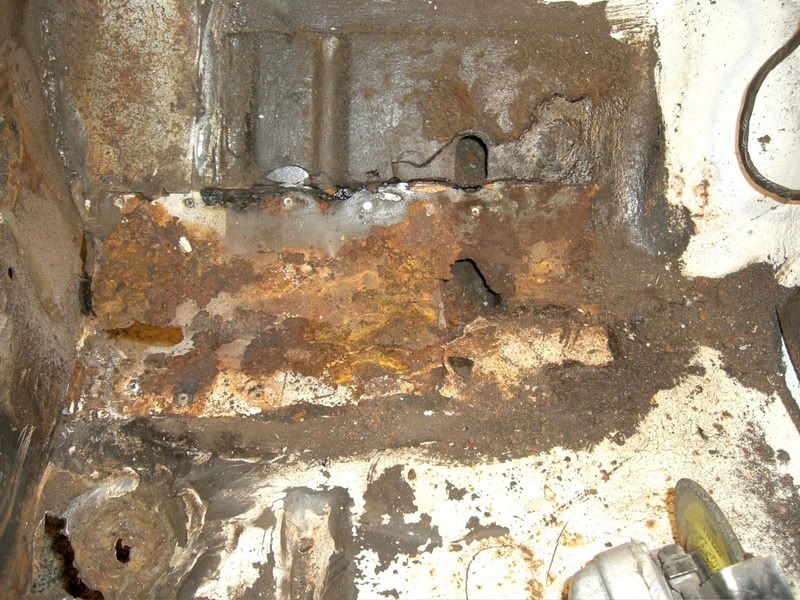
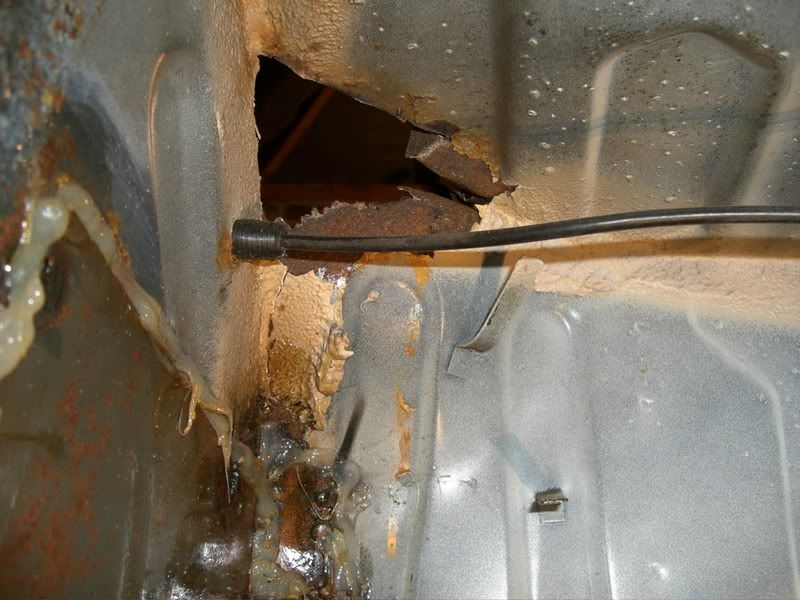
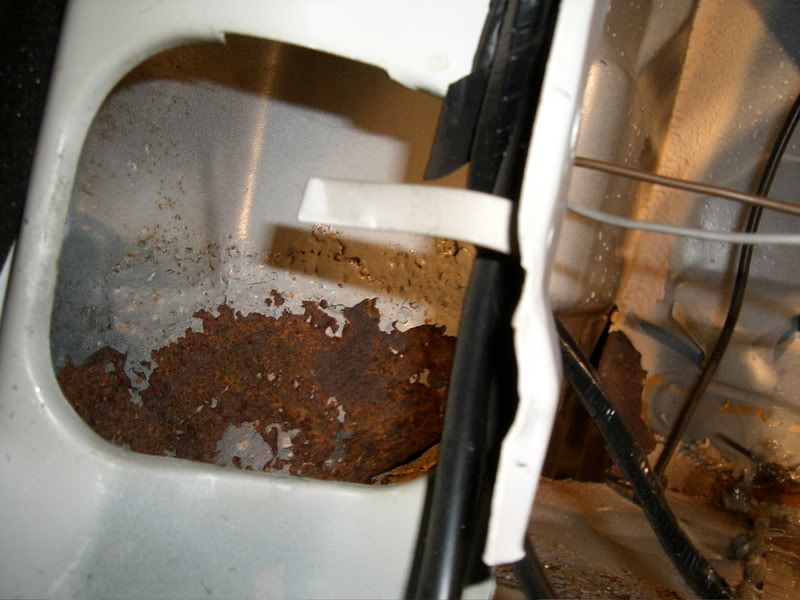
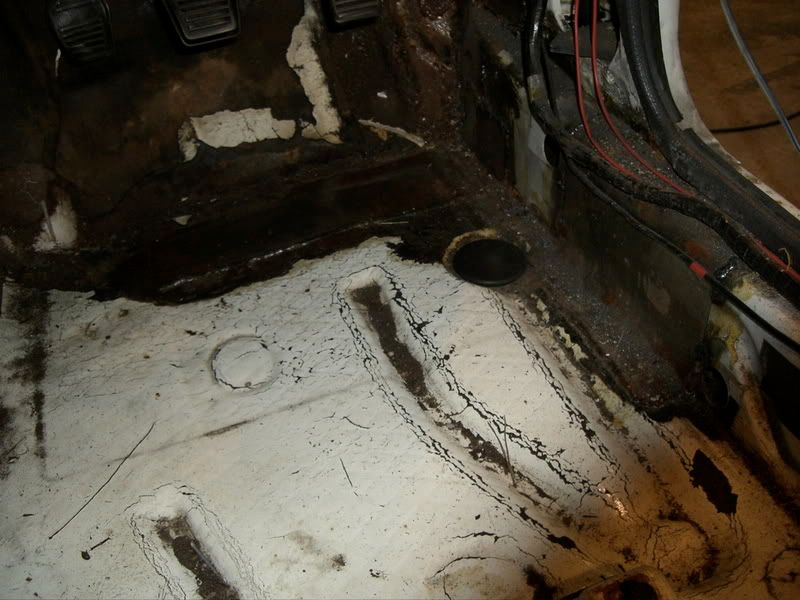
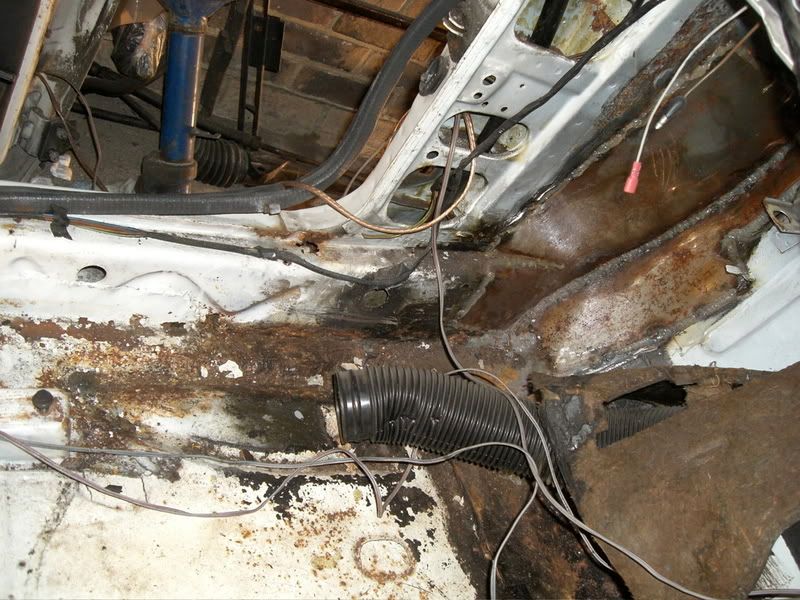
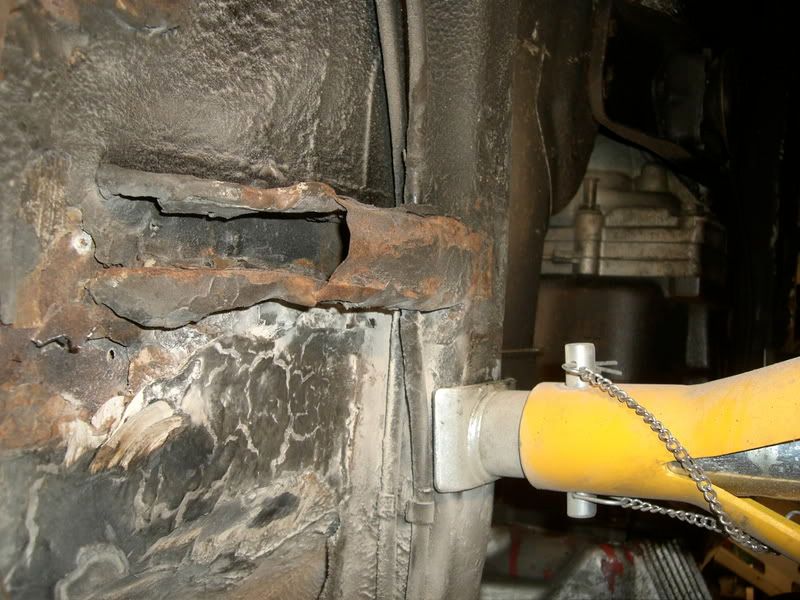
I haven't chopped the bit in the middle out yet cos I'm afraid the shell will implode. The problem I have now it there there is nothing left of the inner sill to weld floor repair sections to. For this reason the outer will will have to come off to give me access to repair the inner sill.

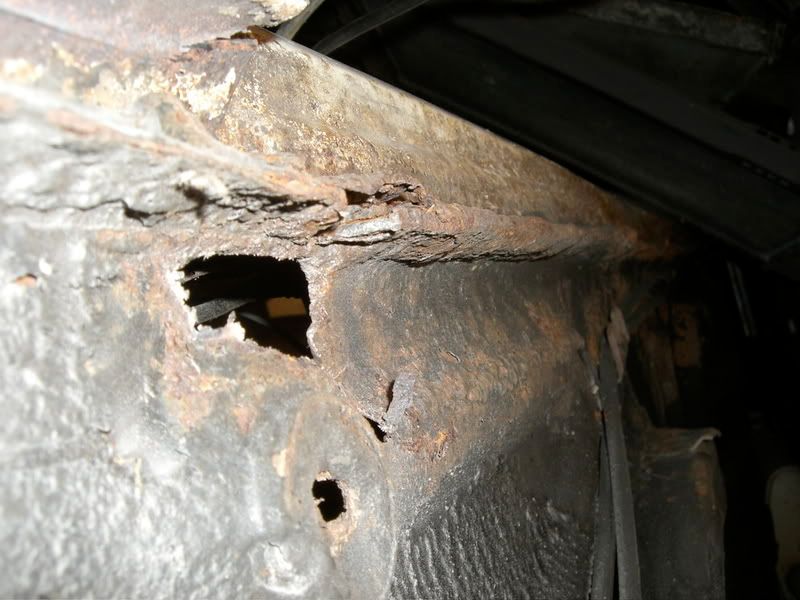
Not a problem I thought as the outer sill is in bad condition and needs replacing, and on first inspection it seemed that sills were cheap, around £30.

Image

Image

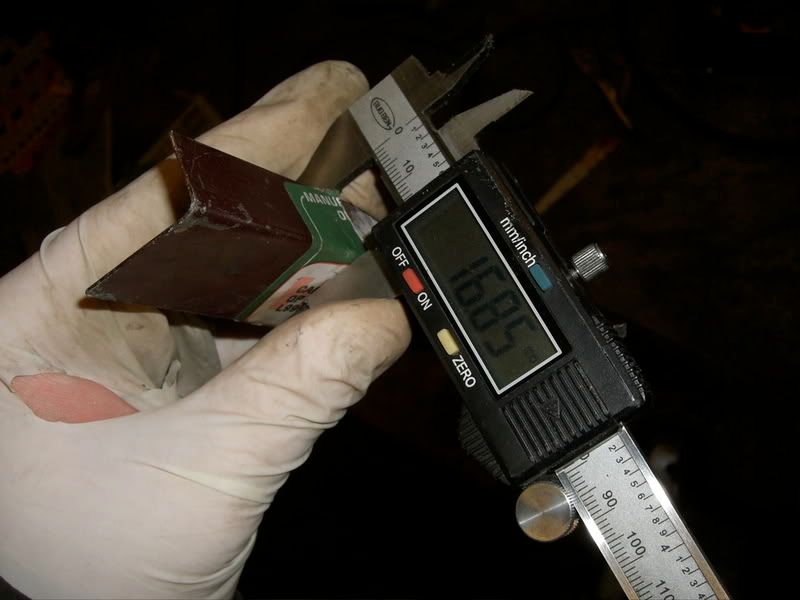
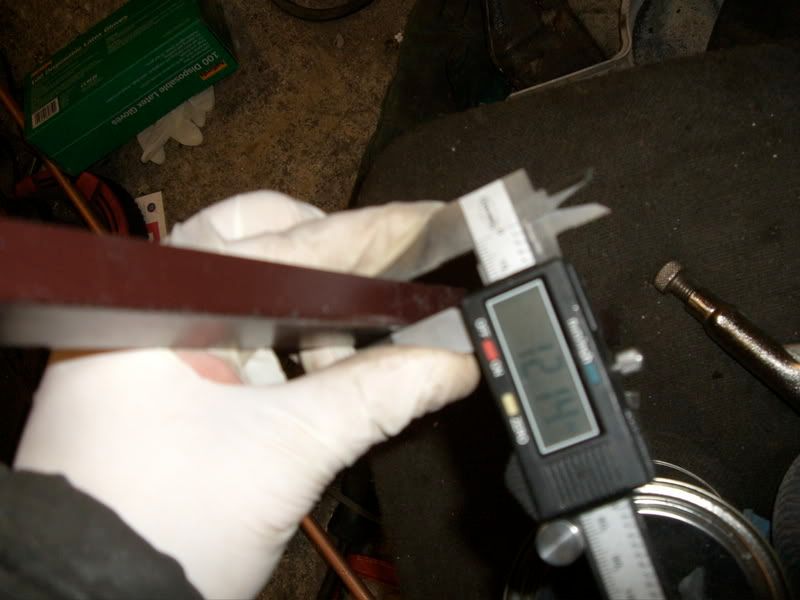
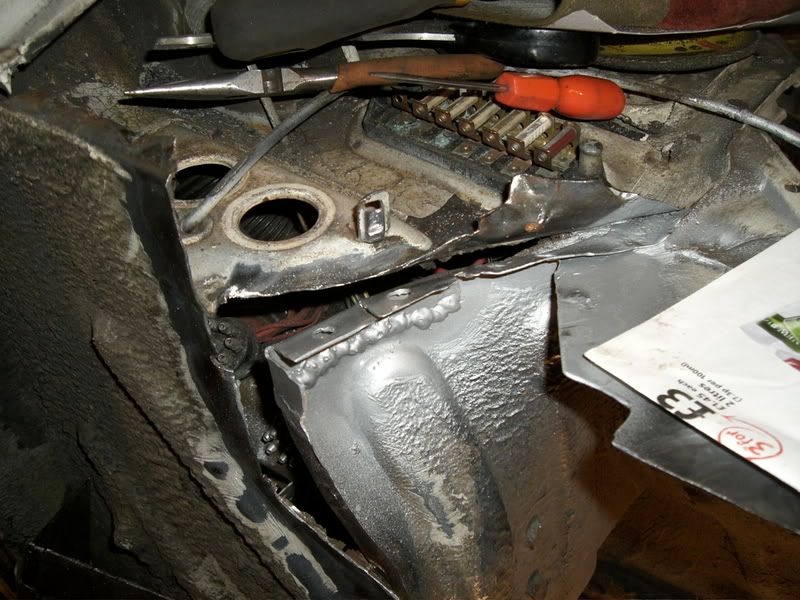
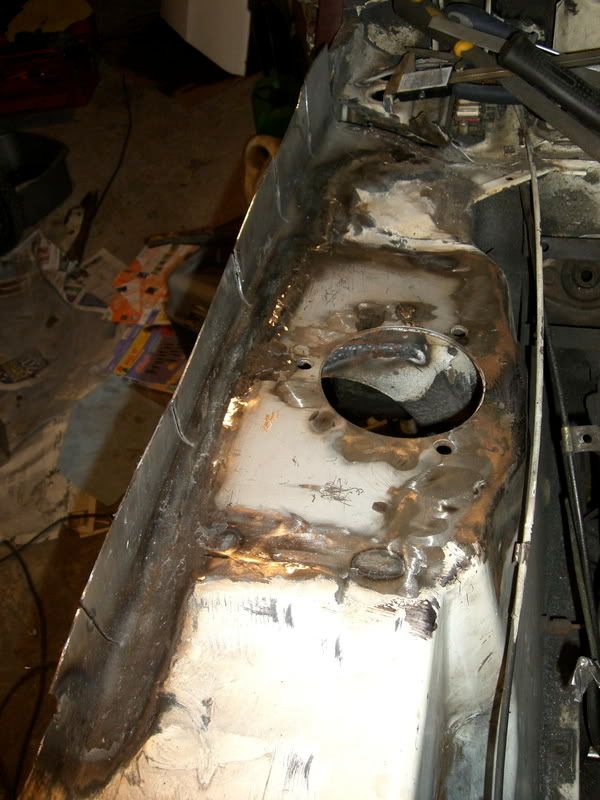
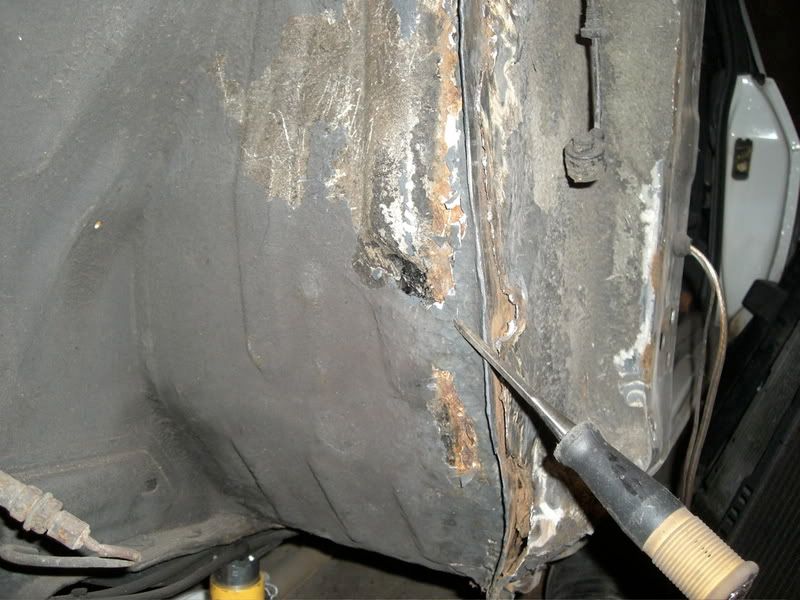
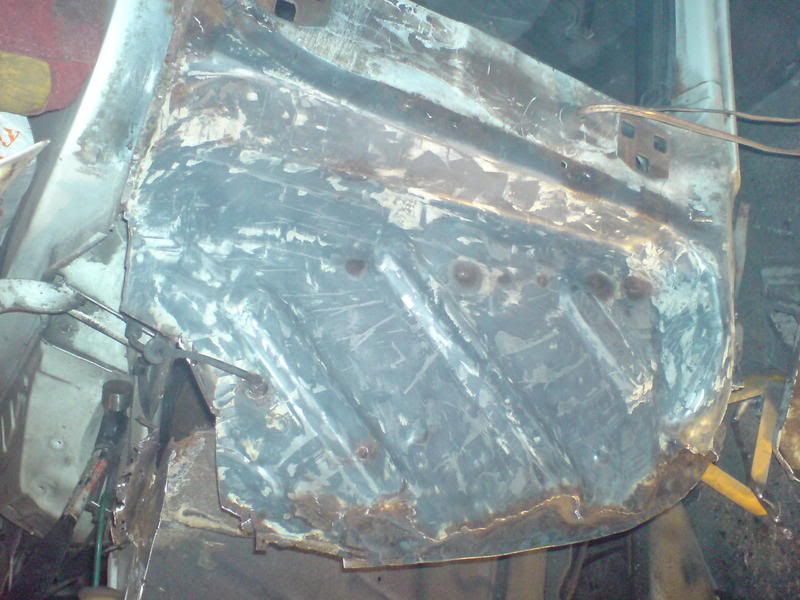
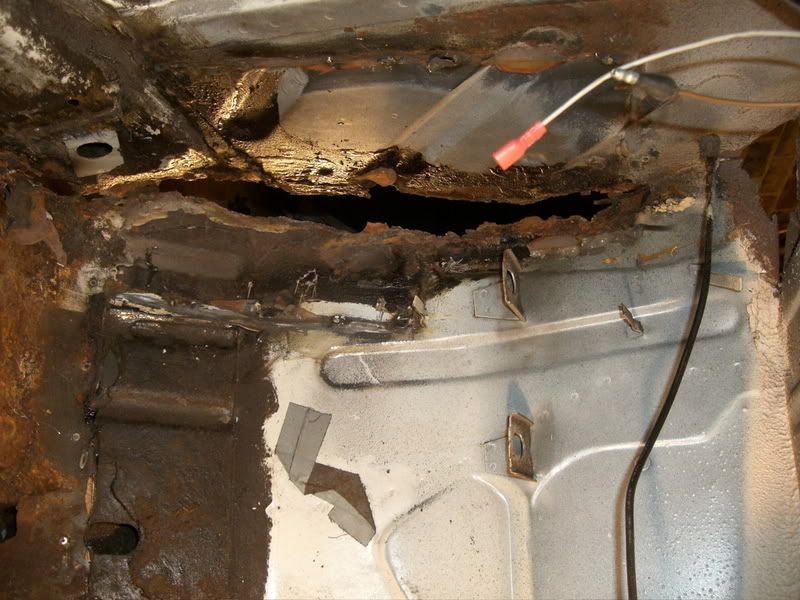
Ok, now look closely at the above pic. It appears the half the sill has been repaired before, but using a sill skin rather than a full sill. It was here I realised the difference between a sill skin and a full sill. The full sill is what I need to do the job properly. It incorporates the door step and is basically the full panel as Ford would have fitted it.

Now if I was restoring a cheap car like a mk1 escort, I could get a sill skin for £15.70, or a full sill for £15.93. No one's gonna do a half assed job for the sake of 23p!

But because I own a mk3 Capri, a sill skin is £12.70, but a full sill panel is £80+VAT and only available from expressed steel panels! :( I'm seriously upset about this! I vow I will never try and restore a Capri again, its a job for the wealthy and I just don't have the money to do it properly. If I replaced the panels which need replacing I'd be looking at around £4000!!!

I'm not sure what to do yet. I might hack it together with a skin, or just pay the £100 odd quid to expressed steel. I don't want to do that though cos costs will soon start spiraling our of control.

It just makes me really angry that this is the case. If it was an escort I would be able to afford new valance, slam panel, floor sections, fulls sills, inner wing section, but cos I've got a Capri I can't afford to do the job properly!Image
Image
Post Reply