Beaksters 2.8i Resto + 24V

Use this forum to post threads of ongoing Capri projects and restorations.
User avatar
Beakster
Donator
Donator
Posts: 3980
Joined: Sun Jul 27, 2008 10:16 pm
Car(s): 1983 Ford Capri 2.9 24V Cosworth Injection
Location: Toronto, Canada
Contact:

Re: Beaksters 2.8i Resto + 24V

Post by Beakster »

Thanks Matty.

Just been out thinking and I really can't afford to spend any more time on this. If I do I won't have time to put it back together and it will have to go to the scrap yard when I leave.

It looks awful. I really wish I hadn't put that laquer in and then it would all be fine, but I did and now it looks shite and I'll have to live with it.

Tomorrow I'm going to clean the 24v engine, paint struts, servo, steering rack, and start putting my worldly possesions on ebay. :cry:
Image
Matty28i
Posts: 2448
Joined: Mon Jul 28, 2008 6:26 pm
Car(s): Mk3 2.8i not a 2.8i any more... 2.9 24V BOB Long Term Project.

Mk3 1.6LS Now 2.0lt powered 4 speed rocket box. Work in progress daily driver.

Re: Beaksters 2.8i Resto + 24V

Post by Matty28i »

Beakster wrote:Thanks Matty.

Tomorrow I'm going to clean the 24v engine, paint struts, servo, steering rack, and start putting my worldly possesions on ebay. :cry:
Chris,

Good luck with the move and all the rest. I don't eveny any of the pressure on you. All the best with the move.

Matty
User avatar
Peter-S
Donator
Donator
Posts: 7457
Joined: Mon Jul 28, 2008 7:57 am
Car(s): 1985 Capri 2.0
1983 Capri 2.8i
Location: Kent
Contact:

Re: Beaksters 2.8i Resto + 24V

Post by Peter-S »

Chris, are you saying you mixed the lacquer and top coat together then?
ImageBanner by Peter Smith, on Flickr
User avatar
Beakster
Donator
Donator
Posts: 3980
Joined: Sun Jul 27, 2008 10:16 pm
Car(s): 1983 Ford Capri 2.9 24V Cosworth Injection
Location: Toronto, Canada
Contact:

Re: Beaksters 2.8i Resto + 24V

Post by Beakster »

Yeah. Thats what company who sold me paint said to do. And thats where it all went wrong.

Really sad, the paint is so shiny too, its just covered in lines! :( Gonna have to live with it now. What a waste of time sanding it all.
Image
User avatar
Beakster
Donator
Donator
Posts: 3980
Joined: Sun Jul 27, 2008 10:16 pm
Car(s): 1983 Ford Capri 2.9 24V Cosworth Injection
Location: Toronto, Canada
Contact:

Re: Beaksters 2.8i Resto + 24V

Post by Beakster »

Today I cleaned my engine. Used degreased and a hose. Didn't have a pressure washer so there is still gunge in some bits of it, but its better than it was. Time is tight so I am taking shortcuts not and not doing things to the high standard I would like.


Image

Image

Painted my struts

Image

And painted the inside floor with brush on hammerite. There is some welding needed at top of drivers side sill, but that will get done after engine is in and running, and quality of the repair will be directly proportional to the time I have left

Image

Image

Tomorrow I hope to start bolting suspension, brakes, steering etc back on.
Image
User avatar
Beakster
Donator
Donator
Posts: 3980
Joined: Sun Jul 27, 2008 10:16 pm
Car(s): 1983 Ford Capri 2.9 24V Cosworth Injection
Location: Toronto, Canada
Contact:

Re: Beaksters 2.8i Resto + 24V

Post by Beakster »

Had an easy night tonight. Did a spot of painting. Hammerite on struts and servo and halfords caliper paint on calipers:

Image

Image
Image
User avatar
Beakster
Donator
Donator
Posts: 3980
Joined: Sun Jul 27, 2008 10:16 pm
Car(s): 1983 Ford Capri 2.9 24V Cosworth Injection
Location: Toronto, Canada
Contact:

Re: Beaksters 2.8i Resto + 24V

Post by Beakster »

Painted a couple more bits... brake biasing thing and the ARB corner brackets:

Image

Image

Used Caliper paint on the bias thing and it came up nice. :)

Next I put the brake servo and land rover master cylinder in. Cross member and steering rack in now aswell. Then I set about fitting my new radiator.

I really like the radiator. It's a new genuine aluminium one from a Scorpio 2.3. You can get them new for £45 posted here: http://cgi.ebay.co.uk/FORD-GRANADA-AND- ... 1|294%3A50

I think that is an absolute bargain given how much people pay for aluminium ones to be made to fit original mounts. It does need a bit of hacking about to make it fit thought. Big thanks go to Simon Race/QuadCamCapri here for pioneering the technique of fitting this type of radiator in this manner. My install isn't as tidy as his but should be just as effective. This install differs to most I've seen. Most people mount the radiator under the slam panel, in front of the front cross member. I don't like that way though as it means chopping the slam panel, and modifying the front cross member to make room for the bottom hose.

Image

Thats what the bits at the bottom look like where it should bolt on. But there don't fit between the Capri's inner wings. So they get chopped down a bit.

Image

Next, there are metal rails at the top and bottom, each one adding about 10mm to the height. Ideally these would get cut off, but I heard bad things about aluminium dust, so I just hammered them flat. This bent a few bits but shouldn't make any difference.

Image

Image

Next I made some brackets out of nice thick angle iron and welded them to the bumper brackets:

Image

As the angle iron is nice and thick, I intend to drill and tap it so I can bolt straight into it. I just need to get a 9mm drill bit so I can run an M10 tap through it:

Image

And this is how the radiator looks fitted:

Image

Image

Image

I intend to chop most of the pegs on the top off, then I will make up a cowling that screws into the holes for the original cowling and has holes in it for the peg stubs. I will then see about running bolts into the remains of the pegs.

I want the cowling to look like this one on Andy's Capri, but I probably won't get it quite so pretty:

Image
Image
Matty28i
Posts: 2448
Joined: Mon Jul 28, 2008 6:26 pm
Car(s): Mk3 2.8i not a 2.8i any more... 2.9 24V BOB Long Term Project.

Mk3 1.6LS Now 2.0lt powered 4 speed rocket box. Work in progress daily driver.

Re: Beaksters 2.8i Resto + 24V

Post by Matty28i »

Chris,

That's a good tip about the 2.3 radiator as it's not as tall as the 2.9 BOB rad I've trial fitted or numerous other options I tried. If you mounted it upside down you wouldn't have to cut the round pegs down and the top mounts can be off the inner wing or headlight bowls.

Keep the info coming as I'm staring to get back the motivation for the long term project again.

Matty 8-)
User avatar
Beakster
Donator
Donator
Posts: 3980
Joined: Sun Jul 27, 2008 10:16 pm
Car(s): 1983 Ford Capri 2.9 24V Cosworth Injection
Location: Toronto, Canada
Contact:

Re: Beaksters 2.8i Resto + 24V

Post by Beakster »

Matty28i wrote: That's a good tip about the 2.3 radiator as it's not as tall as the 2.9 BOB rad I've trial fitted or numerous other options I tried. If you mounted it upside down you wouldn't have to cut the round pegs down and the top mounts can be off the inner wing or headlight bowls.
Hey Matty,

Yeah. The 2.9 BOA (not sure about BOB) radiator is 44cm high. And the 12V one is 40cm high. This one is 37cm high.

You can mount it the other way up, and drill holes in the cross member for the pegs, but then its upside down as you say. The problem with that is that the fan cowling bracket I have for the twin fans then doesn't slot into the mounts for it. That was my main motivation for mounting it the correct way up. More pics coming soon. :)
Image
User avatar
Beakster
Donator
Donator
Posts: 3980
Joined: Sun Jul 27, 2008 10:16 pm
Car(s): 1983 Ford Capri 2.9 24V Cosworth Injection
Location: Toronto, Canada
Contact:

Re: Beaksters 2.8i Resto + 24V

Post by Beakster »

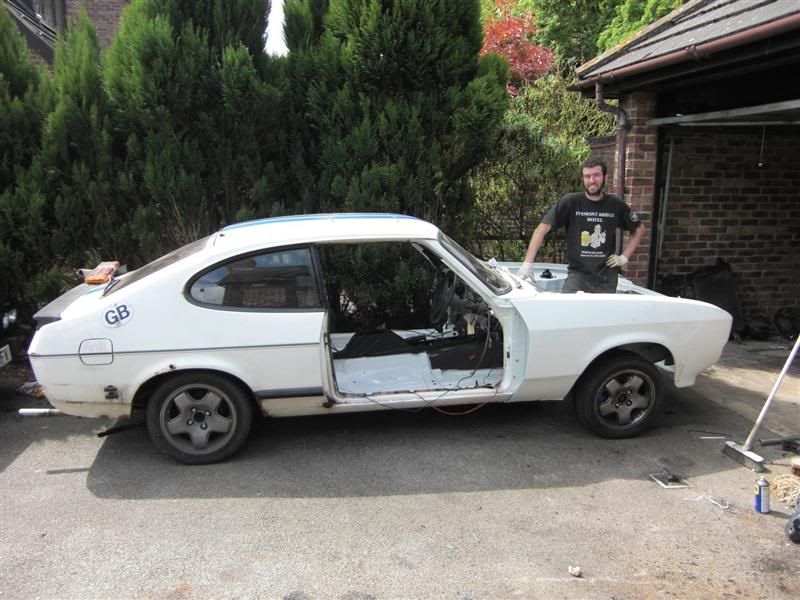
Just finished for tonight. It was a long one, but there's more of that to come if I want to get the car to an MOT on tuesday.

Main progress today.....

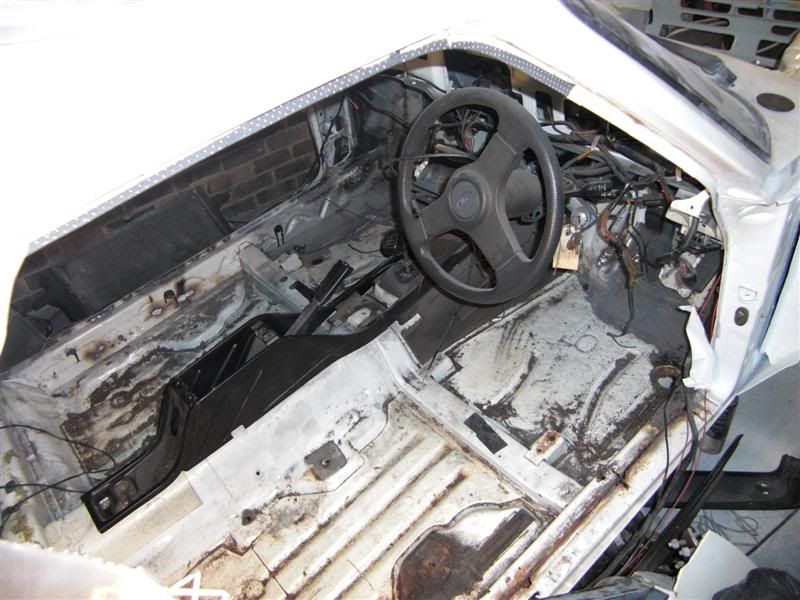
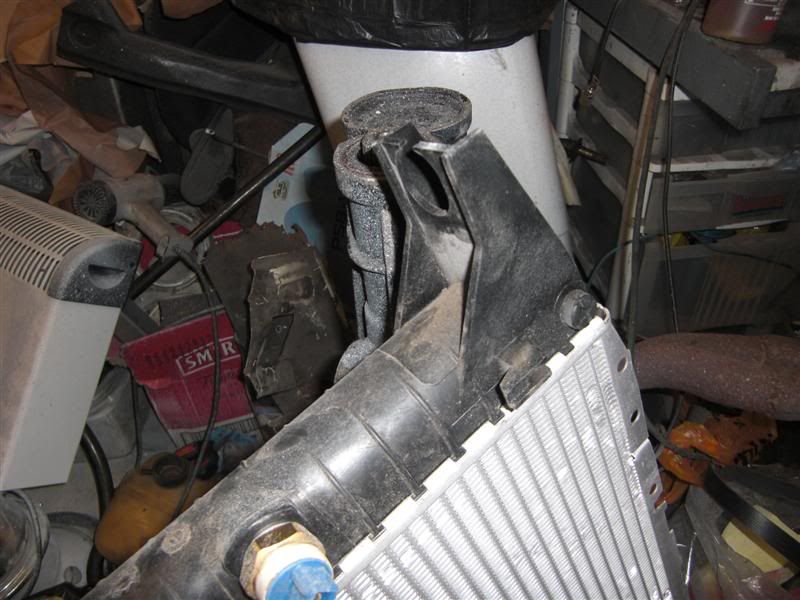
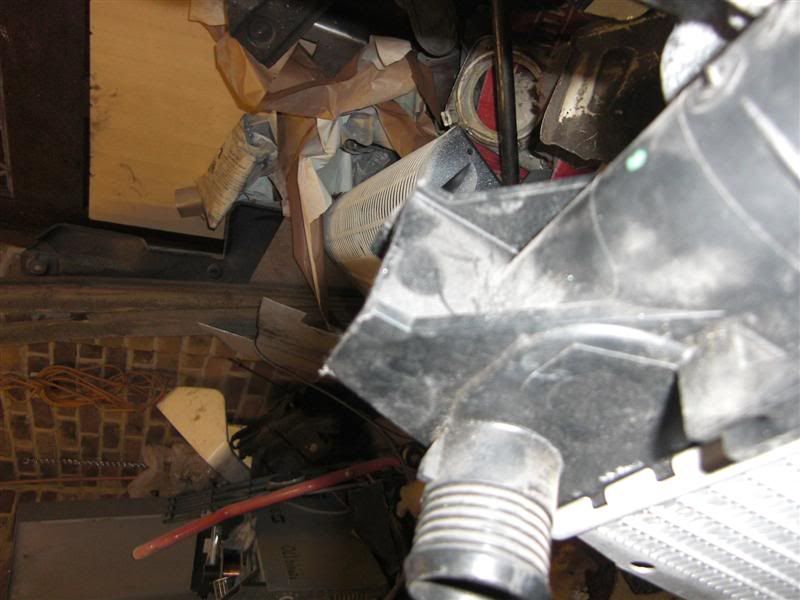
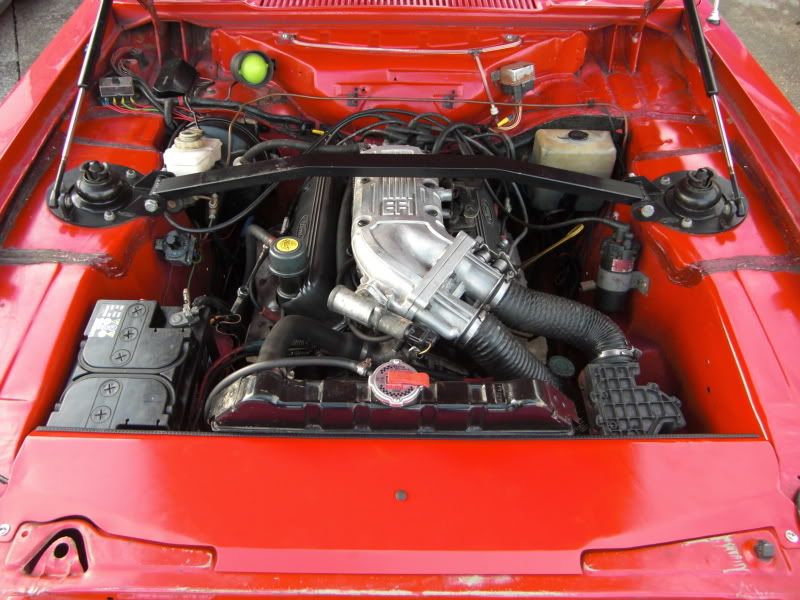
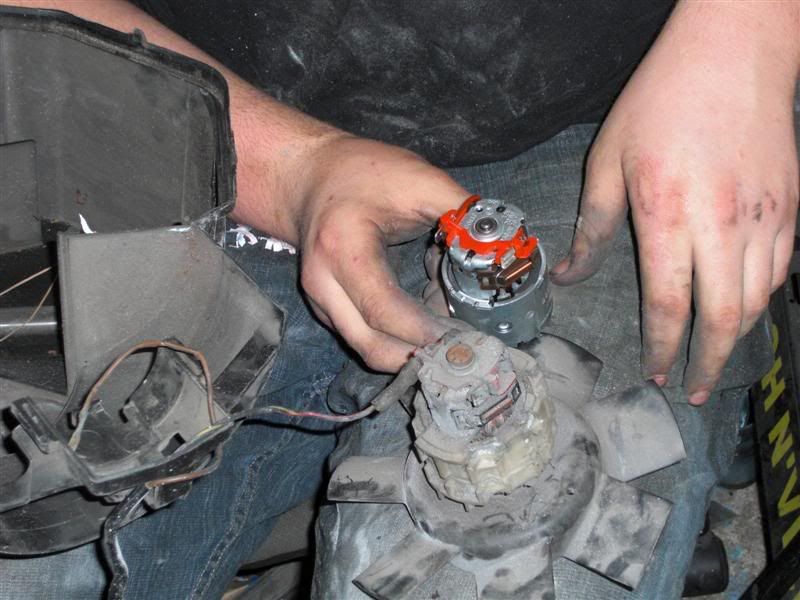
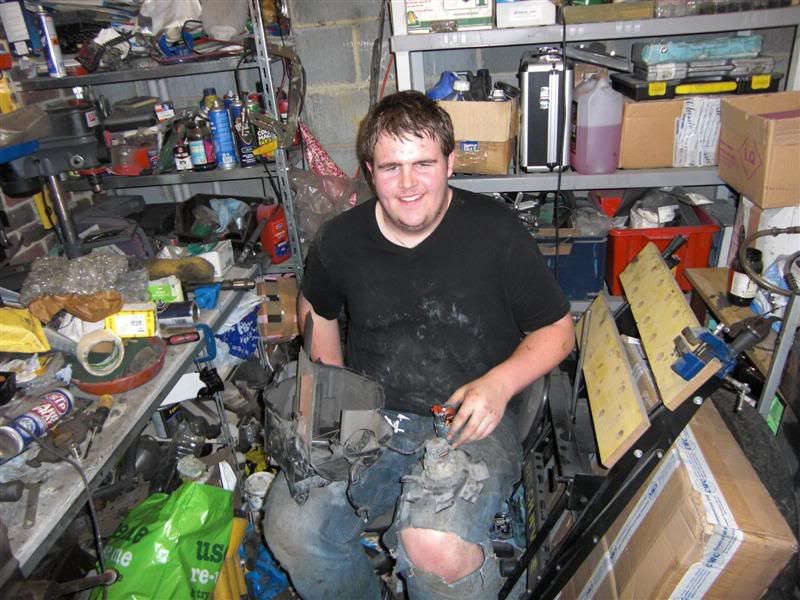
Jonathan came over and gave me loads of help. Fitted a new Bosch heater motor. These motors are tiny, now I know why there's so little airflow from them. Hopefully the new one will last another 25 years though.

Image

Image

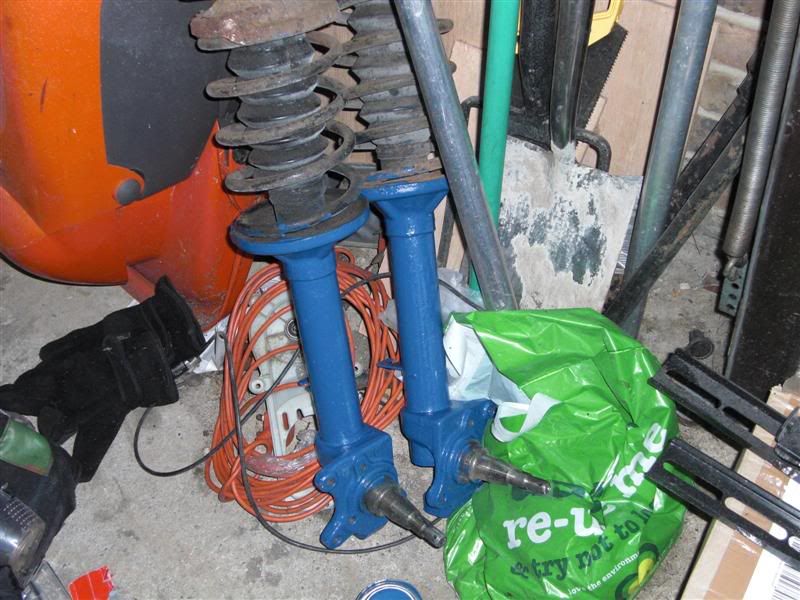
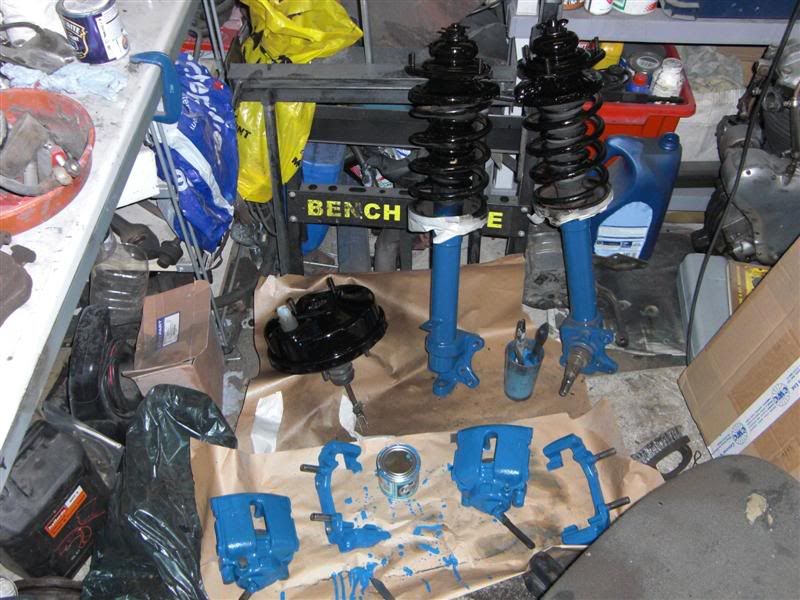
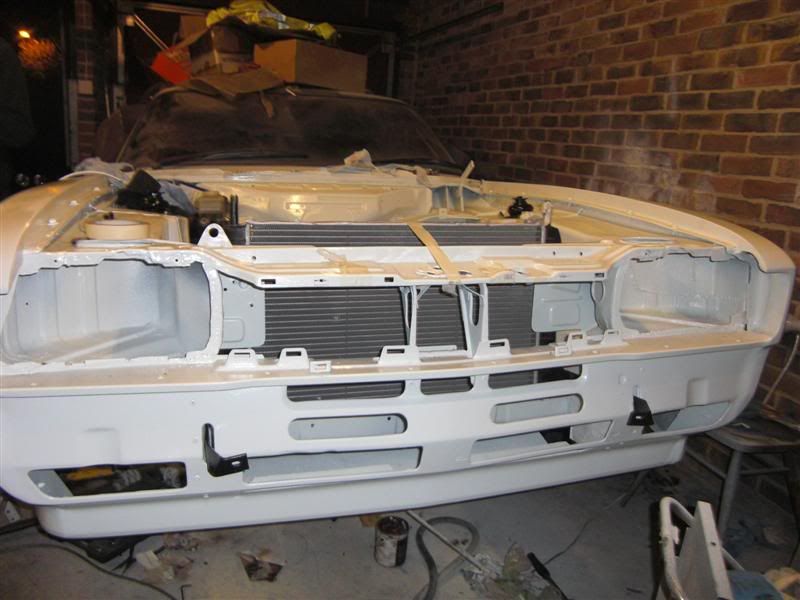
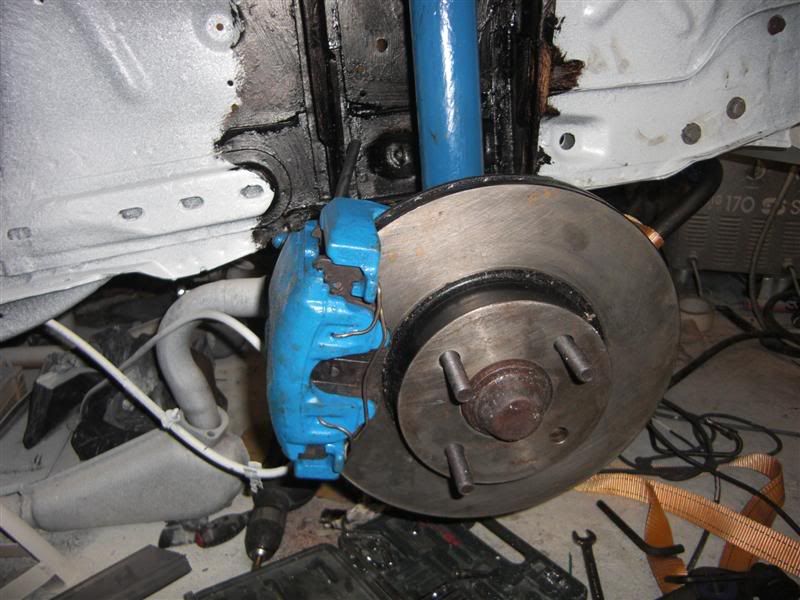
Then I got busy fitting the new brakes. They are the Granada Cosworth/V6 Mondeo-Cougar ones, with 283mm RS500 discs. To make them fit the following was required:
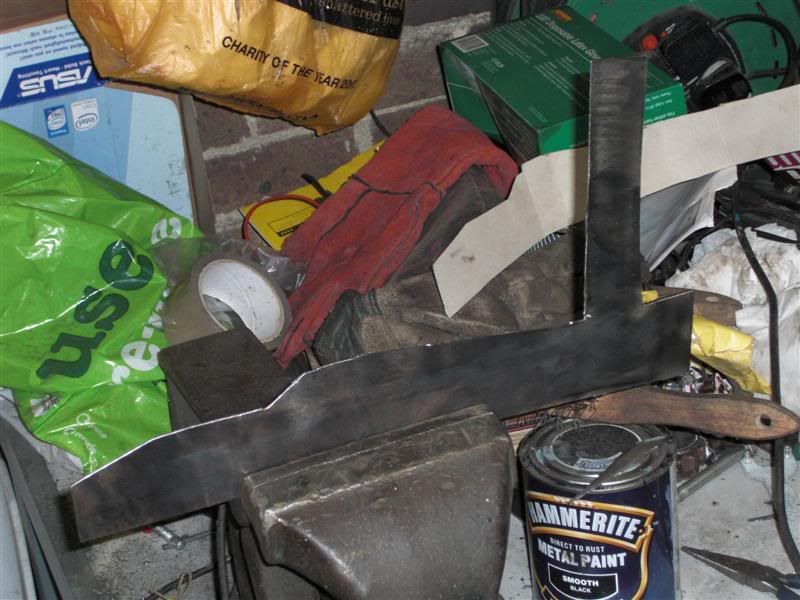
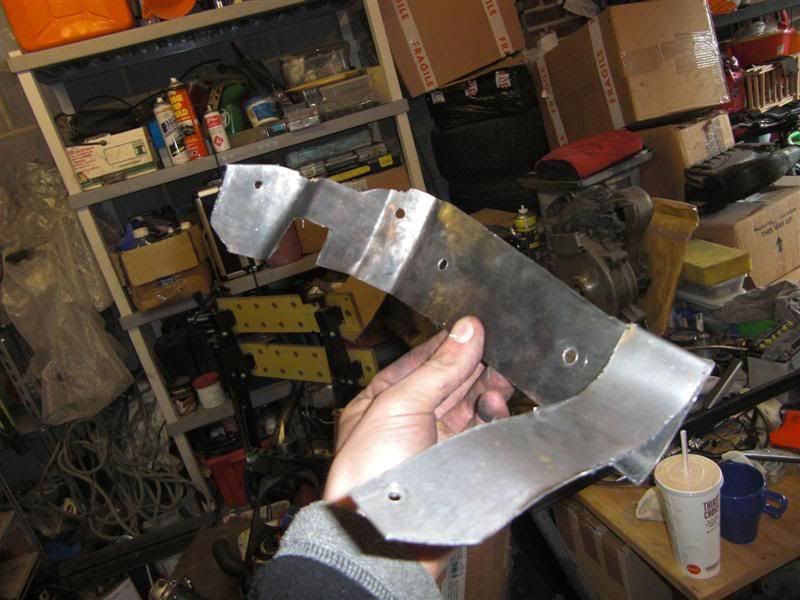
1) Get special bracket.
2) Drill out hole that allows bolt to attach bracket to caliper to 12mm.
3) Drill out holes in strut that used to be used to attach caliper, using a 10mm bit to remove the thread from them.
4) Get 2 x M10 5mm deep washers per side, and 2 x M12 5mm deep washer per side.
5) Get 2 x M10 hex socket allen head bolts per side, and 2 x M12 hex socket allen head bolts per side.
6) Cut the bolts down so they are just the right length. They can't pass through the caliper.
Bolt the bracket to the strut using the M10 washers between strut and bracket.
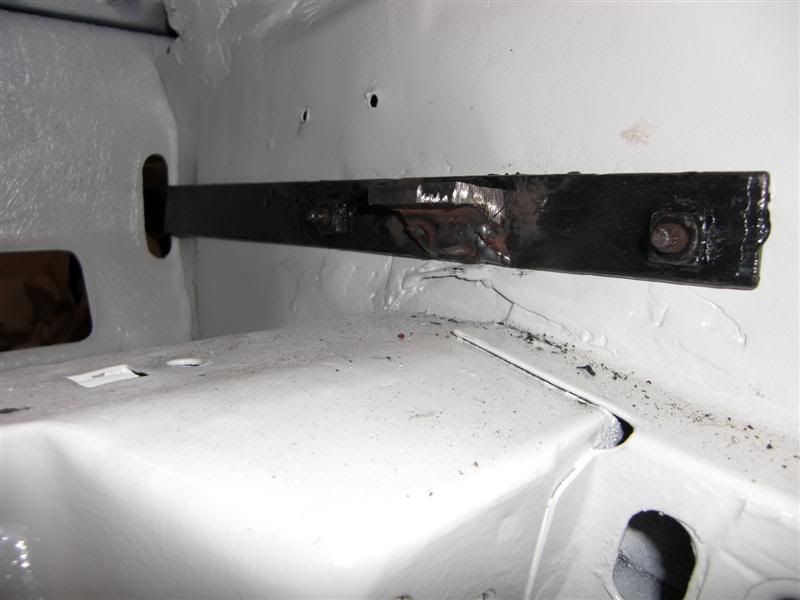
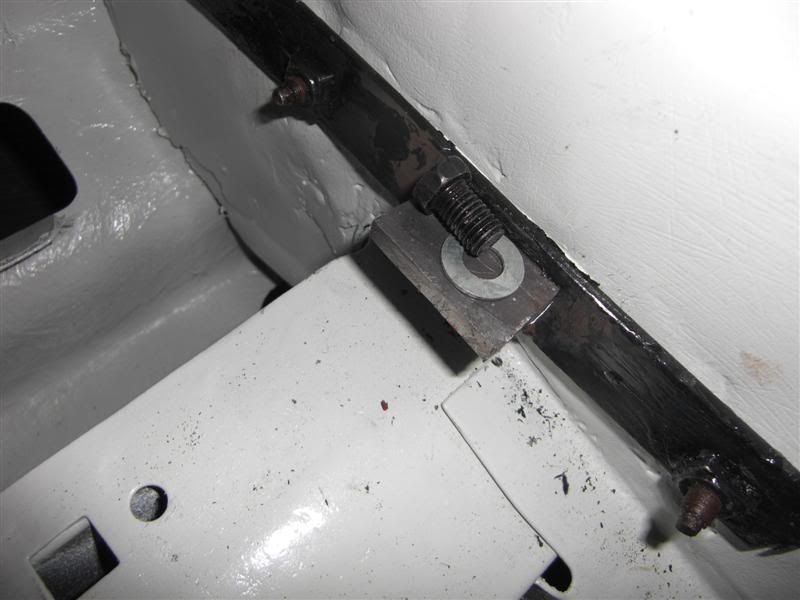
7) Attempt to pass the M12 bolts through the hole in the bracket. You will find the head of the top one fouls on part of the strut. Grind that bit of the strut down until the bolt head does fit.
8) Place brake disc on hub.
9) Attach caliper to bracket using M12 bolts and M12 washers. Check bolt lenghts and cut down if required.

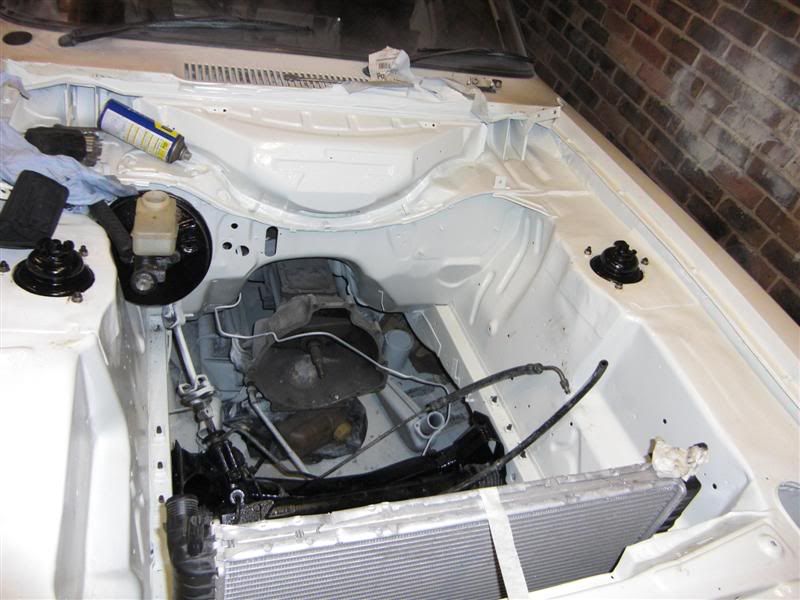
Some pics of it all fitted. Note that I'm missing a wheel stud because I lost mine, then I ordered 8 new ones from Rally Design but they only put 7 in the bag. Hopefully they can send me another out quick, but 3 should be enough to hold it together:

Front:
Image

Back:
Image

Top:
Image

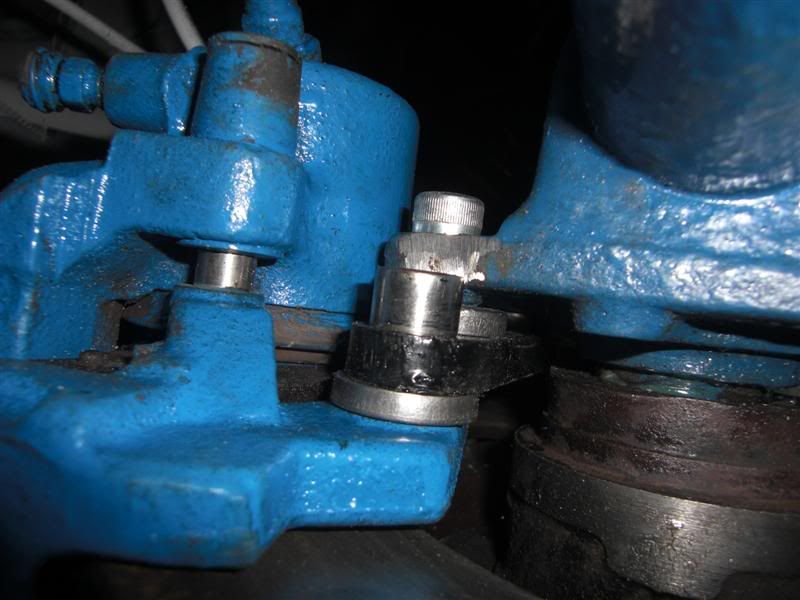
In the above pic, note where the strut has been ground down to accomodate bolt head for top caliper to bracket bolt.

Hope these brake pics help someone else fit this conversion. Definitely the cheapest way to get big brakes.

after 3am now so tired. Up at 8am tomorrow to go to motorfactors to get new TCAs. The ones I had planned to fit are goosed.
Image
Supercharged Nat
Donator
Donator
Posts: 5474
Joined: Mon Jul 28, 2008 4:13 pm
Car(s): Supercharged 2.1 (daily driver- when it works)

Re: Beaksters 2.8i Resto + 24V

Post by Supercharged Nat »

Blimey Chris you have been busy! the painting is a shame, but keep at it- just get her up and running, you can always paint her again in a few years. itl be mot'd and all that, thats what counts!

Your efforts have made me rethink me wanting to paint mine...... i guess the advantage il have is more time to do it. what was the compressor you where using? how can that little thing be up to painting a car?
Image
User avatar
Peter-S
Donator
Donator
Posts: 7457
Joined: Mon Jul 28, 2008 7:57 am
Car(s): 1985 Capri 2.0
1983 Capri 2.8i
Location: Kent
Contact:

Re: Beaksters 2.8i Resto + 24V

Post by Peter-S »

Its not a compressor Nat. The appollo spraymate is an electric turbine type thing.
ImageBanner by Peter Smith, on Flickr
User avatar
Beakster
Donator
Donator
Posts: 3980
Joined: Sun Jul 27, 2008 10:16 pm
Car(s): 1983 Ford Capri 2.9 24V Cosworth Injection
Location: Toronto, Canada
Contact:

Re: Beaksters 2.8i Resto + 24V

Post by Beakster »

Had a massive session today. Just having a beer break then going to tidy up garage before coming in to post pics.

Nat, its an Apollo SprayMaster. It uses HVLP = High Volume Low Pressure. Apparenlty you can get a finish quivalent to a very expensive comrpessor if you know how to use it. Also it uses less paint and doesn't overspray much. The paint dries quicker too cos of the warm air.

I'd like to use it again to be honest, I think I was just getting the hang of it.

Have a read about them. I've only used mine for doing what I did on the car last week. If you want to buy mine, its yours for £80. I think I'd get one again next time I need to paint. Just don't make the mistake I did and put laquer in with the paint!
Image
User avatar
Beakster
Donator
Donator
Posts: 3980
Joined: Sun Jul 27, 2008 10:16 pm
Car(s): 1983 Ford Capri 2.9 24V Cosworth Injection
Location: Toronto, Canada
Contact:

Re: Beaksters 2.8i Resto + 24V

Post by Beakster »

Yo!

Just back from a 3 hour garage tidying session. Not fun, but essential. It was getting to the point where i was spending more time looking for tools that actually doing work.

Back killing me and desperately in need of sleep so gonna try and get 6 hours after I post this, then back to the garage. Here's today's progress:

First off went to get some new TCAs, then fitted them with poly bushes. Fitted new steering tie rod ends and approximately aligned wheels. Put road wheels on and filled with air. Then dug the back end of the car out from a mountain of boxes it was hidden under.

Image

Out in the sun for the first time in over 2 years. Bit of a mission as the rear brakes are seized.

Image

1 Beakster Horse Power

Image

My babies

Image

Brakes and some wiring connected up

Image

Image

Then, I got a brand new hole saw and tried to cut a hole in the bulkhead for the engine bay loom. It went horribly wrong tho. The hole saw couldnt get through and instead just burnt all the paint! I ended up drilling loads of wee holes then cutting through with chisel. I'll tidy it up with a file tomorrow and whack some white hammerite over it.

Image

Hot air ballon passes by

Image

Preparing the lump for lifting

Image

Out she comes

Image

Time for a quick beer before dropping her in

Image

To me

Image

To you

Image

Image

And finally after lots of jiggling about engine is in and bolted up! :xd: :xd: :xd: :xd: :xd: :xd:

Image

Image

Massive thanks to Jonathan (Ghia15) for helping me out all day. Without him I couldn't have done it!

Tomorrow I'm going to free up rear brakes, connect fuel, weld up exhausts, and do the wiring! :xd:
Image
User avatar
Ghia15
Donator
Donator
Posts: 2585
Joined: Wed Jul 30, 2008 10:14 pm
Car(s): 1981 3.0 Ghia (Restoration Project), 1982 2.0's (Long term project), 1993 BMW E34 520i, 1999 Volvo V70 (Sold to the Parents)
Location: Reading

Re: Beaksters 2.8i Resto + 24V

Post by Ghia15 »

Happy to help Chris, i've learnt soo much form you and youve helped me on the Capri's loads now so was just happy to be able to return the favour. If you need any more help next week from tues night wed give me a shout.
Image
Supercharged Nat
Donator
Donator
Posts: 5474
Joined: Mon Jul 28, 2008 4:13 pm
Car(s): Supercharged 2.1 (daily driver- when it works)

Re: Beaksters 2.8i Resto + 24V

Post by Supercharged Nat »

good stuff boys! looking like it may be a gooer soon enough Chris!
Image
User avatar
Beakster
Donator
Donator
Posts: 3980
Joined: Sun Jul 27, 2008 10:16 pm
Car(s): 1983 Ford Capri 2.9 24V Cosworth Injection
Location: Toronto, Canada
Contact:

Re: Beaksters 2.8i Resto + 24V

Post by Beakster »

Today I freed up the rear brakes. Painted drilled and tapped the radiator mounts on the bumper irons, fitted the starter motor and made up the exhaust downpipes.


I had to use the 2.8 starter motor because I have a 3 bolt starter part on my bellhousing and the granny had 2. It didn't fit at first because of the bolts that hold the oil return on. So I filed the bolts down by a few mms then ground a bit out of the starter. :)

Image


Granada downpipe

Image

Chopped

Image

Welded to flexihose then to part of Capri pipe

Image

And passenger side

Image

Fitted

Image

Not ideal but should do the job for a while. :)
Image
andrewg1323
Posts: 2259
Joined: Mon Jul 28, 2008 6:50 pm
Car(s): 2.0 Cabaret Auto - Soon to be daily driver
2.0 Cameo - Currently being Zetec'd
Peugeot 406 - Daily Driver and dull as!
Location: Ipswich, Suffolk

Re: Beaksters 2.8i Resto + 24V

Post by andrewg1323 »

Still on target? You;re MOTing tomorrow aint ya?
User avatar
Beakster
Donator
Donator
Posts: 3980
Joined: Sun Jul 27, 2008 10:16 pm
Car(s): 1983 Ford Capri 2.9 24V Cosworth Injection
Location: Toronto, Canada
Contact:

Re: Beaksters 2.8i Resto + 24V

Post by Beakster »

New MOT target is Thursday morning. And I'm aiming to get her to start tomorrow night.

Here's todays progress:

Battery moved to boot

Image

Rad/Bumper brackets on. All tapped so radiator can bolt on.

Image

Bracket for power steering reserviour modified

Image

Granada water tank is designed to fit on curved sloping inner wings, so I had to make a bracket to fit to capri

Image

Image

Power steering all plumbed in, and water bottle mounted

Image

Loom all labeled up ready for fitting to Capri tomorrow

Image

So tired now. Up at 6:30am in the morning to go to work :cry:
Image
mk1 2.8 capri
Posts: 32
Joined: Wed Sep 10, 2008 4:12 pm
Car(s): 1973 Mk1 Ford Capri Facelift 24V Cosworth

Re: Beaksters 2.8i Resto + 24V

Post by mk1 2.8 capri »

looking good !!! , just take your time on the wiring and go through each pin one at a time , don't worry theres only 60 :D
Image
Post Reply